
.jpg.3ac0503e11ebafeb46012fb8533e7d26.jpg)
Farqui
-
Posts
2,296 -
Joined
-
Last visited
-
Days Won
17
Content Type
Profiles
Forums
Events
Store
Gallery
Tutorials
Lexus Owners Club
Gold Membership Discounts
Lexus Owners Club Video
News & Articles
Posts posted by Farqui
-
-
-
Oh no, that's terrible news!
So sorry to hear this as he was a good chap.
Thanks for the update Herbs.
-
 1
1
-
-
Hi John @Britprius, how are you doing?
How are are your alloys holding up after their refurb?
I have a TPMS sensor failure and I'm very tempted to take my car over to Wheel Furb for them to repair/recode my wheels.
Did you opt for powder coat or paint/factory finish?
Many Thanks, Lee
-
Whilst you are checking your brakes, ensure all the pads and pad to calliper sections are clean and sliding freely. Also a dab of lube on the back of the pads may sort it, all the common brake maintenance checks. Good luck.
Take a look here for the ride height sensor repair;
-
Hi Jake, so Lexus have taken a look but not resolved the issue - right...
Are your disks scoured at all?
Is the vehicle new to you?
Do you know when the pads were last changed?
Do you know when the calipers were last lubed? - the rear have sliders are notorious for drying out and dragging 😉 Oh and dealers typically don't maintain/lube these, they just let them get so bad that they then charge you to replace the whole rear calliper.
Do you brake hard to engage the hydraulics are just a little/medium to use the motor regen for most of the braking?
I'd have a look at RockAuto over in the states for a ride height sensor. Is it just the arm that's broken? - if so, then you can make up a rod/rose joint yourself to fix it 😉
Regards, Lee
-
Haha, yes that is comforting Steve
-
Thanks John/etc, the annual test gets a bit more of a worry as each year ticks by.
-
1
-
-
Happy day despite the lack of sunshine

-
5
-
-
Great news Amanda / @IS300KK

I'm really pleased it was fixed for you without too much fuss, mine was far too blocked and after repeated flushing/back flushing over several years I recently bit the bullet and had the heater matrix replaced. So it's just bread/water for me now 🤣
-
Just catching up on your progress and you've done a great job pal, well done.
-
2
-
-
Thanks for highlighting this, it popped up on my YT feed and enjoy it.
It shows plenty of mechanical details, maybe too much for some Lexus owners 😄
-
On 10/5/2020 at 11:01 AM, royoftherovers said:
Been to Hannover twice in mine.........no problem.
I'm not sure how this is relevant but it made me check how many trips we've done to Europe in our GS.
ln almost 4 years of ownership we've done 11 trips to Belgium.
Surprised me, they soon add up.
The only roadside issue she gave was excessive/rapid tyre wear due to bad rear toe adjusters.
Terrible reliability, terrible.
-
2
-
-
-
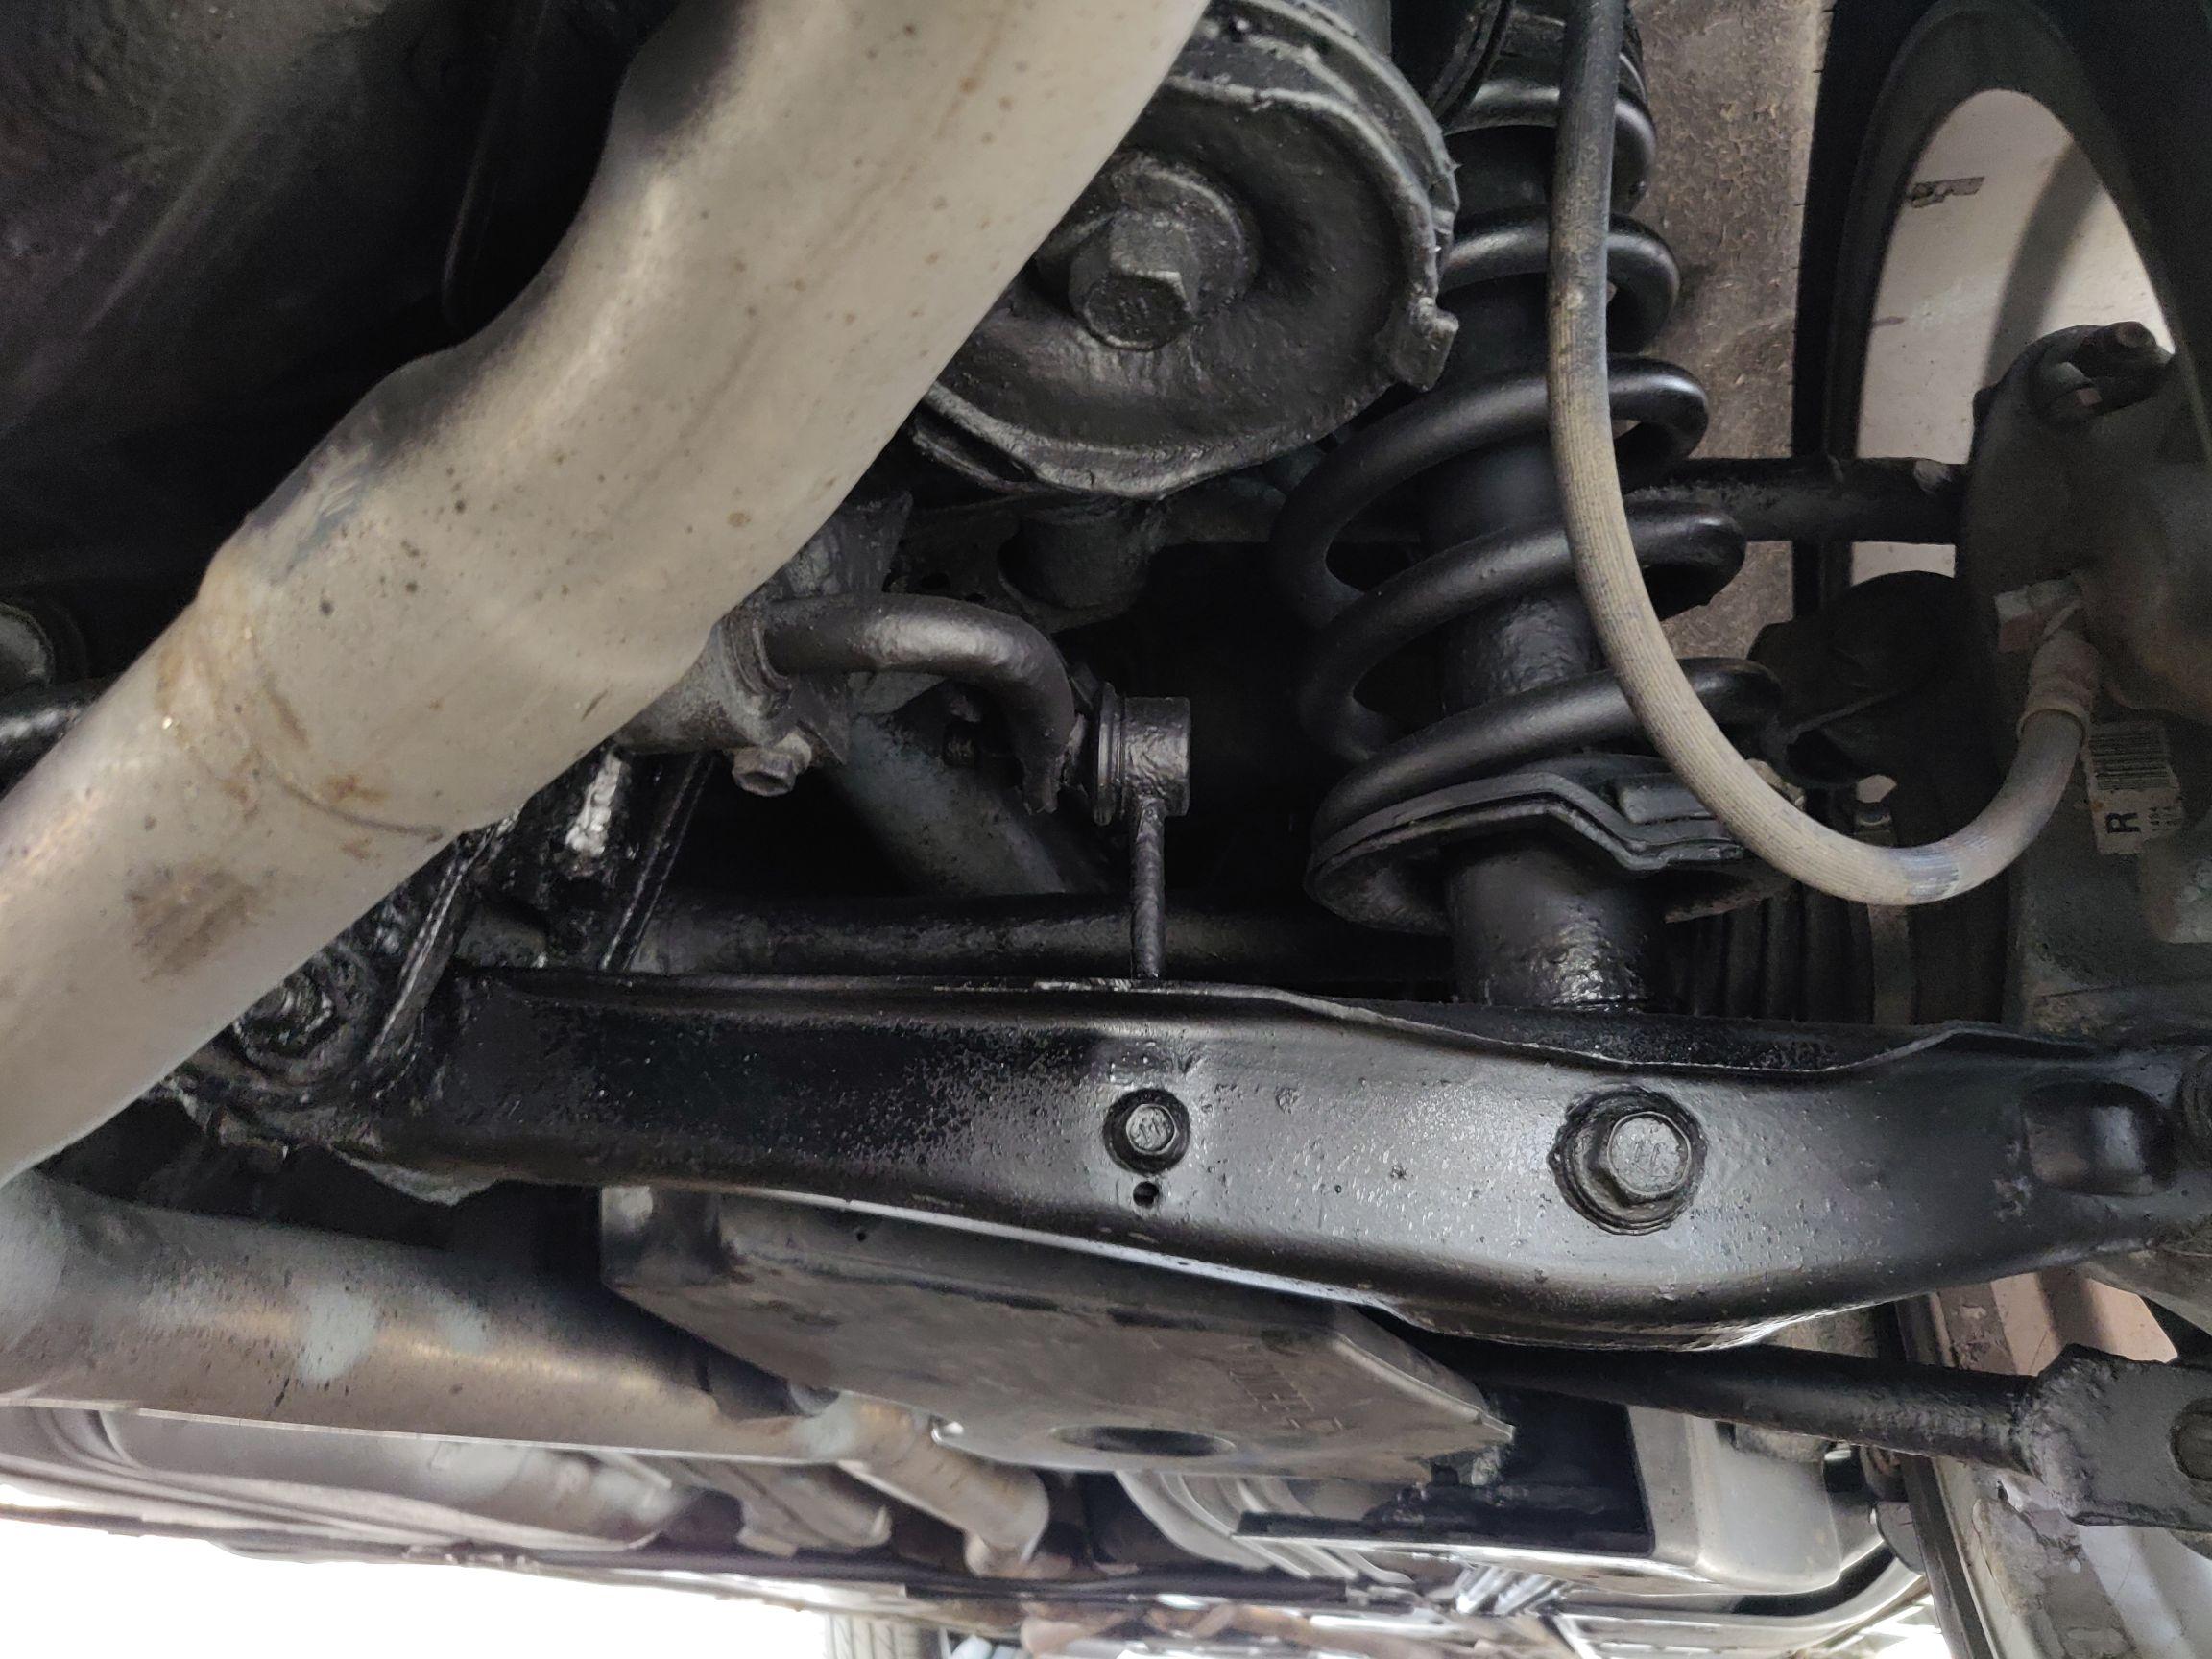
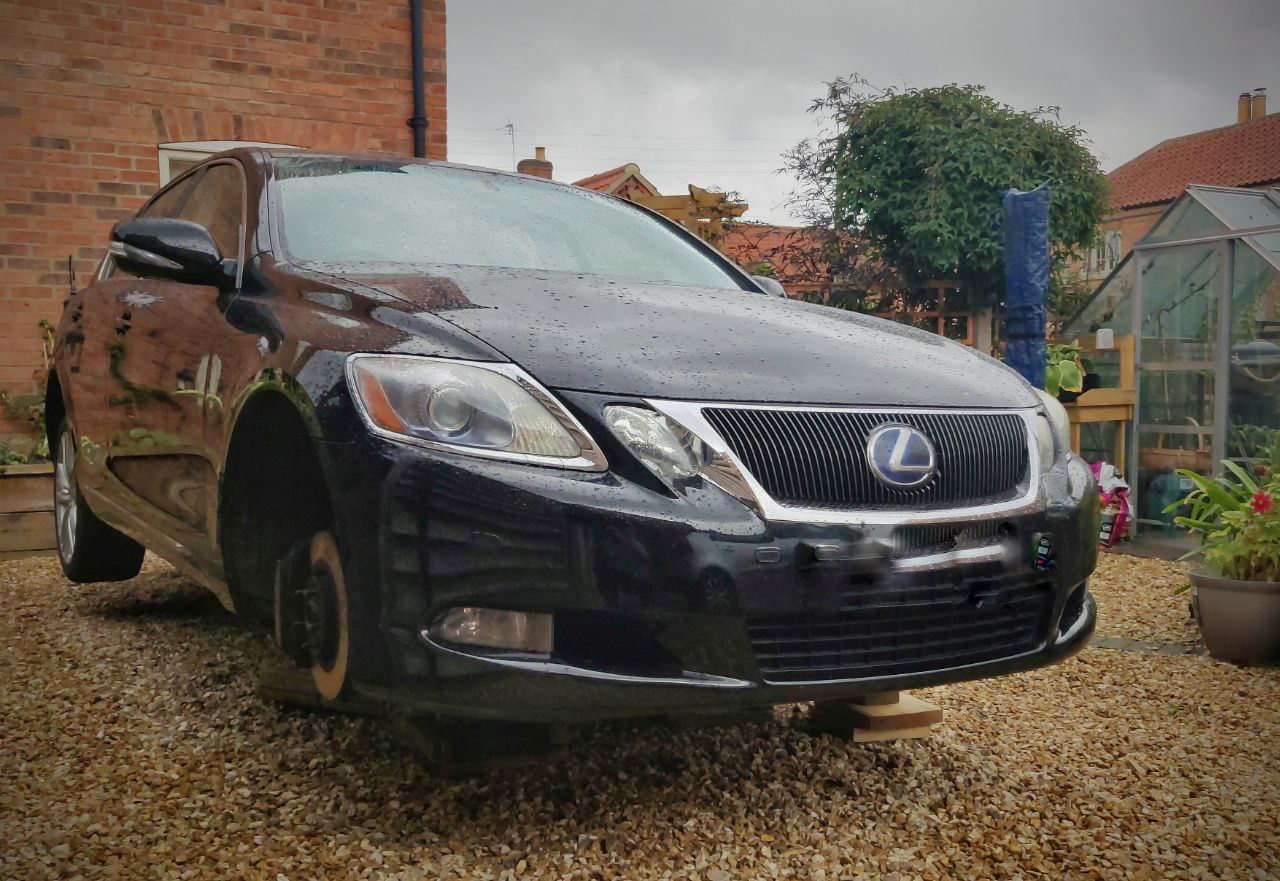
Wow, had a good long drive today over Nottinghamshire's finest/worse roads...the car feels completely different with new front dampers.
The leaking unit has obviously been poor for some time. Those rough Belgian cobbles took their toll this spring.
The next time the jet washer is out, I'm going to try and find the source of the leak in the damper body.
-
1
-
-
Well done Richard, looks great
-
You're welcome, pals and I have found that BH products work although I must say there are now many more good options out there.
Will be keen to see how you get on treating your vehicle John...
-
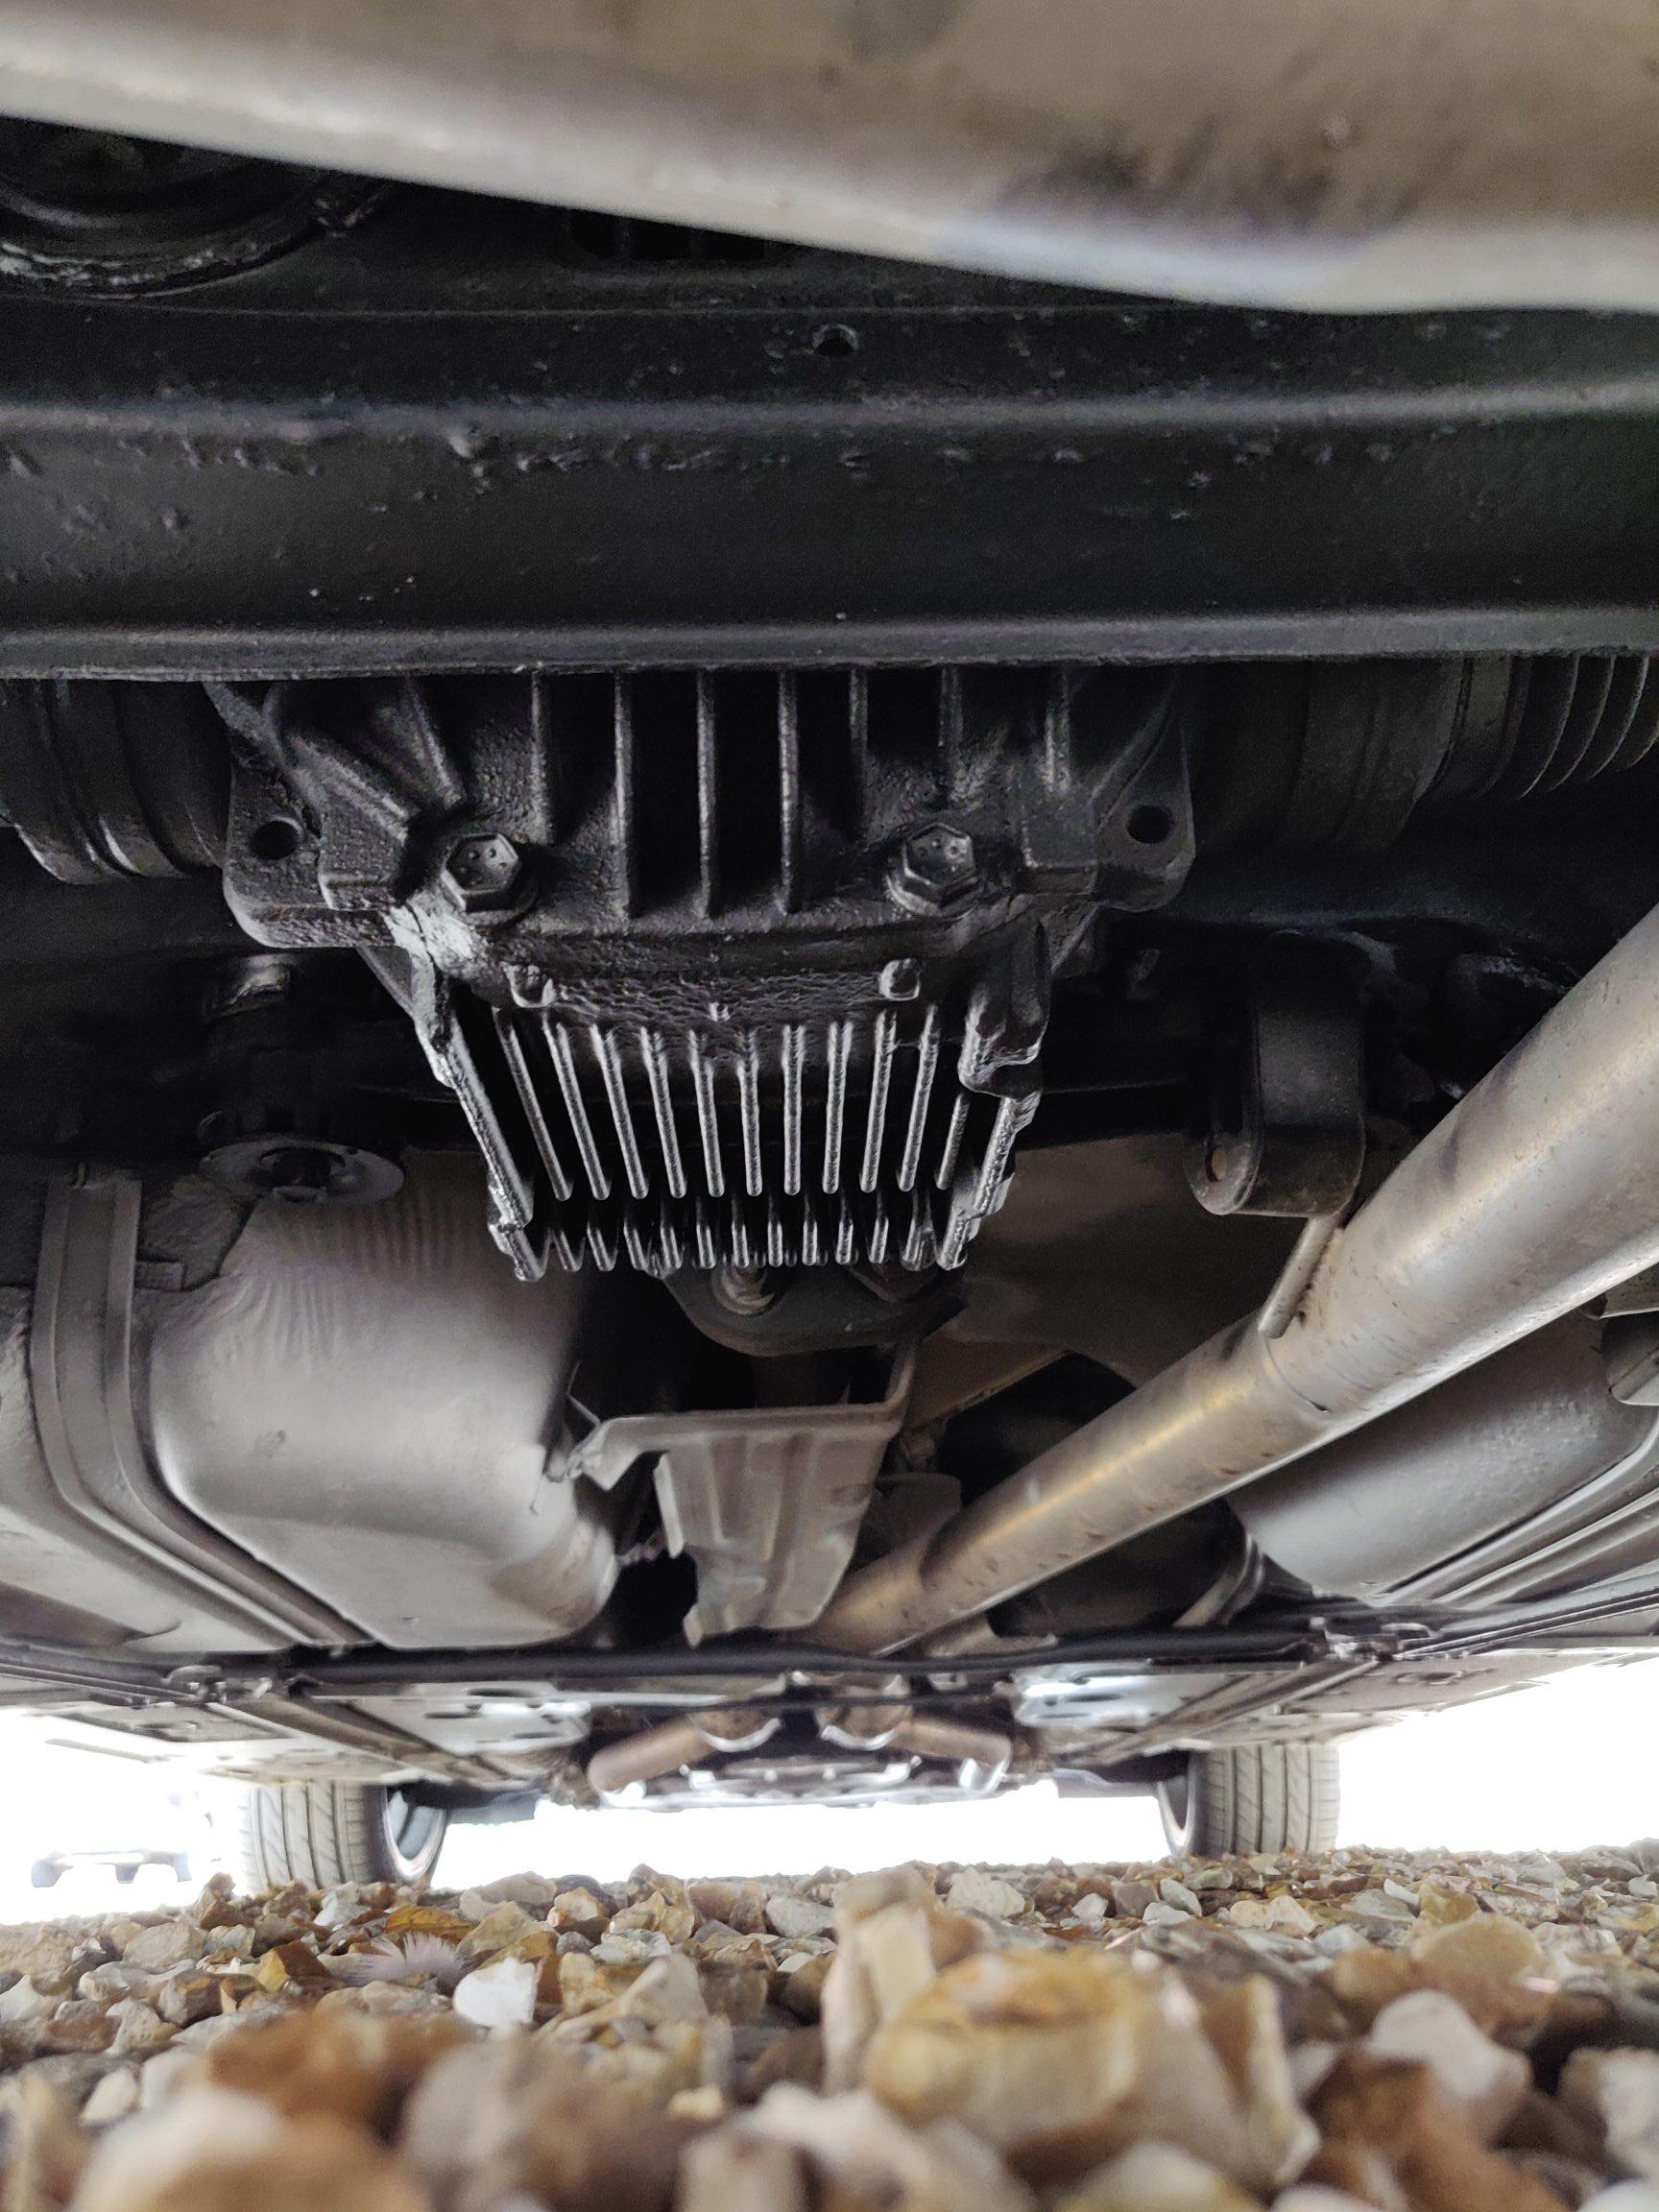
Thanks John @J Henderson, I can't express how much better the complex rear end now looks - I'll try and get some pic's online when she's next airborne.
Good call asking what I used...after clean the undercarriage was treated with Bilt Hamber Hydrate 80 - a messy job but well worth it. I've used this in the past without any protection and it keeps rust at bay.
Then I applied a liberal coat of BH Electrox, which went on really nicely and was very satisfying. Being silver you could see where you'd been and it also helped when applying dark coverings later on.
I then applied Tectyl 190 (this also covers well) and other miscellaneous paints I had in stock.
I aim to add some protection and Dynax UB has been recommended but I haven't ordered anything yet. Does anyone else have any recommendations?
Product links;
https://www.bilthamber.com/corrosion-protection-and-rust-treatments/hydrate-80
https://www.bilthamber.com/corrosion-protection-and-rust-treatments/electrox
https://www.tectyleurope.com/wp-content/uploads/2019/01/PI_Tectyl-190-Black_TE019-01.pdf
https://www.bilthamber.com/dynax-ub
-
 1
1
-
-
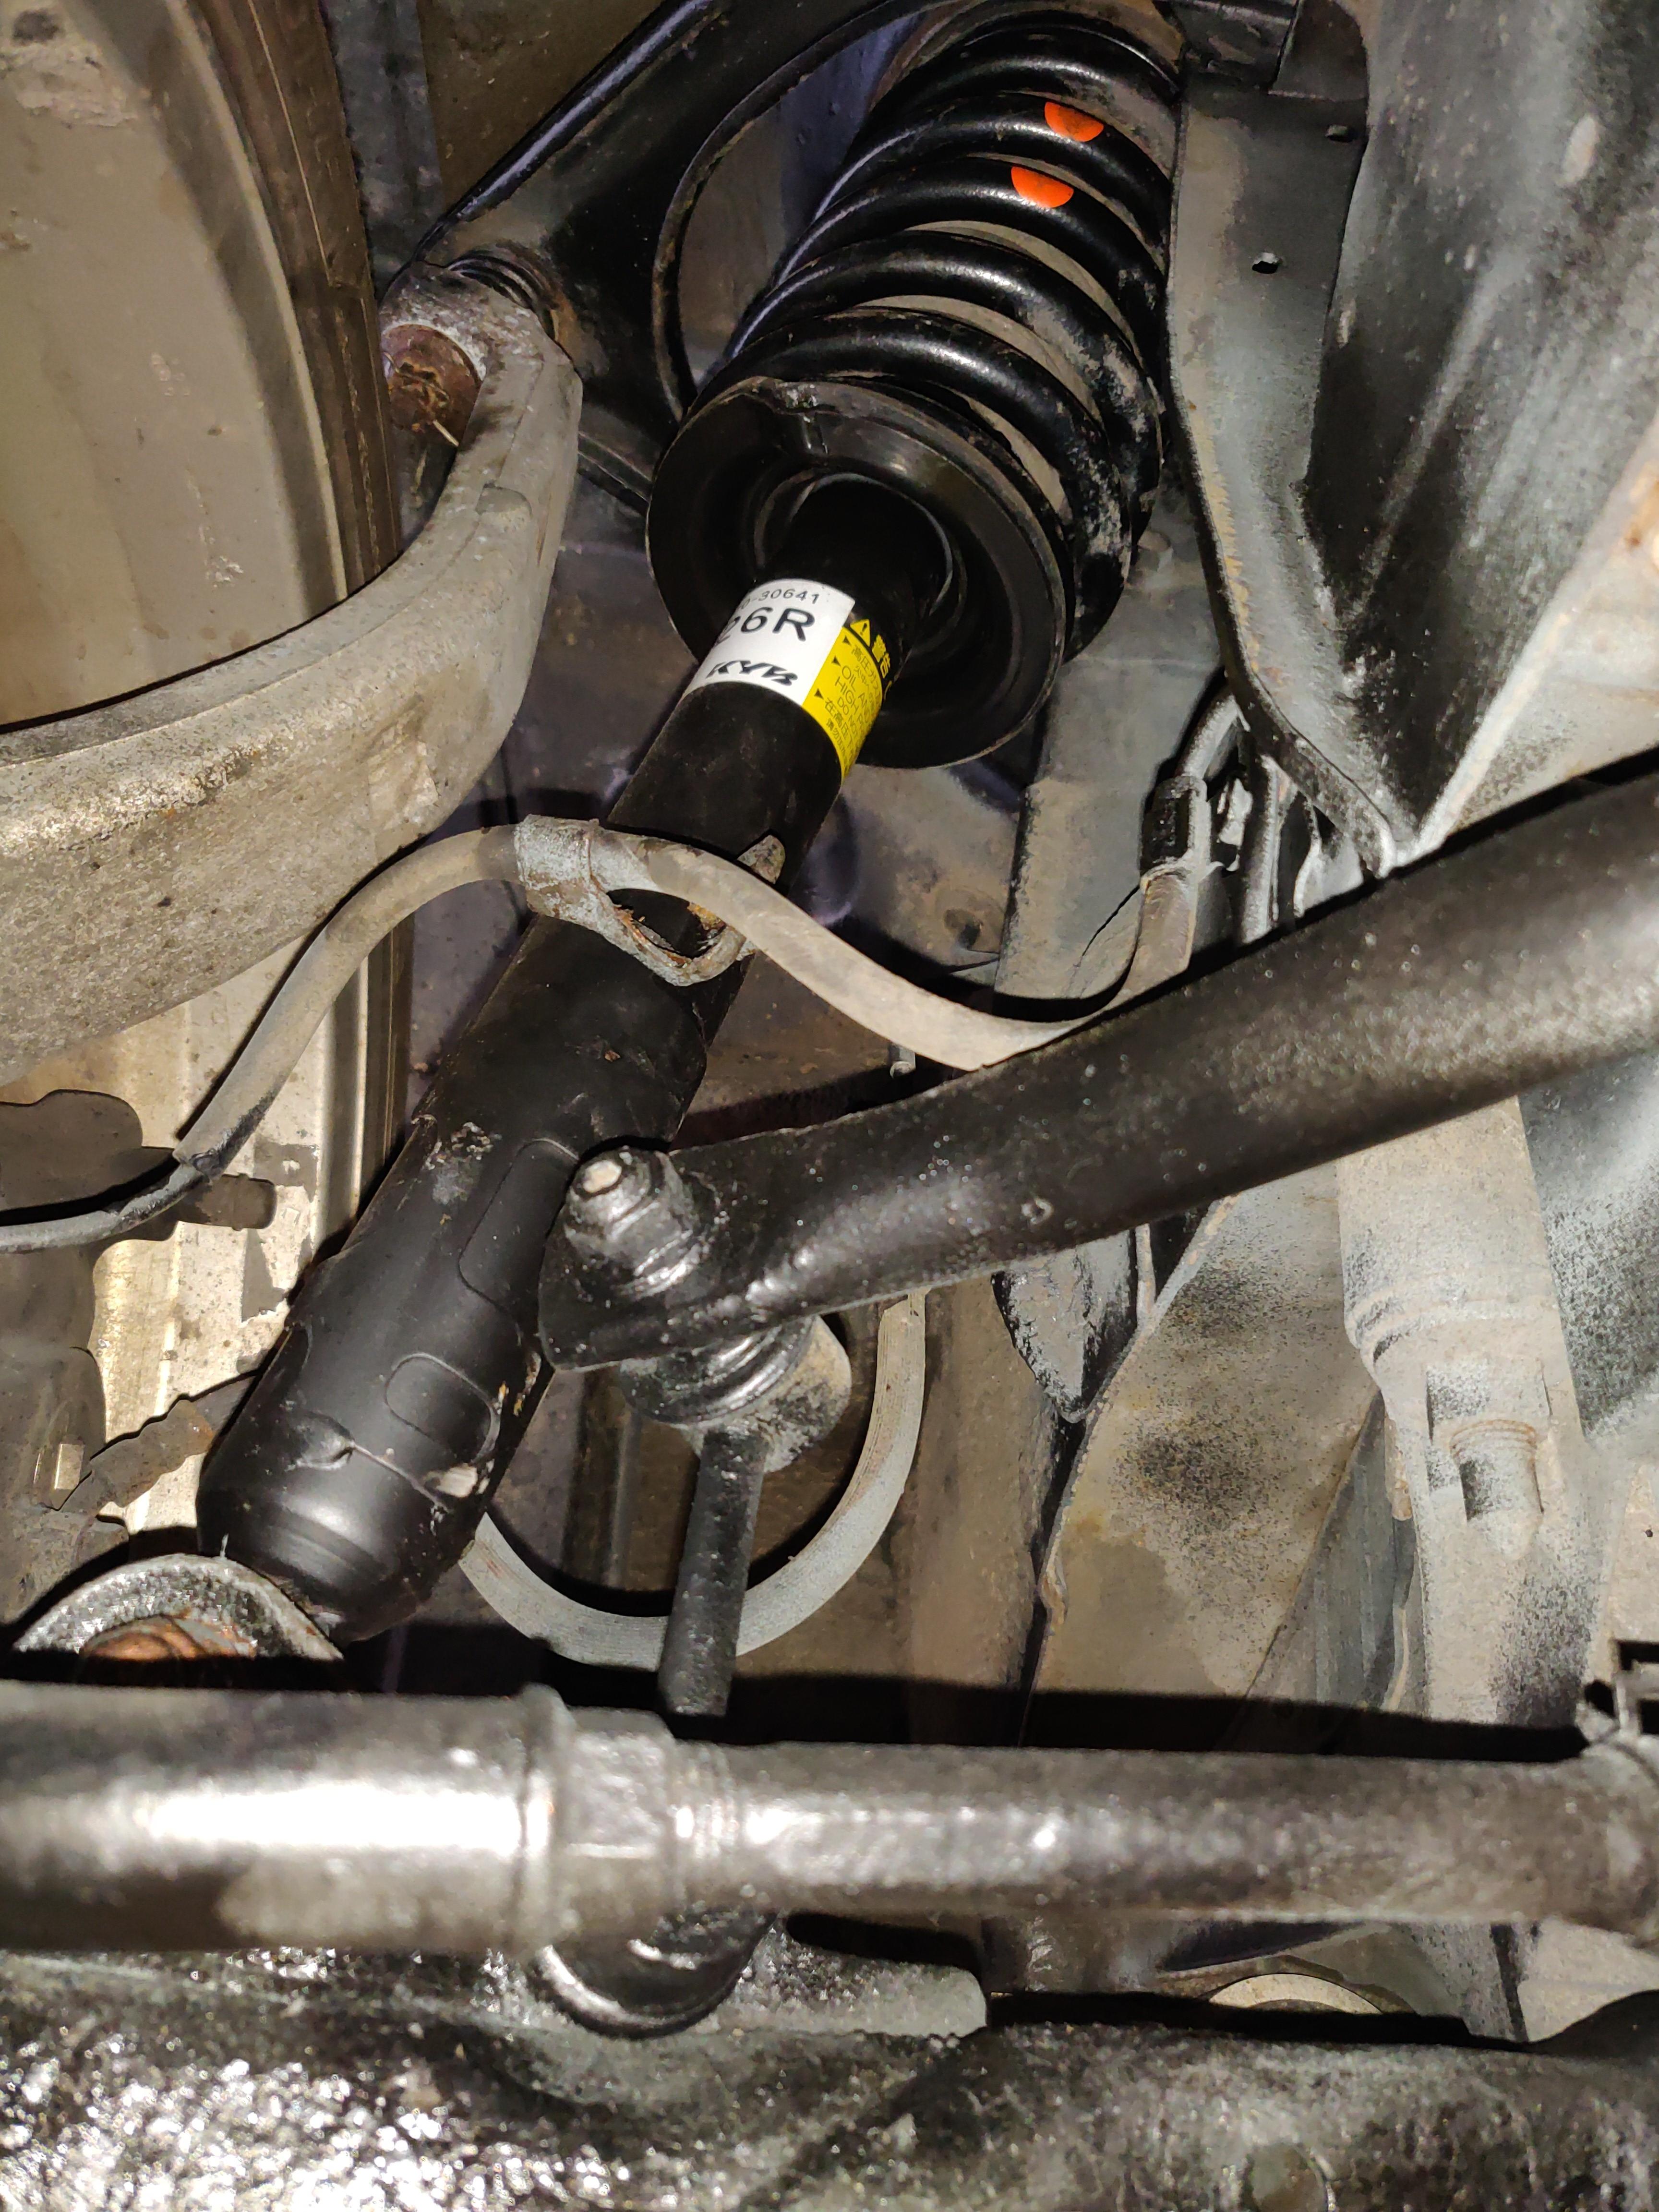
Front dampers replaced and test drove really well 😃
Almost finished with the underbody prep, it looks much better under there now. Both front and back.
-
3
-
-
@Spacewagon52 I take no credit for the heater work, even I left that to someone else.
-
1
-
-
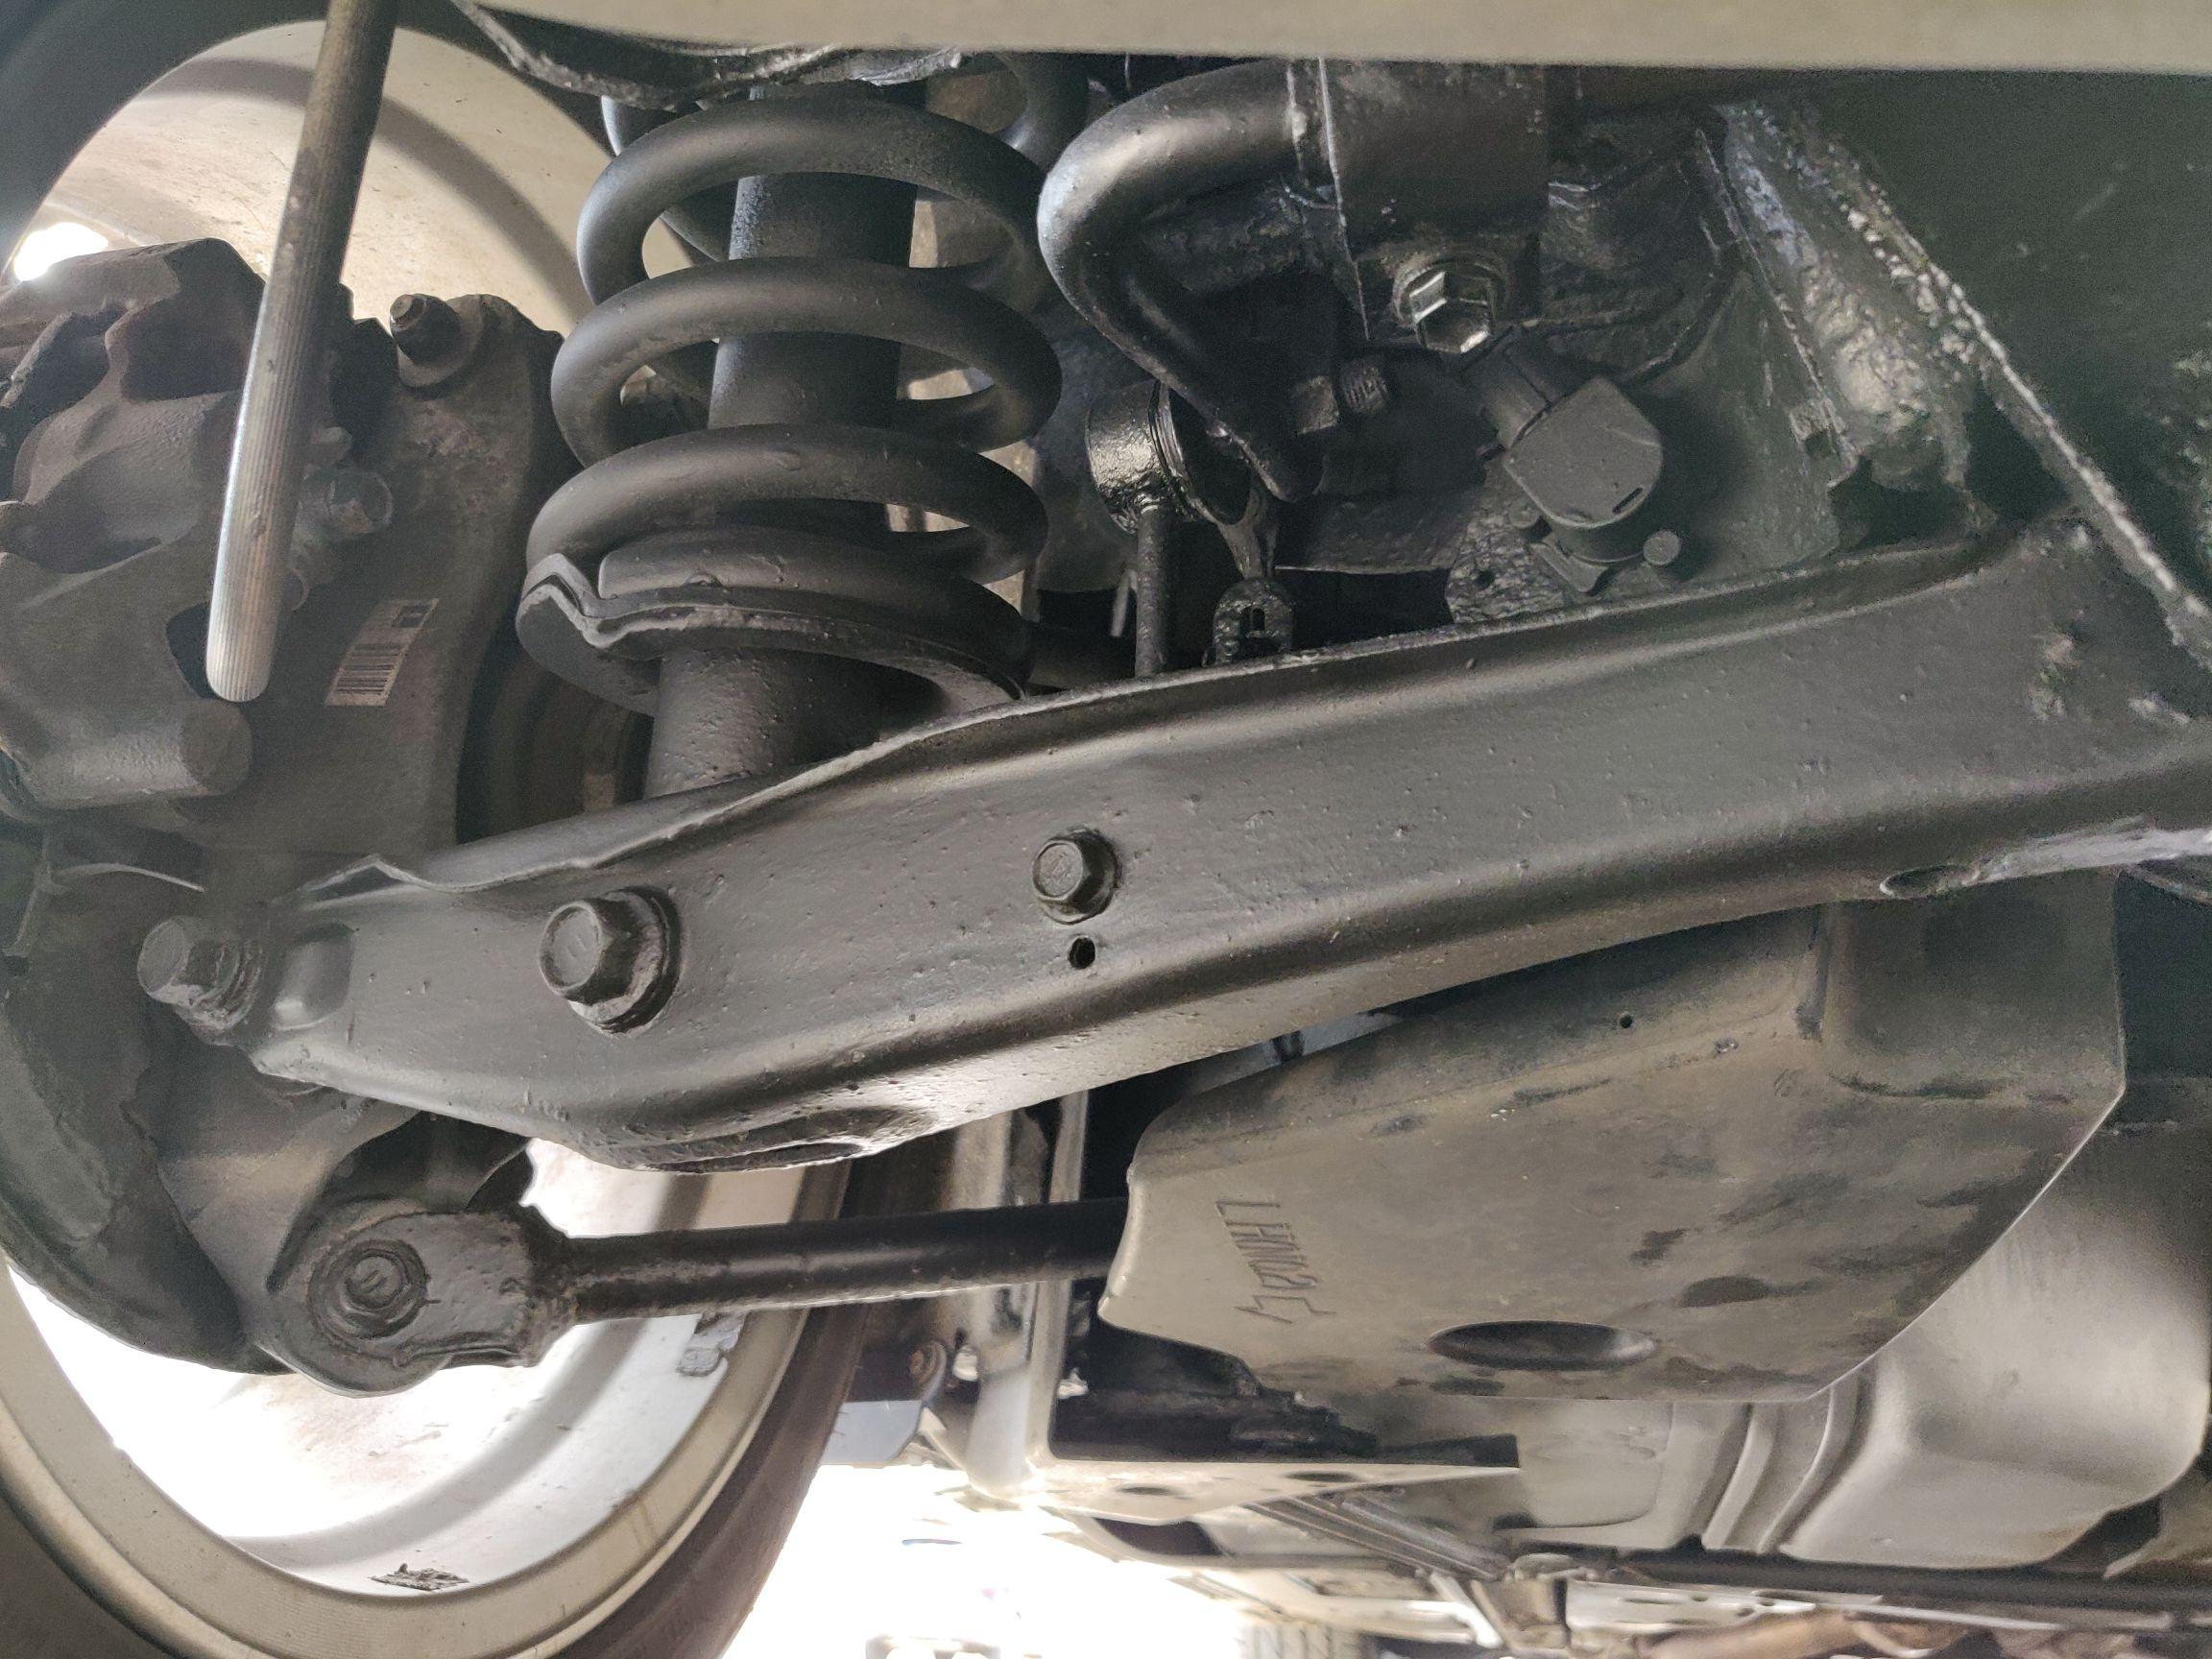
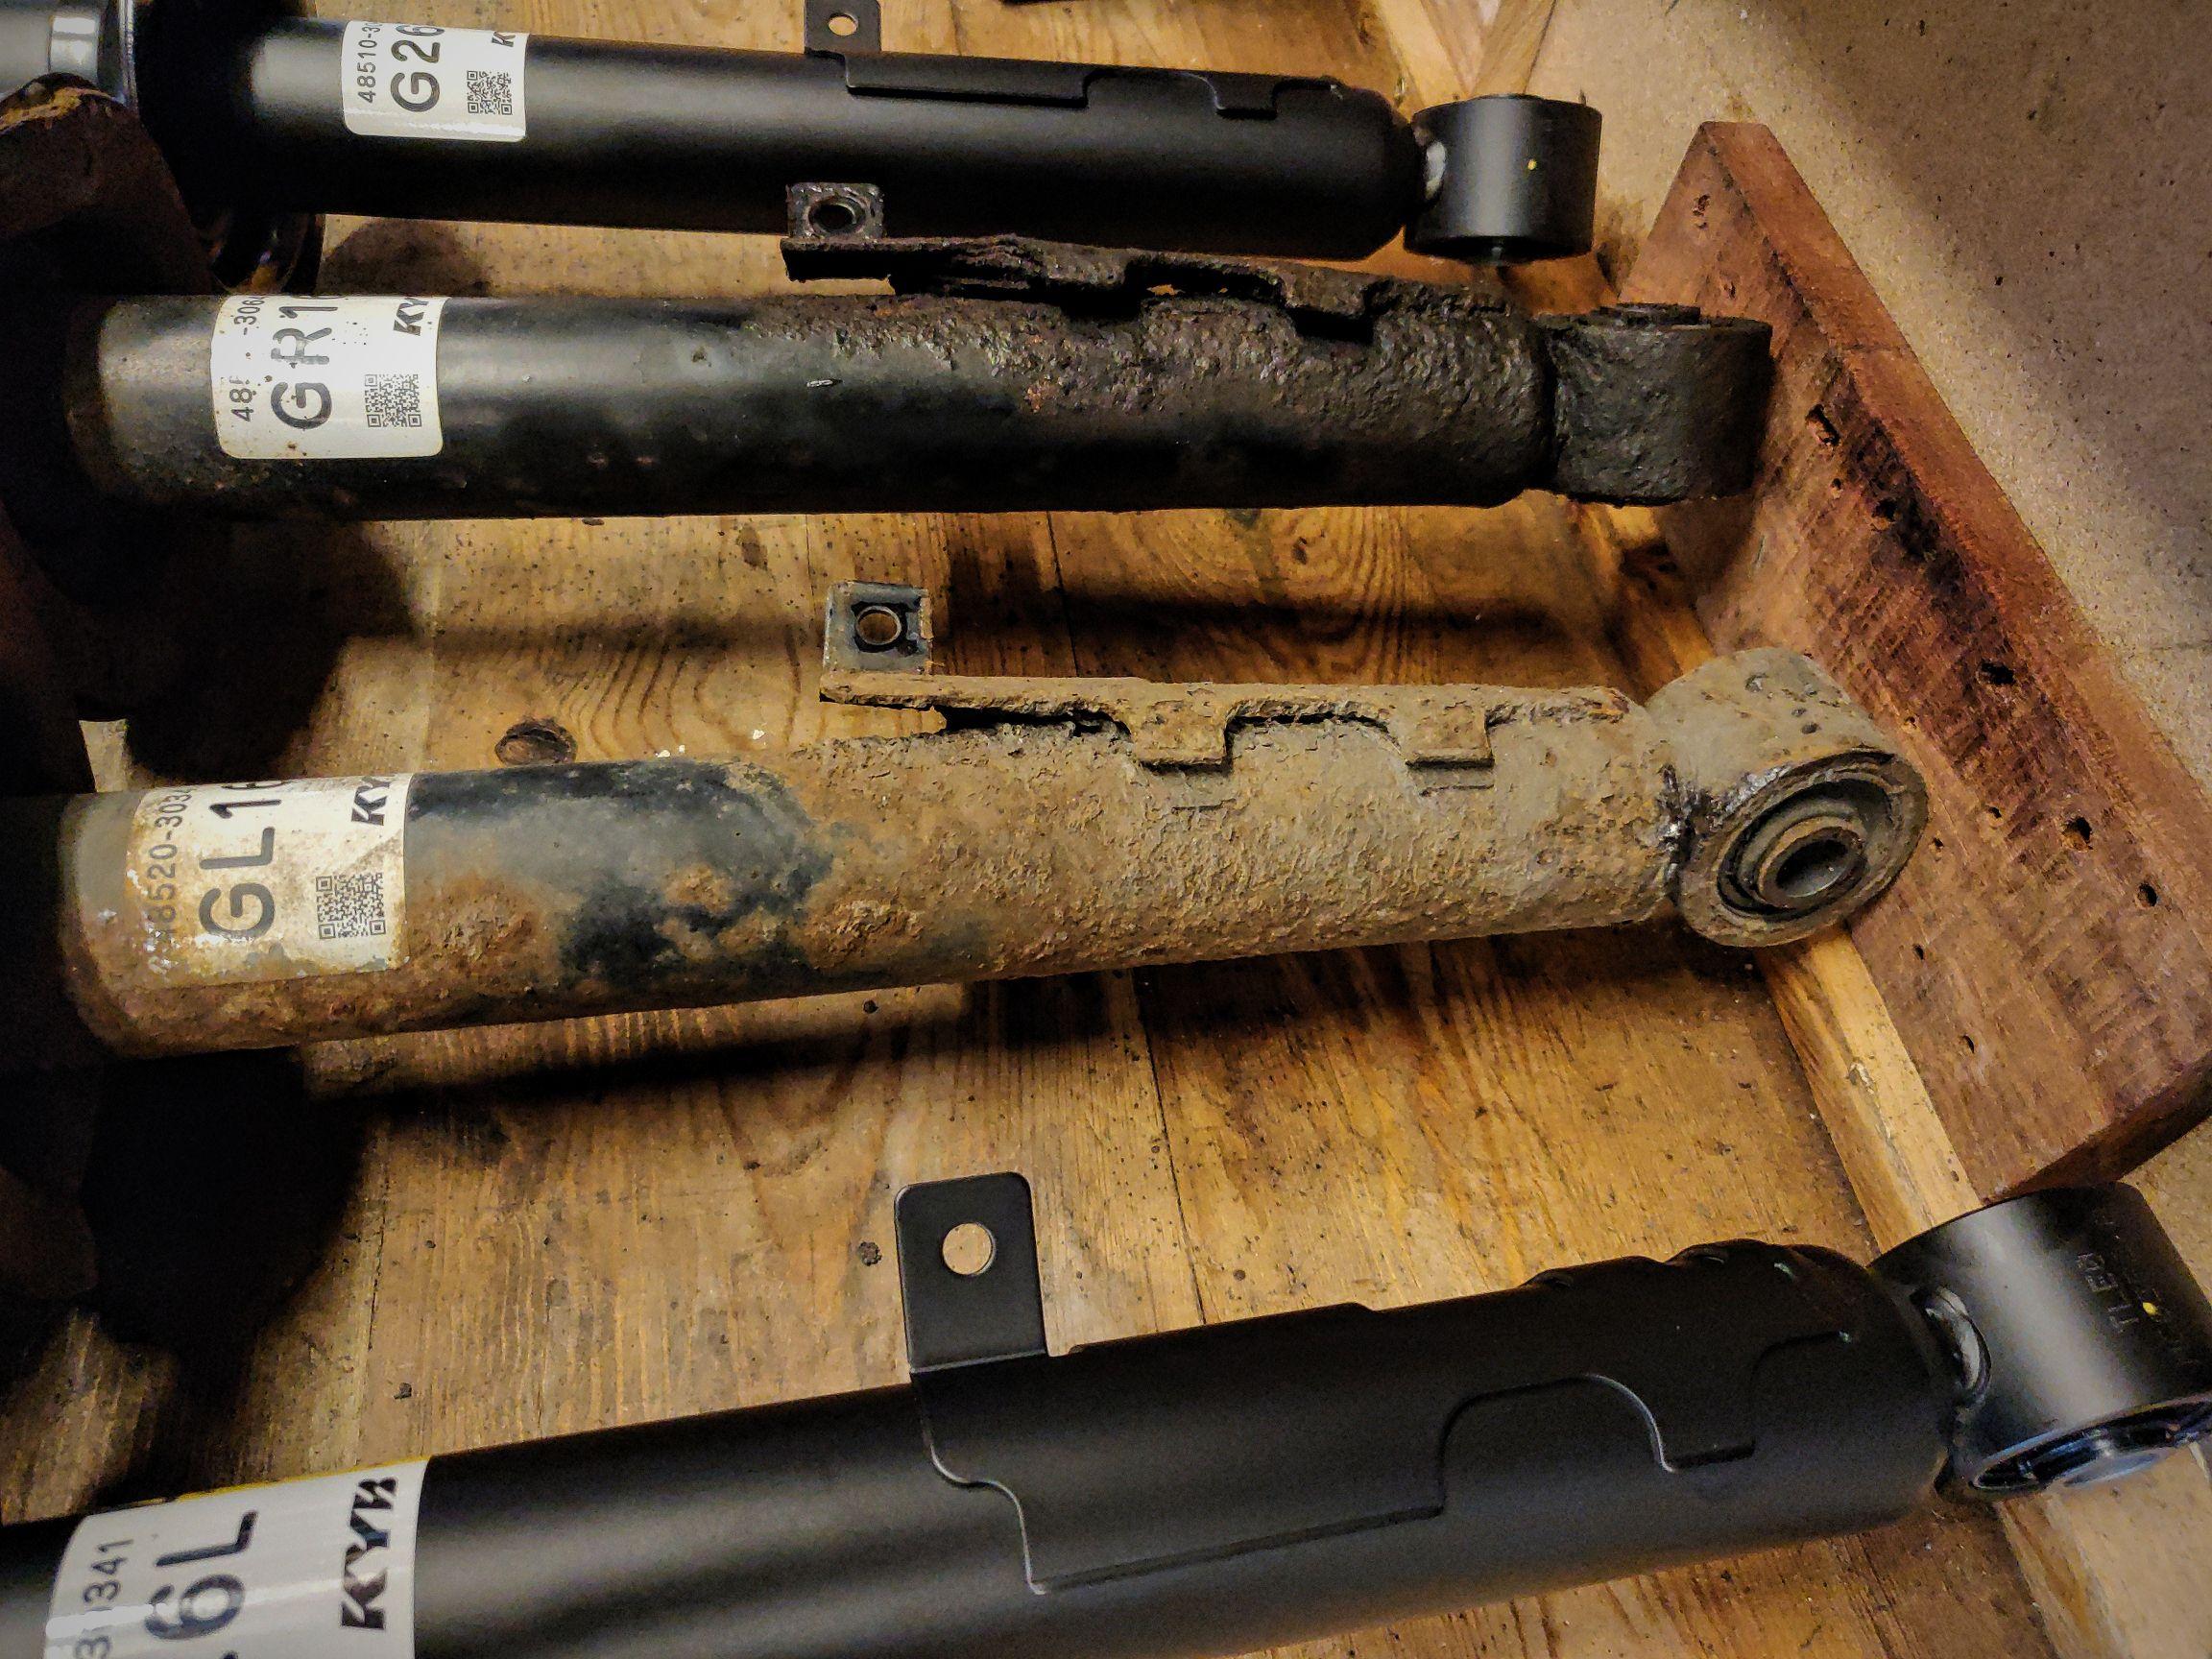
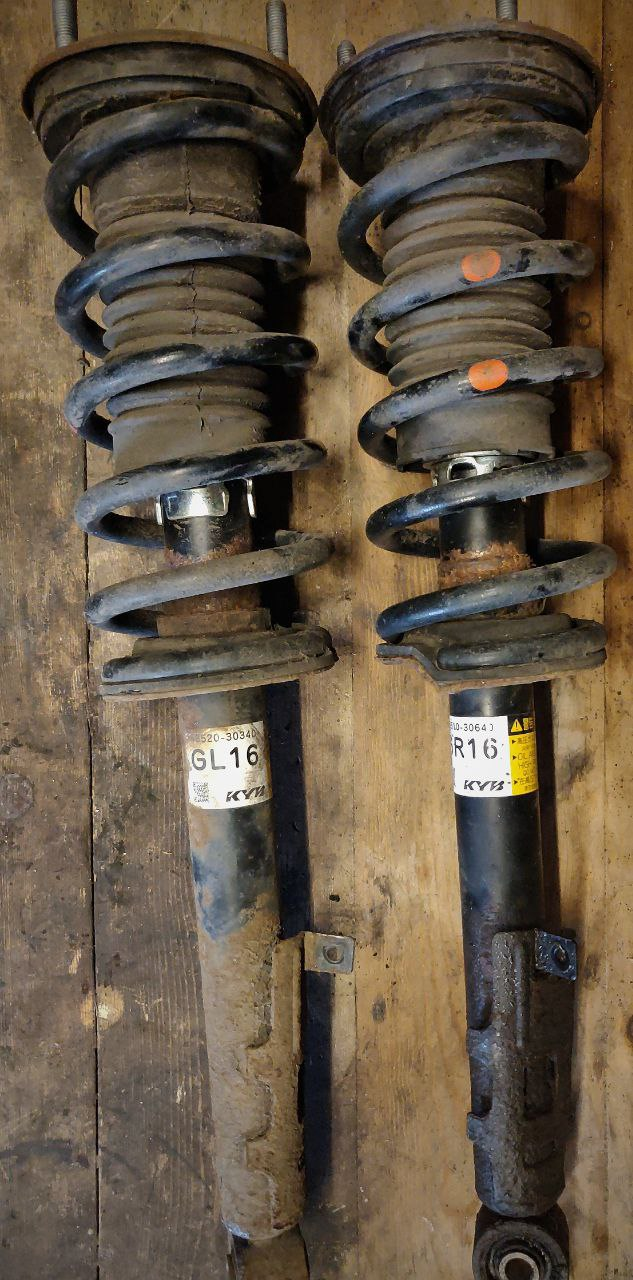
Front dampers, old and new.
The old drivers side is damp with oil/darker, was leaking from the rusty bracket.
Once the spring was removed, you could easily move the damping rod, it's definitely broken.
All back together now and the underside has been treated and sealed. Looks much better.
Will upload some pics tomorrow as I ran out of daylight today.
-
1
-
-
Looking good Neil, looking smart well done.
-
1
-
-
Hi Julian, have you checked both B pillars for the vehicle code stickers?
If there aren't present, then you can run your VIN# through online decoders to figure out your paint code.
Good luck,
Cheers, Lee
-
1
-
-
Beached for a few days

Where'd the sunshine go 😞
-
Dampers were ordered early on Monday morning but later in the day I found out that the NSF wouldn't be in stock until mid October 😞
However they've since had a stock update and reckon it'll be in for dispatch tomorrow and should be with me Monday.
I managed to clean and treat/protect all of the undercarriage in yesterday afternoons sunshine, so will now take my time finishing that job off.
Removing the front dampers is very easy with just a lower bolt, speed sensor bracket, 3 top bolts and the upper rocker arm.
The drop links stay in place as they bolt into the lower arm.


Removing cam phaser noise DIY pre lube
in Lexus GS 300 / Lexus GS 250 / Lexus GS 430 / Lexus GS 450h / Lexus GS 460 Club
Posted
Hi Guy/@Guy63, I'm sorry but I recently learnt that John has passed 😢
I hope you can experiment with your valve operation but I'm with you on how a normally closed valve works, good luck 🤞