
dougie175
-
Posts
837 -
Joined
-
Last visited
-
Days Won
7
Content Type
Profiles
Forums
Events
Store
Gallery
Tutorials
Lexus Owners Club
Gold Membership Discounts
Lexus Owners Club Video
News & Articles
Everything posted by dougie175
-
Thanks Yeah painted the complete bumper, you can see from the images above with the bumper in the booth in basecoat. I kept the primer tight so so didn't need to worry about the colour match to the rear quarters, but to be fair the Glasurit standard shade is a very good match to 8U1 Cheers
-
Thanks Mike, much appreciated No I'm not always a fan either its very difficult to get body modifications right without looking tacky but hopefully I think this one has gone well.
-
Made some very good progress today. 7:30 start and just managed to get finished about 5:30 this evening, but the bulk of the work on the rear bumper is now complete. Just need to take it off again Monday evening and mark up the 3 lower sections to paint them matt black, then build up the bumper and install it again correct. So after several hours and several layers of skin I finished rubbing the panel bond and had a nice shape, this stuff went in nice and smooth with no issues so only needed the tiniest amount of stopped right in the centre, I don't have a bumper full of filler, the panel bond makes the diffuser and the bumper 1 piece you could literally hand off the diffuser and it would not crack away from the bumper. There is not a better method I am aware of for this type of thing, theres nothing worse than someone smoothing something in and 6 months later it looks a dogs dinner as it has all cracked! The bumper was the sprayed with adhesion promoter this helps the primer stick to the bare plastic The bumper was then primed and rubbed down for another 3 hours to remove and tiny imperfections, there's a lot of detail and shapes to this diffuser so takes forever to rub the primer, its about this point when you ask yourself "Why didn't I just paint it and stick it on like everybody else!" This is the bumper once it was all rubbed down and it was taken outside to be washed to remove any dirt and grime so you get a nice clean paint job, nothing infuriates me more than seeing lads painting bumpers and the insides are full or dirt and mud and they wonder why the paint finish ends up requiring 3 hours of polishing to remove them! So after a lot of cleaning basecoat applied ready for lacquer Bumper back on the car, colour match looks spot on, I keep the primer low so I didn't really need to worry about the colour as I wasn't putting any colour up towards the quarters anyway Back outside to check it all looks ok and show off my new wheels also! Few close ups of the work, worth it in the end I feel just pretty OEM now its smoothed in For anyone wondering what I am talking about as far as doing the matt black on the 3 lower sections I found someone else who had done similar in the US this should give you a good idea of what I mean

-
 Pretty much any other OEM wheel other than diamond cut and I would say yeah definitely buy a new wheel over having them refurbed. But wheel corrosion is 1 area Toyota have always had issues! In fact in the 8 years I have worked at a Toyota approved bodyshop we have only ever had about 8 warranty claims through Toyota and every single 1 of those has either been to do with wheel corrosion or door check strap related issues its pretty much the only area Toyota fall down! Unlike VW who we have been approved to for about 5 years and I have witness 300-500 warranty claims in those 5 years!
 -
Jut to reiterate what others have said this does not sound correct, mine pulls away beautifully
-
Found it PTR03-53100 but silly expensive from Lexus dealerships in the UK in my opinion considering what the difference actually is and other options available to you
-
Hi Robbie I have it on my work PC which is off so cant even get in with Team Viewer at the moment, Lexus cant find it without the parts number and they can only supply it as a complete kit to the UK £650 or so it is. I will post the part number and quote from Carlisle Lexus tomorrow though There are much better options out there for that money I feel or you can buy it from the US with import duty and postage for about £300-350 Check out my build thread if you want to see an alternative to the F-Sport setup
-
Thanks yeah fitment is spot on without any spacers which is always a bonus! Yeah the front wheels are far less concave than the rear but that was the staggered look I was aiming for, the rears are even more concave than I was expecting so really happy with that. The wheels are 8.5 x 19 front and 9.5 x 19 rear with an offset of 35 all round. I am amazed just how comfortable the car still is on 19s was expecting quite a drop in comfort but honestly cant tell, no like some previous cars I have had where once you get about 17" or so comfort all goes completely out the window! Im guessing this can be put down to the nicely designed Lexus suspension
-
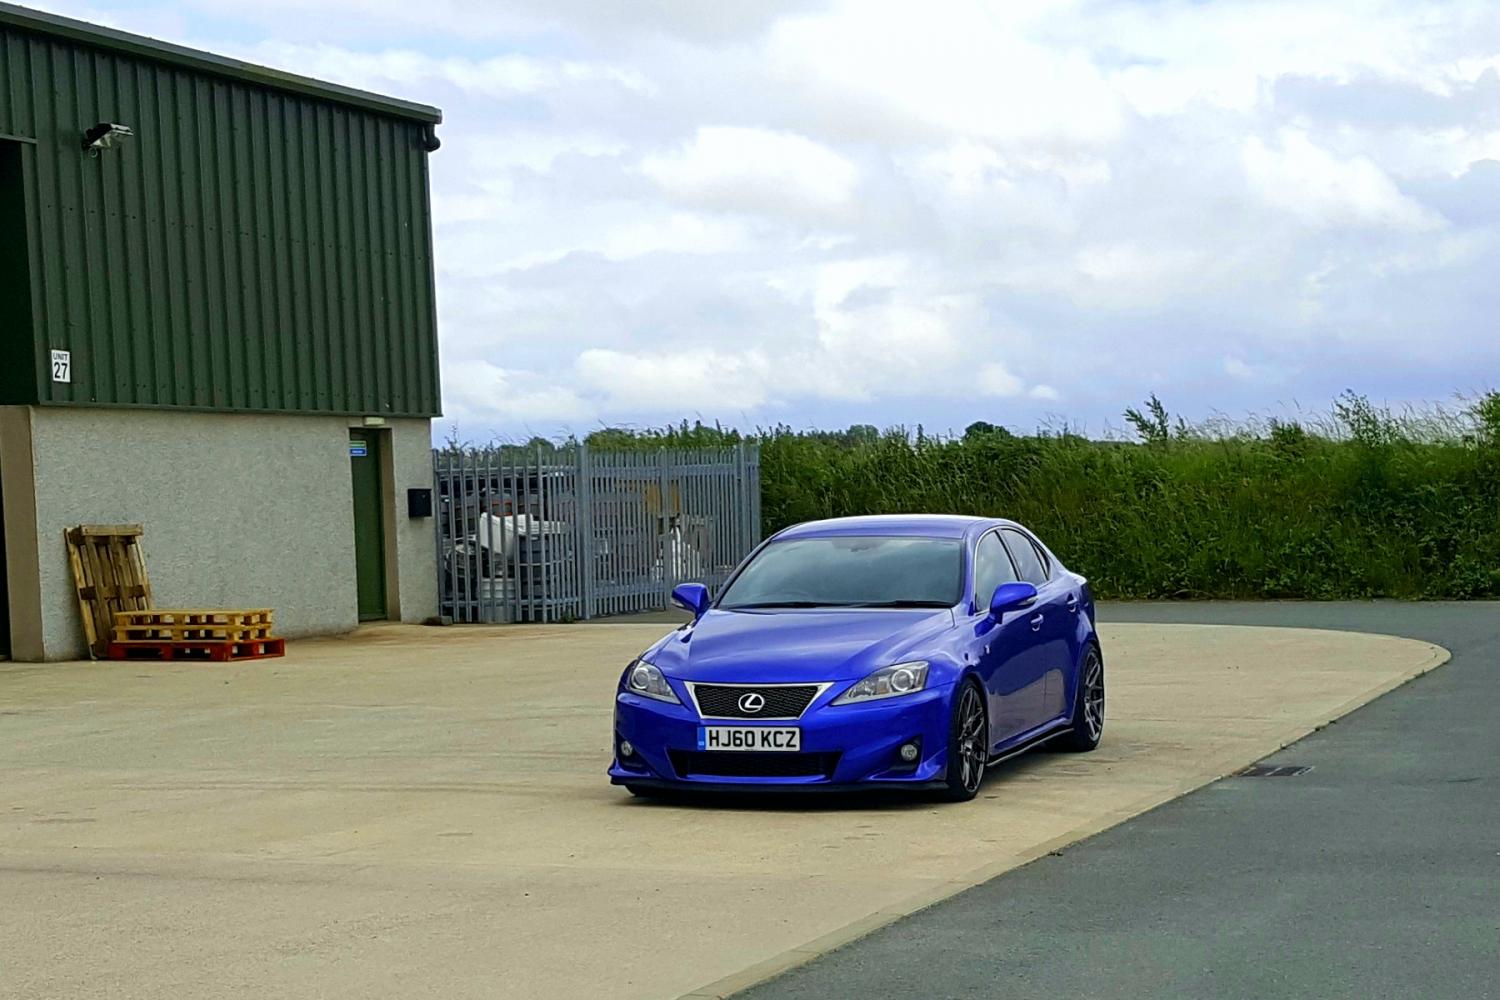
Managed to get the tyres fitted this evening and get the wheels on, these photos really don't do them justice as I was in a massive rush, the tyres are covered in goop and don't look nice, but should give you an idea of how they are going to look once the car is clean and the wheels have been prepped. 1 thing that has become very much present with the larger wheels is that I need to buy myself some Meister R's and lower it an inch or 2 further, being an F-Sport it is already an inch lower than standard but think it needs a touch more to look right. Please do excuse the awful photos the light was getting a bit dark and I was walking whilst taking them so half of them are blurred but you get the idea. Will get some proper photos soon, may not be for a couple of weeks though as any spare time now will be going on getting the diffuser sorted ready for primer and paint!
-
Always been a Honda fan, but wanted something a bit more prestige, wanting to stay Japanese there was no other option than a Lexus for me, not regretted it yet, its a superb car. I have always wanted my cars to be individual and owning a Lexus makes being individual very easy with no compromise on reliability or comfort!
-
If you are having an exhaust custom made I would suggest getting the diffuser on first as you will probably want to make the exhaust tips stick out slightly further with the added depth of the diffuser means the standard distance the tips would finish are a touch too short. Yeah the diffusers are very flexible, nice quality plastic not nasty fiberglass type things. You could use panel bond to adhere it, buts panel bond is £60 a tube not to be wasted, it is also 2 pac so requires a fancy gun to apply it, the gun we use was £250 so not a cheap buy. As far as bonding it on goes I would suggest windscreen sealer, it is extremely strong, dries fast and holds the panel in place whilst you adjust it into position, I can assure you it wont be going anywhere with windscreen adhesive. Yeah seems most people have them sprayed then just stick them on which is fine, the fitment is OK in fact its quite good for a Chinese part (dispatched from the US) but with that being said there will be gaps and I wouldn't say it will look genuine without going to the trouble of smoothing it in. Good from a distance bit average up close I would say sticking it on
-
Can I purchase this diffuser from the UK?
dougie175 replied to dougie175's topic in Modifications & Tuning
Hi mate sorry for the delay getting back to you, been very busy with life and haven't had chance to work with the diffuser until today! I can confirm the diffuser arrived very safely it is well packaged and to be honest made of a nice flexible plastic it would take some serious abuse so wont get damaged in transit. As for the quality yeah its a very nice quality diffuser cant complain, however fitment is far from perfect if you just stick it on like they recommend you will have slight gaps and it wont look like it was made by Lexus anyway. If you want to go a bit more involved though you could get someone to do what I am doing with it so it will become 1 with the bumper, I will update the progress on it as I go on this thread http://www.lexusownersclub.co.uk/forum/topic/107391-is250-f-sport-build-thread/?page=4#comment-952594 -
Made some good progress today with the rear diffuser, bit of a pig to fit and as usual I decided to make a load of extra work for myself by smoothing the thing in rather than just sticking it on like any normal person would The extra effort should be worth it though as it will become 1 with the rear bumper and look like it is all part of the same piece once I am finished Bumper prepped ready for the diffuser to be bonded on: Diffuser is then bonded on and held in position with tape: Once the bonding is complete I have then run panel bond right around the edge where the splitter meets the bumper, this stuff dries incredibly strong, it is used for holding quarter panels onto cars so you can imagine its got some good strength to it. The main reason for using panel bond over anything else though is that it does not crack, ones smoothed over like this is has fuel the diffuser to the original bumper they are pretty much 1 piece now, the slightest knock isn't going to crack the edge right along and look a right mess like you see on some vehicles that have had bits and pieces added this stuff is superb, also it can be sanded smooth So that was as far as I could get today as the panel bond takes quite a while to really cure so I can sand it down make it smooth and give it a final bit of stopper before prepping up the entire area and high build primering, so until I get chance to work on it this is how my car will look driving around for a while, bit of a mess! Next on the agenda was a job that should have been nice and simple quick job but actually took me 3 hours! My new wheels have centre caps that are about 2mm bigger than the original Lexus ones, I needed to remove the domed logos from my original caps onto the new caps. New caps lacquered around the edge so the glossy Lexus logos don't look smaller than the caps This was the bit that took all the time, logos removed from original caps, all the double sided sticky removed and undersides re-blacked ready for to stuck onto the new caps Badges then glued to the new caps, excuse the dust couldn't wipe them clean until it has dried, will give them a quick polish on Monday and they will be all good and ready to go as soon as the tyres are fitted on the new wheels and I can get them installed
-
Thanks that was the idea was hoping it would come across as OEM like it was there from factory. I feel the F-Sport should have come with a rear badge. Yeah I wouldn't dream of adding one of those after market badges you see on some cars such as "TURBO"
-
Cobra exhaust
dougie175 replied to Warrington guy's topic in Lexus F Club - Lexus IS-F / GS-F / RC-F Club
Sounds superb, good job you have a couple of helpers too! -
Cheers Gents went with the 3.4 fitted this evening
-
Ok well after a bit of looking I decided position 3 was best so then wanted to make sure I got the exact position correct so tried a few different positions I'm thinking 3.4 wins hands down really, looks how I wanted it too. Just wanted to get the placement right. Others agree 3.4 looks best?
-
Bought myself a very rare boot F-Sport badge, now there is no correct place to put this as the car doesn't come with 1 but out of 1 2 or 3 where should I position it? Obviously with 1 I will be removing Lexus and replacing it with the F-Sport
-
Too much for a badge hehe! It ended up as £29.86 delivered to the door
-
This arrived from the US today for the rear, just thought it would make a nice touch on the boot lid
-
Couple of people said they couldn't see/hear the videos so uploaded them to youtube https://www.youtube.com/embed/D2L5vjHfIqY - Exhaust closed Window closed setting off https://www.youtube.com/embed/ar81jJGed1w - Exhaust open Window open setting off https://www.youtube.com/embed/HktyZKkeETU - Exhaust open Window open setting off 2 https://www.youtube.com/embed/PhyuKdUmdtI - Exhaust closed Window closed accelerating https://www.youtube.com/embed/I2N-XjNXBVU - Exhaust open window closed accelerating
-
They come with a solid black centre caps and badges separate so rather than fitting the badges I have taken genuine Lexus centre caps removed the badges and transferred them across to these centre caps, these wheels have a couple of mm larger centre caps than Lexus OEM but with a gloss black centre cap and the Lexus centre caps installed they will look spot on and genuine. The caps that come with the wheels are just bare plastic so matt in appearance, so I will be spraying them gloss black before fitting the badges so you wont be able to tell where the genuine badges stop and the caps start I'm glad you thought they were genuine Lexus alloys that is the idea wouldn't want them to look out of place or cheapen the car
-
Yeah they have a website here http://jr-wheels.com/index.php?action=szukaj&szukaj=JR18_&
-
Yeah Ill post plenty pics of them over time, they are 19's I would prefer the comfort of 18's but 19's just have the perfect look on the IS When you say sound files can you not see the videos on your PC? As far as uploading them goes in the reply box there is an insert other media yellow box bottom right corner just hit that and upload them and paste the link into yours reply. Yeah I would get a drone at time with my exhaust however I only open it up to give it a boot it so don't have to suffer with any drone.
-
These arrived today there are even nicer in real life than they looked on the internet, cant wait for the rubber to arrive and to get them fitted.


