
ahmed24
-
Posts
643 -
Joined
-
Last visited
-
Days Won
8
Content Type
Profiles
Forums
Events
Store
Gallery
Tutorials
Lexus Owners Club
Gold Membership Discounts
Lexus Owners Club Video
News & Articles
Everything posted by ahmed24
-
 Hello Catalin, If you see the window controls for the passenger side window flashing on the drivers door then that means it still hasnt been sync correctly. Once you sync the window correctly that flashing green light on the drivers door control should stop flashing. Try this, go to the passenger side door again with car started,with the passenger side door open roll the window down all the way with the control on its own door without letting go of the button. Once its rolled down all the way, then roll it up all the way without letting go of the button, once it has rolled up all the way, count to 4 seconds (proper for seconds not fast 4 seconds). Then let go and go to see if it can be controlled from the drivers door.
 -
Here is what I did to operate the DRL led's as per OEM specs, I will do a detailed write-up on how to wire these up soon and post another DIY thread for those interested in just doing the LED headlamp conversion. each headlamp unit has 3 wires coming out of the LED compartment through a rubber grommet. these 3 wires are then grouped with 2 other wires that come from the turn-signal bulb. (total 5 wires). This then goes into a 5 way connector. The connector has 2 rows, 1 row has all 3 LED related wires and the second row has the 2 turn-signal wires. I cut off the 3 LED related wires at the connector. (Black, Green, White). White is the Ground cable, Black is the +12v supply for the LED's to work in Dim mode, and the green is the +12v supply for the LED's to work on 100% brightness. I added my own 3 way waterproof connector to the end of these wires to make it easily detachable. I also added 1n5822 diodes as a fail-safe to each +12v wire just incase both +12v wires were to be on at the same time (which doesnt happen). I purchased a universal DRL switching relay rated above 24W as both headlamps combined are about 24W. These relays are widely available and the function for this relay is to turn off DRL when side-light is turned on. I mounted this relay using a metal bracket to the airbox screw. Pictured here: I also made all my wires go through 6mm conduit pictured below, and cable tied it all neatly: I then have a fused +12V from ACC going into this relay, i also connected the +12v of the sidelight to the relay and a ground too so that it can switch off the output when the sidelights activate. Then the relay basically has 2 sets of black and red wire outputs for each headlamp. This output connects to the green +12v 100% wire and the black connects to the white ground. As for the black 50% +12v wire, it just directly connects to the sidelight wire. So the way it basically works is as follows: You switch on IGN and ACC +12V goes to the relay and if sidelight is off, the output of the relay sends power to the green LED connector, as soon as sidelight is turned on, the relay will cut the power and this is when the direct connection from the sidelight to the black wire kicks in and powers the LED's at 50%. Hope this makes sense :)
-
Correct, remove front bumper and then there are a few bolts holding the headlamp in. Remove these and disconnect the connector and then slide the headlamp out.
-
I had this issue about 4 years ago when my IS250 was still under warranty and had 60k miles on the clock. i had the TSIB performed under warranty and the noise has never been heard since and since then i've done over and additional 80k miles. My dealers had the car for almost two weeks to perform the repair which i believe involved a top-level engine re-build.
-
I'm considering having them maybe powder coated, but still thinking about it. I was considering hydro-dipping some interior parts in gloss carbon.
-
Yeap, just replied to it. Thanks for the link. I do love those black CT wheels but the stud spacing is different so it wont fit
-
There's a pair for £39.99 on eBay with a make offer option so i'm sure you can offer around £35 for it. Its second hand from a breakers yard. It's probably the same one you are referring to. Contact your dealer and see how much they are brand new and if its higher than the price of the secondhand pair then the eBay option is definitely a bargain. EuroCarParts wont sell these as they are specialist panel parts.
-
Welcome to LOC Sam. The side repeaters are sealed units and if condensation has got in then there is a chance that there is a break in the seal somewhere or possibly a hairline crack on the lens itself. If you can locate where the seal is failing you can repair it. Personally i would just buy a replacement, i've seen some on ebay going cheap recently. It's easily removable, insert a trim removal tool or something like a credit-card to push the tab and pull it out. You need to insert it from the direction of the front of the car towards the back (if that makes sense). Careful not to scratch the paintwork. Mask the area to be safe.
-
I do not like those aftermarket LED's either. most of them are not even bright enough to be DRL's lol. I need to start attending some LOC meets :)
-
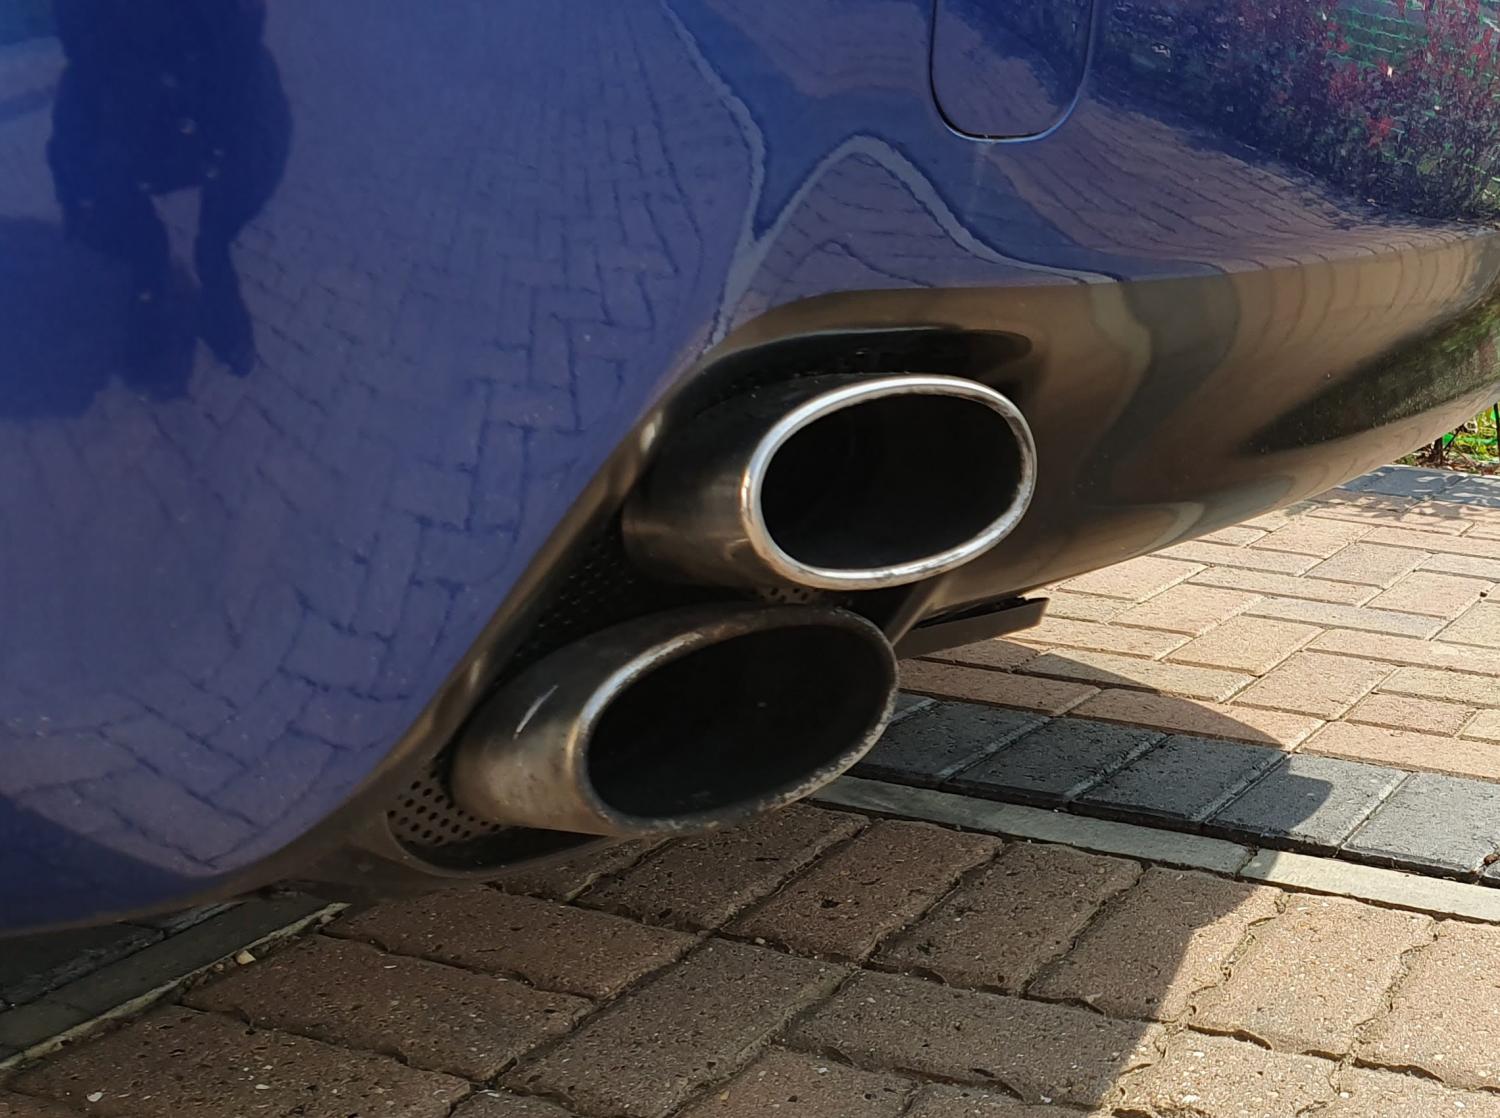
Here are some close-up pics of the front bumper and the second-hand LED headlamp showing panel gap between wing, headlamp and bumper are quite good. There is no gap whatsoever under the headlamp, it's as flush as it can get tucked underneath the headlamp. In the pic it might look like there is a gap but that's a shadow. I will try and take a better picture. The second-hand headlamp could do with a slight headlamp polish, which I might do sometime soon. Also, will try and take some pics of the LED's and possibly a video of the LED operation and post it soon.
-
I purchased one second hand off eBay and the other brand new. Paid total of £629 for the pair and sold my old pair for £300. The new one cost me £495.
-
Thanks for the PM, i had a look at those black CT alloys which look really nice but they have different stud spacing so wont fit. Yeap, i did consider them but prefer the OEM ones that have the L shaped design which goes well with the front LED L shape design
-
Thanks normski2. I thought I had my location on my Profile but seems not. I've updated it now. I'm in London.
-
Thanks normski2, Yes I am planning to have the facelift rear light clusters with the clear outer versions as apposed to the amber versions. There are two facelift versions pictured below, i'm planning on the second combo. Just waiting to get a good deal on a pair for second-hand. Cost must be low :)
-
Thanks Ian You are correct, the new LED headlamps no longer come with AFS either because of cutting costs to accommodate the cost of building the LEDs or lack of space due to the LEDs. Hence on the newer cars their is no AFS system so no need for the car to monitor the AFS system. By installing these headlamps on a car that has AFS causes our system to detect an AFS fault and hence the AFS OFF light flashes. This does not have any effect on anything, its simply an alert indicating that there is a malfunction on the AFS and hence the system has been turned off. I rectified this by applying a dab of black bodykit glue (silicone like) on top of the AFS led inside the instrument cluster. Well to stay within the small budget of the entire project, I am considering just having the existing ones refinished in black until i come across some nice bigger set of wheels. It's quite hard finding a nice set of black wheels to suit the finish. Any suggestions anyone?
-
Some more pics that i forgot to include:
-
Doing a DIY wrap of an entire car is very time consuming. Wrapping the panels itself doesnt take very long, e.g. bonnet 30mins, doors 30mins each. The bumpers took a few hours each. However the most time consuming part is prepping the panels, carefully removing the panels and neatly tucking away the vinyl. I spent over 2 weeks on the entire project, took my time doing it and didnt want to rush it. Yes you do. There is alot info on the net about how it's a temp colour change and hence no need. DVLA now require any sort of colour change to be declared whether temp or not. Only area is underneath the front bumper where the F-Sport fog spoilers fit, the design in that area is extremely curved and it is impossible to form the vinyl there without overstretching, so instead i worked it all out right to the bottom and created a few overlap creases. But this cannot be seen unless you go under the car.
-
Some more pics:
-
I havent done much to my Lexus for a while now and hence have not been active on the forum. Here is my latest project: I picked up a cheap second-hand 2012 f-sport bumper for £30 which needed a bit of filler work. So decided the amount of money that will go into a quality paint job, if I put a bit more on top I could embark on DIY wrapping project and fancied a colour change to Pearl white with gloss black roof, door handles and mirrors. I thought I would give the car a makeover to freshen it up. Chose to do my wrap during the summer holidays, along with this I managed to source one second-hand 2012 LED headlamp and the other I purchased brand new at a discount from Lexus Birmingham. I also installed the new mirror casings that come with turn signals. I used the Hexis brand wrap. I've wired The LED headlamps to work just like stock setup (full brightness with lights off, dim mode as soon as sidelights are turned on). Information regarding OEM ballast removal: There seems to be alot of youtube videos and guides out there that instruct you to pry open your headlamp lens just to remove the ballast. I can confirm that this is not necessary. Why would Lexus be selling headlamp units without ballasts, if you then had to pry open the sealed lens just to get the ballast installed. The ballast can be transferred simply by removing the internal connector and fishing out the wire. I am planning to have the wheels re-finished in black and paint the callipers red. Some tips for anyone wanting to do any sort of wrapping: 1. Do not wrap in extremely hot weathers, it's an absolute NO NO. 2. Do not wrap in cold weathers either, as the film won't adhere well and the adhesive will not cure properly 3. I know people say to use a heat-gun, but do not overkill it with heat-gun, try to naturally squeegee it in place, and save the heat gun method for complex curves and recesses. 4. Vinyl wrap will still be susceptible to stone chips just like paint. But advantage would be that your main paint will have an extra layer of protection. Here is a photo gallery of the summer project:
-
here is another pic of the brushed aluminium di-noc:
-
Why not wrap it in 3m di-noc? they have some nice colour options. if you're not a fan of the carbon fibre look, then they have now got brushed aluminium which looks really nice. I used the brush aluminium look on my wife's car and it looks much nicer than the cheapy silver painted parts some cars have. here is a pic of how brushed aluminium looks: The texture of the brushed aluminium is also very good
-
yes it can, 2 methods: wire splicing method or the plug and play TOM's override kit. depends on which one you are comfortable with.
-
In theory it's possible but installing a OEM unit would be very expensive. You'll need a whole new set of wiring harnesses and electronics, not to mention the GPS antenna and voice controls. The practical answer would be No. The best option would be the Fly Audio aftermarket unit that can be found here And here is a video of it installed and reviewed: http://www.youtube.com/watch?v=xFy2S0vzNOI
-
Switch Query
ahmed24 replied to david1981's topic in Lexus IS 250 / Lexus IS 250C Club / Lexus IS 220D & IS 200D Club
I see you used picture of my car there :) that switch is windscreen defrosters/de-icer. on the icy days when the windscreen has ice built up, it melts the ice around the windscreen wiper area at the bottom and the rest melts down slowly

