-
Posts
1,431 -
Joined
-
Last visited
-
Days Won
16
Content Type
Profiles
Forums
Events
Store
Gallery
Tutorials
Lexus Owners Club
Gold Membership Discounts
Lexus Owners Club Video
News & Articles
Everything posted by Neil E
-
Okay so now the speaker grills have all been renewed, the interior looks a lot better but sometimes the back seat becomes even more unusable than normal. Here's the story in pictures to take the car a little further down the ICE road. Gathering the kit Measuring up for sealed enclosures Not much room back there Getting started by removing the rear seats. Battery removed to commence threading the '0' gauge cable through to the cabin. Removing the battery tray. To uncover a rubber grommet covering a suitable hole. Disassembling the glove box and foot-well trim to thread the cable through. It only takes a matter of minutes and it's so much easier with it out of the way. Carefully threading the cable The rubber grommet is heavy duty and more than adequate protection from the metal firewall. 4 bolts secure the seats, unplug the electrical connections and they are out of the car in 5 minutes. Running the cable under the carpet alongside the sill. The sill cover and trim just lifts up. The side panel can be gently released to provide space to thread the cable into the rear seat base area. Loosening the armrest to run the amp remote lead and phono leads from the back seat and rear camera cables from the boot. With the cable all in place and secure, the 150A fuse/holder is added and the cable cut, trimmed and crimped Don't perform the final battery connections until everything else is complete. Adding foam to the speaker boxes before they are covered in Vinyl Wiring in the rear view camera and testing before the sub-woofers are installed. A few more panels, foam, vinyl and leather dye and it looks like this. Or sometimes like this depending on how I have it set up. I've recently changed to smaller enclosures that sound slightly better so an improved and simpler install should be completed in the next few weeks. It's designed to be unbolted in a matter of 20 minutes and returned to normal rear seats. The drivers are JL Audio W3V3 10s powered by a DLS A5 (Big Three amplifier) It's an improvement over the standard sound but it's not quite a properly balanced set up at present however if the Focals are installed in the doors it should be quite a nice sounding system.
-
There's a bit more work to do to swap the rear speaker grills. First task remove the rear seats, the bottom rest lifts up with a firm tug. Note the huge amount of leg room on offer to rear passengers. Remove the sill covers, they just pull up. Unbolt the bottom part of the rear seat back rest. (ignore heavy duty cable ) Drop the top, it's so much easier to work inside the car without a roof. Until it rains Pry off the covers to reveal the 10mm bolts at the back of the head rests. Undo them all to release the plexi-glass between them. Pry off the backs of the headrests and undo the bolts that secure the head rest pads. Undo the top bolts to release the seat back rest and remove it through the seat belts. That provides access to some of the fixings that secure the rear side panels. It also permits access to the 8 inch sub-woofer. At this point it's time to operate the roof again to gain access to the side panel top fixings. With the roof half way through the opening process, a bolt and a push plug can be removed to free the top part of each side panel. A bolt is hidden behind the seat-belt top cover/securing point. There is a plastic surround to pry off first (not shown, sorry) Peal back the weather strip. And gently pull the side panel off to gain access to the speakers. There is a push fit plug at the bottom. They frequently become detached from the panel but are easily recovered with a pry tool. 4 screws secure each of the speaker grills and then it's the reverse sequence to put it all back together.
-
Yes, it's stunning but subtle and it's a beautifully composed picture. The front lip really works.
-
Any plans to change the bodywork? I've seen a few with kits but how good does this look?
-
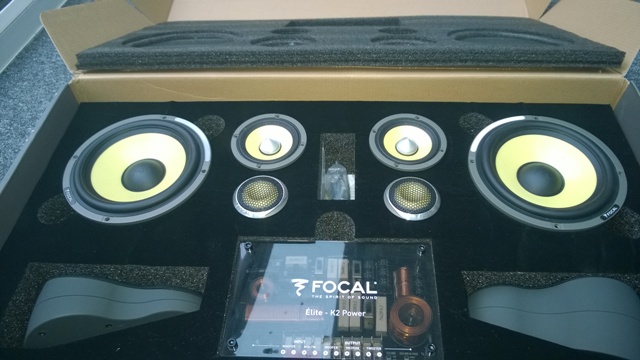
The speaker grills were £200 for all four. A bit expensive but easier than repairing with colour matched acoustic cloth. I'll demonstrate what can be done with the useless back seats shortly and how they may serve to help the sound system. The Focals are some of the best available for under £1000 so I would expect there to be a significant difference in quality when matched with a high power amp but they remain in the box for now. I've made baffles and adapters to fit them into the doors but haven't decided if they go in or get saved for the next car. I was going to buy an LS but I'm still distracted by the ISF, then I had a little go in an RCF before I was politely reminded by the chief financial officer that mortgage free living has a greater appeal than a sporty spindle grill. So with the RCF firmly on the shelf, the Focals may just find their way into the doors quite soon.
-
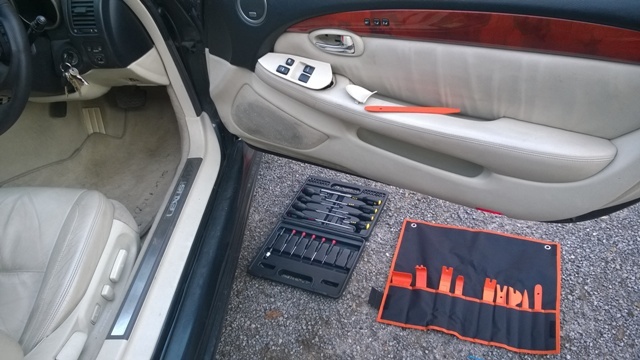
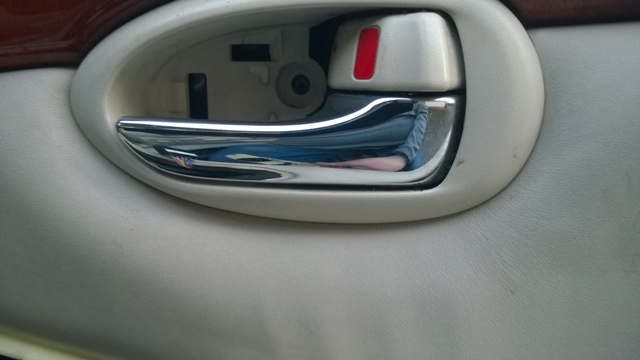
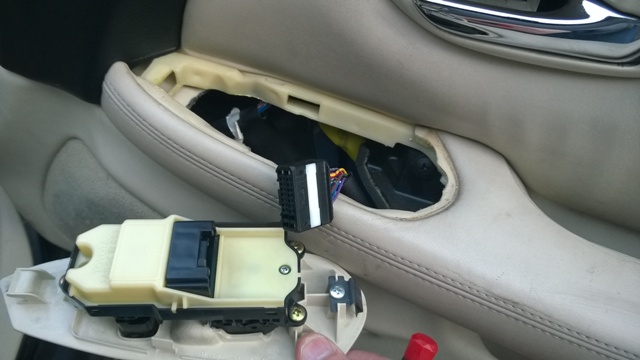
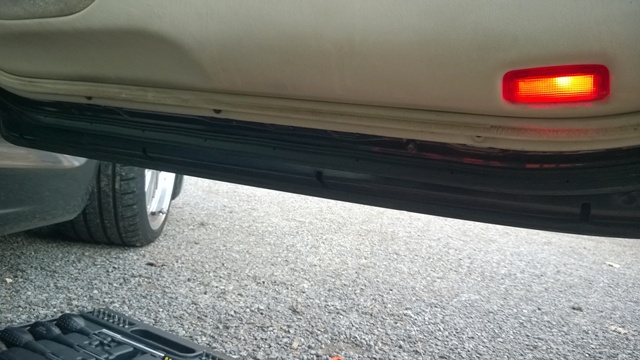
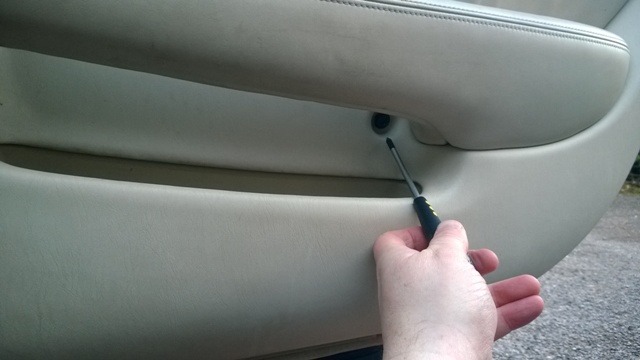
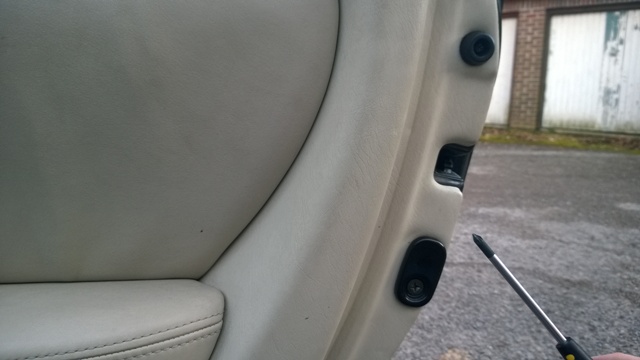
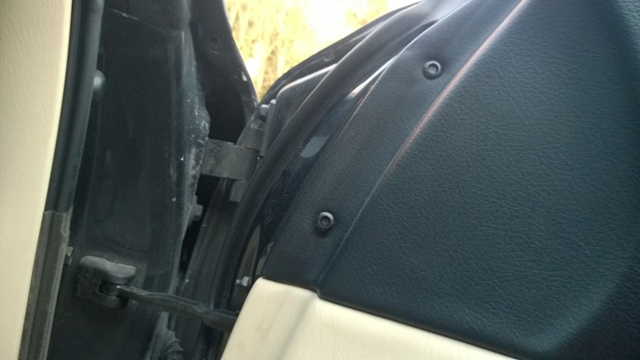
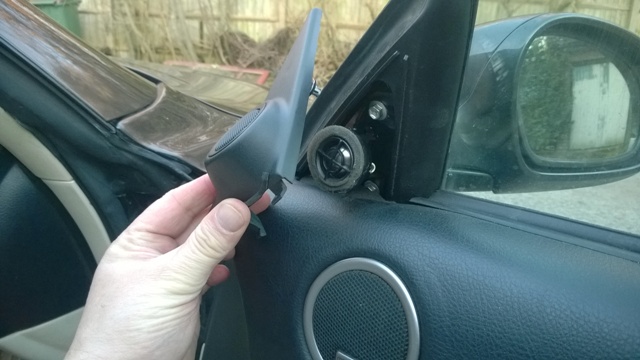
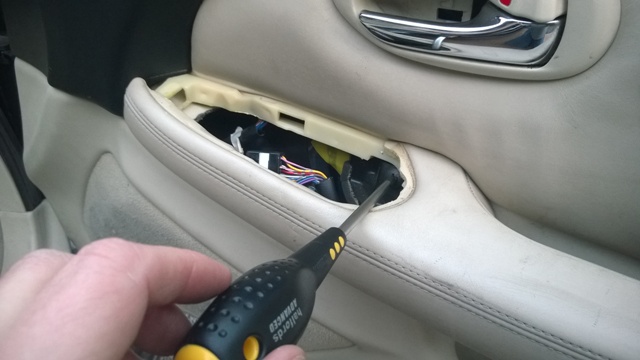
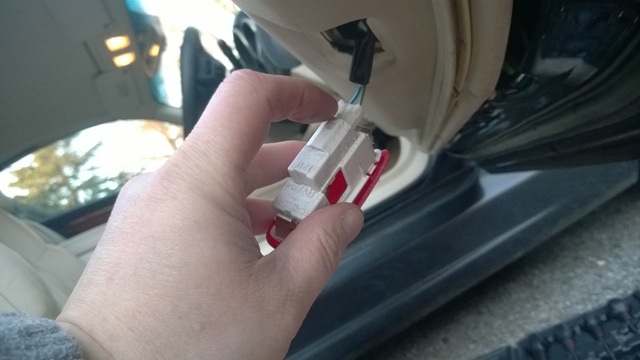
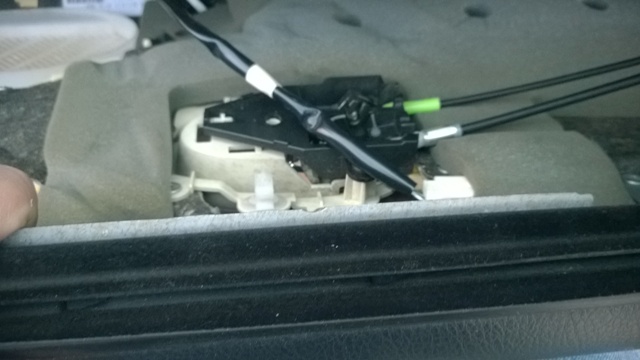
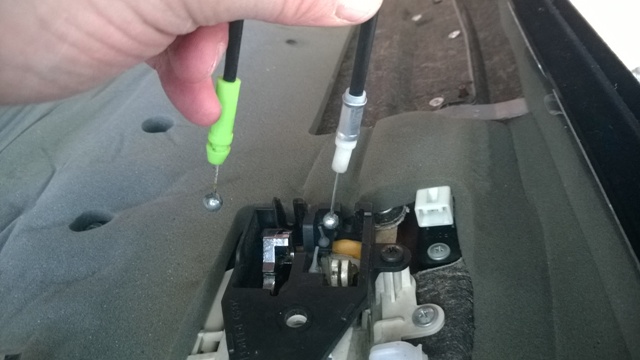
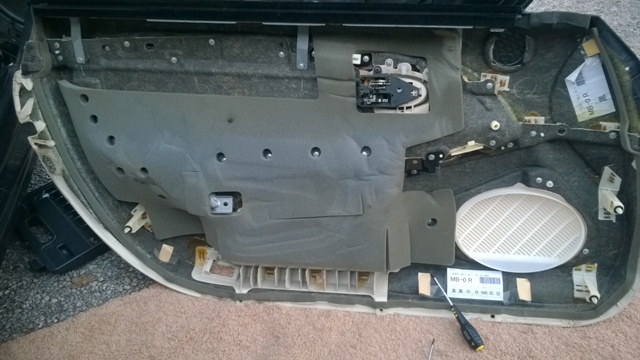
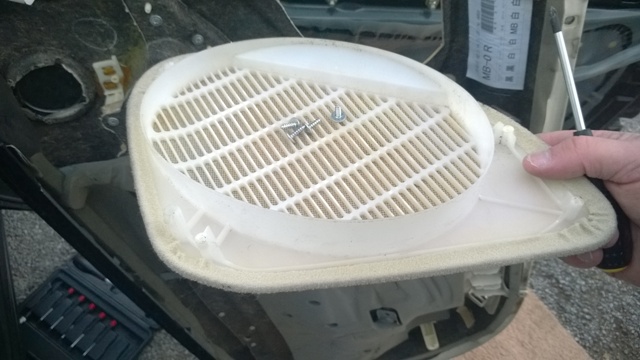
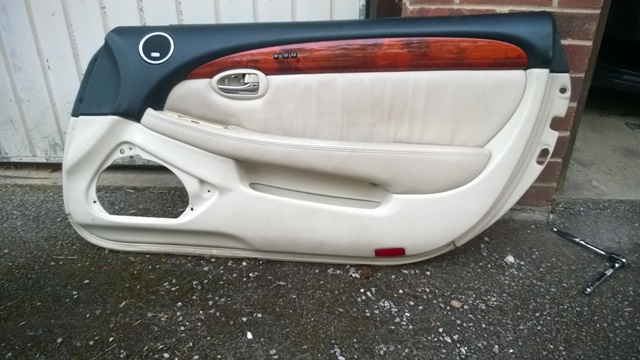
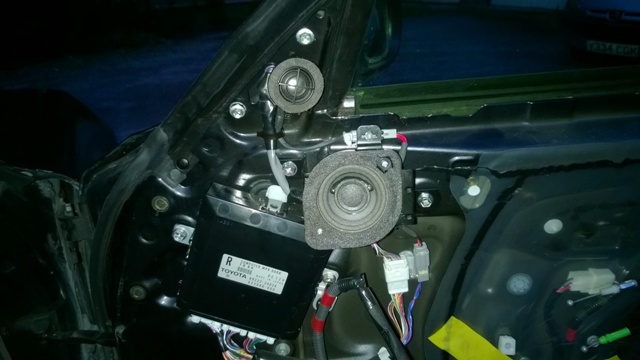
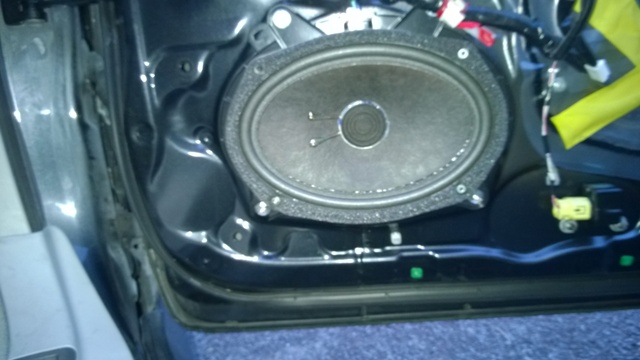
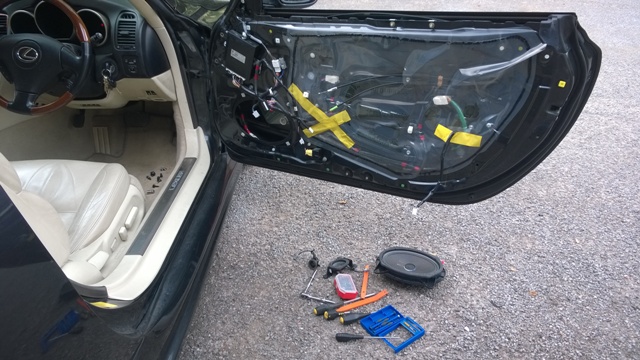
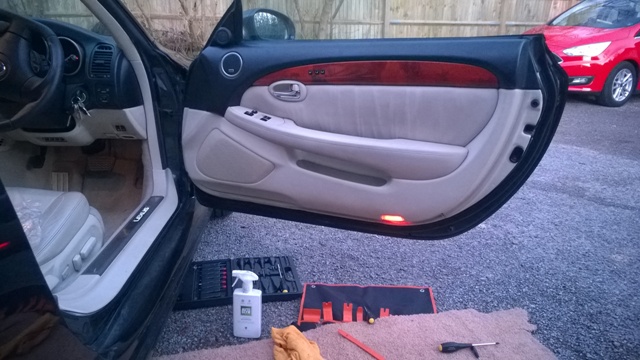
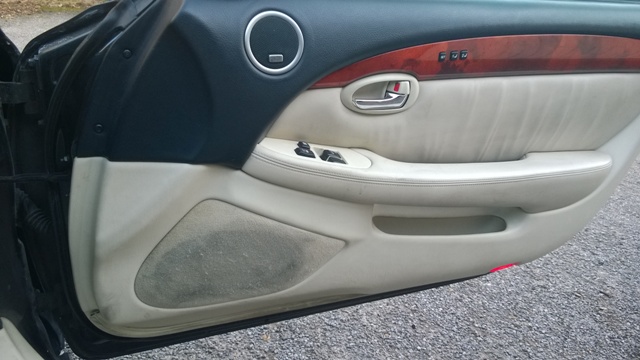
Ready for some ICE? At different stages, I've experimented with improving the sound system. It's a weakness I have for which I probably should have sought professional medical help many years ago but it remains with me. Despite vowing to leave systems alone and claiming to be too old to care about music, it's never very long before each car I've owned is hacked, disassembled and re-wired for sound. The aftermarket Alpine head unit has a USB connection for Apple devices, plays CDs, DVD movies, has a back up camera input, blue-tooth phone prep, etc but most important of all, pre-outs for an additional amplifier or three. The Mark Levinson (Pioneer/Harman Kardon) sound system is really very good for a standard car and unlike some, the speakers in this car all work very well. The thing it lacks most is powerful bass. At normal listening levels the front 3-way components resolve the music signal very well and don't begin to distort until the volume is reasonably loud. Having integrated the Alpine with the car so that the ML amp still powers the fronts and the steering wheel controls work and everything mutes when required, I decided the front components would be left in place however the state of the speaker grills really did let the interior down so before we look at amps and subs, here's how to replace the speaker grills and if necessary swap the speakers. Grubby speaker grill requiring replacement Tools at the ready, using plastic pry tool set to lever off the switches and covers to access the concealed screws. Note the switch panel needs to be released from the back and lifted gently. Then disconnect the wire plug. There are retaining screws along the bottom of the door. A screw hidden behind the armrest. (I'm pretending to multitask with screwdriver and camera And another one here More fixings at the end of the door And some push in/pop out fixings at the hinge end of the door panel. Removing the tweeter cover Disconnecting the door marker light And that should free the door panel. Check that all fixings have been removed and then pull the door panel upwards and off the door enough to access the door lock and opener cables. Disconnect them to free the door panel Remove the 4 screws that retain the speaker grill. Removing the tweeter and mid range And the mid-bass Investigate adding this component set at a later date And then replace the speaker grills as planned and reverse the sequence to put it all back together. And that's the fronts replaced. Next task the rear speaker grills.
-
Good to see a GS450 getting some treatment. When it first appeared I didn't like the new shape but after owning a 430 for a little while it really grew on me. It has a presence, can look posh, can be practical but it's also a bit of a Q car because it's far quicker and more agile than its look and size might suggest. I found it to be quite a driver's car after replacing the rear shocks and fitting a decent set of Yokos. The solution to the slightly smaller boot issue is to go for a GS430 or a GS460 I'm pretty sure that's why I went for the 430.
-
Yes that's the problem. They don't seem to be expert at their specialist subject. Perhaps there are countless successes that we don't hear about but they have worked on and supplied gas struts for many Lexus vehicles and quite often there's a story to go with it. I was thinking of using a linear actuator instead but the boot on the SC is something of an engineering masterpiece so I do need to be careful and perhaps give SGS a try. SC performing its 25 second party piece. Handy if you're stuck in traffic and the weather changes.
-
No not too extreme at all.....hifi install to follow. Good result with the clips to access the adjustment, I never really look either, I just count the clicks. I too need some stronger boot struts but received mixed reports on the well known suppliers.
-
I'm going to make my covers a little smaller probably from fibre-glass and then cover/colour it to match the carpet, I just haven't got around to it. I would love that air suspension. The ride height is spot on and is completely adjustable for humps and bumps.
-
This is how one of the SC owners (Steve) did it with large round covers. It's a really cool car with air suspension. The disc style covers could be trimmed or painted.
-
It may not be like for like as the spring rates could be different. I do vary it a little as it's so easy to change but typically, for normal driving, it's 3 clicks off the firmest setting at the front and 4 clicks off the softest setting at the back but do keep in mind that the Conti's are 285 30 19 on the rear so there's not much air between the rim and the road. It barely leans at all on the firmest rear setting but it's quite uncomfortable on anything but the silkiest of roads. Perhaps I'm showing my age.
-
Now that is smart. Not sure it would look too clever on an SC430 but I do like things that are designed well.
-
Plenty on the great big auction site but you may need to buy a blank and get the key cut.
-
It looks huge and a really good piece of kit for an adventure holiday.
-
I do like the wheels but I think you may have over-cooked the roof spoiler.
-
One task I failed on with the SC was to add paddle shift. I know it can be done and I got to the point where I had most of a solution to achieve it but I backed down because it would have required an air bag change. Disconnecting the controls Removing the grub screws that retain the air bag (disconnect the battery and wait a few minutes of course) Disconnecting the original wooden rim steering wheel. IS250 steering wheel with paddle shift has a 2 stage air bag. The SC has a single stage. I located the wires to push the gears up and down and was working on the clock spring wiring to control it but although I found a single stage bag that fitted the wheel I decided it would be a step too far and would invalidate insurance so backed away. Here's the IS250 steering wheel in place, alas, it wasn't to be. This is how Skipper do it. Still very envious....... And this is the custom wheel I had made up instead. It's a modified original SC430 steering wheel so uses the original air bag. It really improves the driving experience. Many owners wouldn't part with the wooden steering wheel, it's pretty to look at but does nothing to help the feel of the car on the road and the wooden rim is just too thin. It's really improved the drive but I still want paddle shift. It's another example of Lexus falling well short on the SC. The Soarer above was so far ahead of its time in the early 90's yet this last in the line of Soarers was left lagging behind in 2006. No key-less entry, radar cruise, no rear camera, soft closing doors, ultrasonic mirrors, air suspension, no rear legroom, electric seat belt adjustment. It's a great car, it just should have been made to trounce the competition in the same way the Soarer did. Rant over.
-
+ gearbox, diff, suspension, internals....it never ends . Yes the simple answer was to buy a late model Aristo and breathe on it a little. My second Soarer was a quick GTT, probably should have made that even quicker but didn't get around to it. The numbers rarely make sense, we just do it out of .........well in my case madness. I'm happy to admit it. I've made profit from some cars but the SC was always just a project because it needed to be done. Just did a quick check and the SC has cost more than £20k so far and is worth perhaps half of that on a good day. I always wanted to twin turbo a V8 Soarer, a worthy car to do it to but it would have been a very big money pit.
-
I know, I may have mentioned before, there was some debate among fellow SC owners about how it could be done and what would be required altogether. A 470 bhp SC430 has a certain attraction. Others said it could be done for a lot less but my view is that purchasing the whole accident damaged ISF would be the best bet and I suggested it would cost at least another £3k on top of that to complete the swap. That's assuming it really is possible and the owner did the bulk of the work. Essentially, lift all of the running gear and loom from the ISF and 'stick it' into the SC. I think the hardest part would be the merging of the electrics. It would make an interesting build thread. A quick search through Lextreme suggests they did quite well with the 1UZ but not the VVTi 3UZ. There's a lot of promising titles and part threads, part research, etc but I don't think they were able to move any further forward than the last time I looked. SRT build up-rated engines and offer upgrades at very hefty prices but they don't enjoy the best reputation. I really wanted a GS430 Sport or an Aristo to play with but couldn't find the right car at the right time. There's a guy with a C63 AMG at work. We all stop to hear him leave in the evening. It sounds awesome from outside of the car.
-
@Big Rat Thanks already searching through Lextreme. Yes I really need to catch up with the ISF team again and add a few more calories but I fear it will lead to another bout of 5 litre envy.
-
@Big Rat Oh very interesting. Thanks for that, yes I thought I knew all about Lextreme from the early days (V8 Soarers) but it looks as though I may need to catch up on where they are now. I used to be on the Australia Soarer site too, most of the really good stuff came from there and we copied them. Discs from OZ - Disc Brakes Australia http://www.dba.com.au/ As for the build thread, this is the shortened version. If you really can't sleep there are 33 pages elsewhere. @dougie175 thanks Robb. If you can get them supplied and fitted at reasonable cost, equal length scavenging headers are a good way to increase power. In my case it wasn't cheap and I can't stress enough that Dyno results are only really useful when you can compare before and after with the same machine and similar conditions. I'm well aware that often it's all a matter of smoke and mirrors and how the Dyno is set up. It would be interesting to see what a standard car in good order would measure on the same machine at the same time. If it read 279 (or 282 for the earlier model) then that would provide some evidence of accuracy in line with how Lexus recorded the power output. IF it really has increased from 279 to 307 at the flywheel then I would say that's a pretty good result and perhaps a shade more than I expected. The Dyno tester (another Sean) said with better fuelling at the top end it would easily make 10 more. Those 28 bhp probably cost £100 each in parts, labour, shipping, overnight accommodation, etc so it wasn't good value but I did it for the challenge, not for the track times, I said before.... 307 isn't going to keep up with ISF coffee and cake club.
-
I must find a tunnel, attach the number plate properly and remake this clip.
-
A very impressive list and a good idea to take stock of progress to date.


