Leaderboard
Popular Content
Showing content with the highest reputation on 07/30/2023 in all areas
-
3 points
-
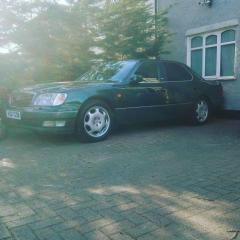
I've seen this video ages ago, and it says one of the best, it's not the best lexus ever made, the best for me is the ls4003 points
-
My IS250 is now 13yrs old and the ivory-coloured leather is looking tired. I’d been mulling over different options and settled on doing the work myself with a restoration/recolouring kit. There are a few companies out there that can supply you with the necessary components. Having watched many tutorial videos and accounts of how the job went I settled on getting my gear from Furniture Clinic based in Durham. https://www.furnitureclinic.co.uk/ This is the kit I got along with some of my own bits I have in the garage. My additional bits were a funnel, selection of paint brushes, foam backed sanding blocks [ I'm lucky I have many from previous], measuring pot say 5-50ml is damned handy [the type from the top of Tomato feed is spot on] and a selection of Pry tools for getting thing apart without damage. Oh and my spray gun got in on the act too I see! It is the medium colourant kit plus I got the repair add on pack so that I could do some filling with their flexible filler. I also sought out a small leather sample piece from inside a headrest for a colour match to be made. The worst scuffing/wear/cracking and discolouration was on the driver’s seat and the centre armrest as you would expect. These three photos show the condition of the areas needing the most work. So, the plan was to fully refurbish both front seats and the armrest. The seat bolster was really pretty grim. This video from Furniture Clinic [FC] is very good and pretty much encapsulates what I did. https://www.youtube.com/watch?v=aFXkraC9B7o I found all the products to be very good apart from the airbrush kit. I have a compressor and spray gun of my own thank heavens! No matter what I tried the airbrush would not play ball. I will return to it and get an adapter for my airlines. They can be very useful tools so I will attempt to get it functioning. But that’s for another day. So, I used my own spray kit and just closed it down to low pressure and low feed and it worked a treat. I should point out everything is water based which makes it all rather pleasant!! FC videos seem to show a lot of work being undertaken in the car but that requires a great deal of masking and you can’t get to every surface properly. So for my needs it was out of the car repairs. This next video is useful for showing how some of the armrest components come apart. https://www.youtube.com/watch?v=WXgTBn8MHZ0 You can get the armrest out without taking out the entire centre. You just need to prise up the trim at the front of the cubby box, where it meets the wood section [on mine] enough to release the tabs and then the top U-shaped trim will pop off. The rear of the cubby box just pulls off. Then you have to move both seats forwards as far as poss to clear the beck end of the cubby box to pull out the metal tabs and its off. Two screws underneath will allow the handle to be removed. I then masked up all the underneath and mounted it on a piece of wood for spraying ... a stand if you will. There is a useful write up here that Agent-Dess put up a while back, credit to him for this This will guide you through seat removal if you want to remove the seats. Remember to disconnect battery and wait 10mins before unplugging the seats. I found them not too heavy but you need to be careful when removing as you don’t want to damage anything with the seat prongs [they stick out a wee bit – so be mindful!]. I wrapped masking tape around mine! The Driver’s seat is the more awkward of the two as you have the steering wheel to contend with. The three electrical plugs under the seat are a bit fiddly but not too bad. I also removed the lower plastic trim once the seat was out and up on my workmate bench. There are three screws hidden underneath. Two at the front and one at the back. Pry off the raise/ lower knob and back tilt knob and remove the three screws that are now seen. Then unplug the electrical connector and its out of the way. Next was masking up all the areas you want to protect from spraying. Seat back is a contrasting colour on mine so that need looking at with care. I masked the headrest collars and the stalk and the re-inserted the headrest into the seat as it’s easier for me to spray it all in situ. I then did everything as outlined in the FC repair video. But I used my own spray gun for applying the colour and the clear two pack top finish. I have to say the colour is spot on. The Leather Binder I found to be very good indeed, that I used on the more heavily scuffed areas. The Heavy filler and Flexifill are surprisingly good, much better than I anticipated. In truth I could have put more in but that’s something you learn from experience, and I had none with this! It seems odd using a hair drier to speed up curing but it really works well and at every stage even after spraying the finishes on!! Just remember when you start scrubbing it's going to look worse...much worse on the bad areas. But then it all starts to improve. This is the side bolster after scrub and 6 coats of filler applied with the spatula Same bolster after dab sponging on some colourant just to see how it's looking after filler. Colour coat [x3 with 10 mins between coats]. Colour coat is glossy/satin finish and when dry is still almost tacky to the touch. If you sponge apply any colorant onto the pierced leather ... do not wipe it on [ you'll clog those holes!] ... just dab it gently. If you mess up and block a hole just tease it out with something like a bradawl tip. I sprayed 3 coats of the finish top coat with 10 mins between and used the hair dryer to speed it up. If go careful you can see it drying in front of your eyes. If you get a sag or run just dab it with a sponge. Pleased to report I did not get 1 ... but then I was a furniture restorer and sprayer for over 20 years. Passenger seat and armrest done ... driver's seat untouched Everything back in the car I am very pleased with the results and very pleasantly surprised at the flexibility of the fillers and finishes. I have been poking and prodding after 24 hrs and it’s all very impressive. My only gripe would be that FC don't supply enough crosslinker for the amount of top finish supplied at 8:1 mix!! Which to me is daft, but they claim the pack is based on 250ml ... but I have 500 ml? ... and we go round in circles on the phone getting absolutely nowhere! That's just poor in my book. How long did it take? Firstly, I’m retired so I have plenty of free time [ I was spraying the last coat at 7pm on Thursday evening!!]. The kit arrived early on Wednesday morning and I finished putting everything back in the car at lunchtime on Friday. Oh and there is enough left over to do the whole exercise again. The plan now is to leave it for 3 or 4 days to fully cure and then I'll give it a going over with the FC Protection Cream. I've given it a waxy paper de-nib and it all feels really good. There you go then ... Job done ... chuffed! I hope that will be of use to anyone considering doing this. Take your time and follow the instructions they are very comprehensive. My only reservation is that airbrush.2 points
-
2 points
-
@Franklin As well as taking note of the useful advice given here by other forum members, it may be helpful to learn that you can manually disable the key fob from transmitting signals by pressing and holding down the LOCK button on the fob and at the same time pressing the UNLOCK button twice. The small light on the fob will flash 4 times to indicate that the key has been disabled. Note that this will disable the keyless entry so you will need to use the key fob to subsequently unlock the car. I do this all the time and it soon becomes second nature. I personally trust this method over the faraday pouch option. Plus it helps to conserve the key fob battery.2 points
-
I wouldn't declare these little things. Especially stickers or painted calipers. They will put everything down as a mod to shaft you. Half the time they don't even inspect the vehicle after a claim anyway2 points
-
This nonsense dreamt up (or so it seems) by insurance companies has often left me wondering as to whether there is any lawful validity to some of the suggested absurdities of motor insurance. I do feel that in a court of law, an insurance company would be hard pushed to justify the non-payment of a claim based on, for example, the colour of a brake caliper, but I stand to be corrected.2 points
-
I had a service on my Lexus a couple of months ago which was pretty uneventful but my mechanic told me I was going to need 4 fresh tyres soon. I decided that I would replace the 17 inch wheels with a set of 18 inch alloys at the same time. I started looking at f sport wheels but they were very expensive so I decided to see if anything else would fit and were cheaper than the f sport wheels. I came across the wheels which are fitted to the Model 3 and after doing some measuring and some basic maths I worked out/hoped they would fit. The internal diameter of the hole in the middle of the wheel were different so I ordered a set of spigots to make sure they fitted correctly. I fitted them yesterday and I think they look the part, they are a trifle wider than the f sport wheels. The offset is good at the front and rear and I’ve not needed to use any spacers to get it looking right. Personally I am rather pleased with them and think they look standardish1 point
-
Many of you will be familiar with this, but some may not. As the 2nd owner of a 2004 in the same colour scheme, I loved this 😀1 point
-
Off to France soon and wondered if anybody’s has ventured abroad and bothered to charge the car whilst on a long trip or just filled it with petrol and use as a standard hybrid.1 point
-
What happens when someone stands outside your back door and relays the signal from your key to a device placed next to your car? Answer - it unlocks. This is the issue people are trying to solve, not just moving the key further away from the car than its normal operating range. A garage with a metal roof and door is far from a faraday cage - but I'd say it is very unlikely your car would be targeted inside the garage, too many easier targets to go after.1 point
-
That would make a lot of sense, wife took our old toilet seats to the local dump around 6 months ago 🤣 It must have fallen loose and eventually fallen through the boot lining haha1 point
-
Yeah because the 430 and 460 are newer and dont show any signs of electrical faults or any faults. But do have air suspension issues, gearbox issues, air con issues, cd player and amp issues, speaker blowing, rust on both front doors, but hey, because he said good things about the 430, they are better than the 400 in your opinion too now?1 point
-
1 point
-
Indeed that is possible, that is basically the key point of having memory seats. So if two people use the same car, they each can have their own key and everything adjusts to their preferred size. I think in total you can link 3 different keys. The way to set it - first obviously set the memory on the seats (say setting 1 for yourself and setting 2 for your wife), then turn the car OFF, close all the doors, press and hold desired memory function (1, 2, 3) AT the same time as pressing and holding "lock" key on desired key fob. In my experience works better if second key is not even close to the car (in theory should not matter). Page 22 for both if you have car manual, not sure what it would be on pdf. So basically, first record preferred memory option on seats and mirrors for yourself and wife (let's say positions 1 and 2), then take only the key you want to link with you to the car and follow the steps for memory setting 1, put the key away, take another key repeat the same steps for memory setting 2. Now one thing that always bugged me sharing the car was the interior mirror... but I am guess I am just picky and one can't have everything all the time.1 point
-
I’ve owned 5 Lexuses - CT, IS, RC, GS,RX. I would be inclined to bow to the experience of a Lexus Master Mechanic, but I’ve never had a whiff of petrol in any of my cars.1 point
-
Like you, I wanted my new car for March/April when the weather is good. At least your wait is nearly over 😀😀1 point
-
My NX 450h in on the ship right now and is expected to arrive att my dealer late september for delivery in october. It was ordered in Sweden in march 22, so almost 19 months of wait. Not very pleased with that to be honest. To receive a new car in october in Sweden is not very nice either. The roads are full of salt, sand, mud and dirt. The car is "always" dirty . I was told april from the beginning.1 point
-
I have only done around 4,000 miles. i will have to contact my local dealer ready for the next time I am passing. Thanks1 point
-
Charles, Sorry, I have only returned to the thread this morning. As mentioned in my other post this morning, my insurer was very good at settling my claim and the amount paid by them was IMHO very reasonable. My problem came when I was made aware that if I did not replace my car within a month of the claim being settled, that my policy would be canceled and I would receive no recompense for the period remaining on the policy. For whatever reason this made me a little suspicious - perhaps this is standard industry practice - but I was very wary of being forced out into the insurance market seeking a new policy having just claimed on a stolen vehicle. Anyway, it prompted me to decide to replace the RX and I was very reluctant to get the same after what had just happened and I was even more reluctant to get the new model with its four cylinder engine and £80k price tag. So I thought I'll be more modest and as a stop gap I decided to go for a 3 series BMW - not the M3 I hasten to add. A lesson learned is that before doing anything I should have called the insurance company to verify there would be no problem. My bad as they say! I got as far as arranging the purchase of a 6 month old car from a main dealer and called the insurer to advise on the new details. The response was that the 'system' would not offer a policy for that vehicle. I have perhaps been too hasty but when they were unable to offer any explanation nor advise on what vehicles would be acceptable to them I concluded that they simply took the view that they had fulfilled their contractual obligations and were now keen to off load a high risk customer asap. My maths may well have been incorrect when adding 2 plus 2 and by going out into the market I have been completely fleeced on the new insurance policy. My decision probably should have been not to bother buying a car until such times as I have a new home with garage! Peter1 point
-
Yes the part was a AC Pressure Switch Sensor. That was the fault on the cars computer. Lexus part is £300 after a quick Google. You can get an aftermarket one on ebay. He had one to hand so used that one. Fantastic result... I have however noticed kwik fit/halfords misplaced the tiny screw top for the ac pipe. I think it was the L one... Does anyone know where I could get one?1 point
-
1 point
-
WT Fudge!! How's on earth is painting caliper classed as a mod??? I didn't realise you would gain 30HP by doing so 😂😂😂 But seriously, you are painting to 1) protect from rust 2) improve visual appearance of car So by definition you can have any colour as long as its silver??? How is that any different from Painting it red, black, blue, orange??? And if you have to replace calipers..it will come in a finished.. you guesses it.. Silver Insurance companies need an overhaul!!1 point
-
Amazing results, good work 👍 Here's to another 13 years 😁1 point
-
This is pretty standard place to have rust issues on any car (the rear wheel arches), basically if stone chips are not addressed in time it will start rusting. The side panel goes into "C-pillar" and it is one big panel. Fixing it is not that big of the issue but in UK I would expect to pay ~£500 for that. The work is same as on any other rust panel, cut the piece out, weld replacement and paint... just blending is quite difficult on such big panel and on your paint (blue metallic). This is not MOT fail, but will get more and more pricey the more you wait. Although, very unlikely to cause any structural issues you mentioned - it would take literally few decades before structural issues would happen from rear arches rust. And IS250 overall quite rust proof car, it only rusts on damaged areas and they must be left for a very long time. The headlights, do not look too bad, so no MOT issue yet (but it will become eventually). The lights can be simply polished - I do it quite often actually. Total cost ~£50-150, depending if you do yourself and depending how many tools you have and how many you need to buy.1 point
-
It just gets worse! Rusty callipers could therefore be viewed as a failure to ensure your car is properly maintained invalidating your insurance next then?1 point
-
I rang my insurance company and they asked me if i had any mods. I declared my stickers that my kids applied to the rear window and informed them that the sticker collection will grow and i do NOT wish for them to be insured, just noted on the policy to remain legal. Same with my exhaust. Instead of insuring my exhaust i have it listed as "Exhaust system changes" rather than custom built exhaust worth £500+ which kept my premiums down. As another note, front lip, rear valance and sideskirts are 3 separate mods but if you declare them as a "bodykit" it counts as one and leaves you room to add arch flairs or canads etc... Admiral seem pretty cool with what i've declared and i even sent them pictures of my mods to clarify what i've put was acceptable.1 point
-
That actually makes your case stronger i.e. you could not see it, because it was full of water. The council has 1 single defence - that is "there were signs on the roads advising of potholes". This is how it should be marked: If sign was there then anything goes and councils are known to abuse these signs e.g. instead of fixing the roads they just put the signs to shield themselves from liability. Whereas intention of the sign is just to be placed there "temporary" until repairs are done and this should be reasonable amount like couple of weeks, but some of these signs are known to be placed for many years. Now the cases are known to succeed, where owners managed to prove council used the signs like that for years without actually fixing any pot holes or having any contracts in place, but that is very vey complicated, often requires FOI request etc. BUT... If such sign is not present, they have to pay. Now sure - process is not straight forward, you need to stop and measure the pothole (ideally right away), approximately over 20mm depth and over 100mm in circumference is what counts (although that is just general guidance, particularly sharp edges, or very deep but small hole can as well cause damage), you have to report it to council, then you have to get your car inspected by authorised shop, get estimate etc... In other countries insurance helps with all that, in fact I used to do that regularly abroad - car gets damaged by pot hole, I get claim on insurance as non-fault and if all the details provided insurance will recover damages (so it does not affect the cover at all), but in UK I would be inclined NOT to report it to insurance (at all), because in UK they will class it as accident, hike your premium, but will NOT help you at all (apart of maybe being a witness and providing inspection), but they will not pursue the costs for you like in other countries. So you may have to hire the claims management company (they take 20-25% of the claim) or get your own lawyer, or do it yourself, but that is rather painful ~6 months process. Last thing - if after reporting everything and getting estimate for repairs they still not paying up, then small claims court route should be used. In my experience they pay right away before it gets to the hearing. So they do pay-up in almost all cases, but it is not easy to get to that point and not many people actually claim. The best claims are usually when pot hole caused break-down, so basically punctured tyre or bent wheel... as that is obvious, easy, if you have roadside assistance they get called, you can use them as witness and that makes for strong case. Suspension components are harder, but if you documented it well it is as well possible to claim. And who doesn't like free shocks on councils account?! https://www.gov.uk/claim-for-damage-to-your-vehicle1 point
-
Btw i looked into this a bit more and turns out not all insurance companies care about paint on calipers. Perhaps dont declare it when getting a quote and then call the company whose quote you like and ask them if its declarable and how much it would affect your quote before purchasing. Unfortunately the companies dont do much to clarify what is declareable and what is not at time of purchase. Also yes. Clear lacquer should help protect the bare metal. I always thought that the calipers on premium cars are not just bare metal and that its silver paint or some sort of coating that comes from the factory. I could be wrong though. But if it is bare metal high temp lacquer should help protect it. Something like this https://www.amazon.co.uk/Tech-Xtremely-Temperature-LACQUER-Exhaust/dp/B00ZXZP480/ref=asc_df_B00ZXZP480/?tag=googshopuk-21&linkCode=df0&hvadid=310513207083&hvpos=&hvnetw=g&hvrand=5557811078190784502&hvpone=&hvptwo=&hvqmt=&hvdev=m&hvdvcmdl=&hvlocint=&hvlocphy=9046083&hvtargid=pla-435342569741&psc=11 point
-
I’ve replaced all the bulbs with new ones that ‘should’ be in there. If the wrong bulb/s are in the car to start with, and it is entirely possible as illustrated with my car, when you take them to the motor factors for a replacement you will get the same bulbs which are not correct. The point of my last post was to clarify what the configuration of the lights are, wiring/type of bulb fittings etc, and what type of bulbs ‘should’ be in the car so people can purchase the correct bulbs regardless of what bulbs are in the car. It wasn’t an attempt to create a fancy/complicated/smarty pants way of bulb failure fault finding.1 point
-
To add some clarity regarding which bulbs are required (single/dual) for the rear outer lights, and hopefully help other people, I’ve spent some time on my car with new bulbs and what I’ve found is below. Outer Cluster wiring: Top lights - 3 wires - wired/configured for dual filament bulb with dual filament fittings Middle indicator lights - 2 wires - wired/configured for single filament bulb with single filament fittings Bottom lights - 3 wires - wired/configured for dual filament bulb with dual filament fittings. A light/bulb failure is detected by voltage differences in the Light Failure Module and not by a 3rd wire to the light bulb fitting, anyway there would be a 3rd wire to the indicators as well, which there isn’t. The top and bottom lights need a dual filament 21/5w bulb and the middle indicator lights need a single filament 21w bulb. Top lights use the 5w filament part of the bulb for the tail lights - 21w filament part is not used Bottom lights use the 21w filament part of the bulb for the stop lights - 5w filament part is not used. A single filament bulb does not fit into a dual filament holder. It can be forced in as it was on my car for one of the brake lights, causing one of the issues I had, but should not be used even though only one filament of the dual filament bulb is actually used. The light clusters are wired etc for dual filament stop/tail in the top and bottom lights but not enabled on the car. They are separated, as described above, top for tail lights and bottom for stop lights. You still need to fit dual filament bulbs top and bottom even though not all the filaments are used.1 point
-
Just came up on my feed. I like reviews from Thomas, I think it looks great. Not bothered about rear legroom, so that isn’t an issue for me, but can’t make any decision until I see it in the metal.1 point
-
Thanks everyone for the help and advice. I took it to a specialist Air con garage that was recommended to me and I am so glad that I did. The fault was showing on the cars computer as a faulty sensor. This from Lexus would of cost £100 to diagnose, £300+ for the part and god knows what to fit and then regas. The car was diagnosed, part charged and the car fully regassed for £110!!! Outstanding service, knowledge and value. If anyone ever has any AC issues and lives in Kent borders with London I fully recommed; Mark from AirCon Direct in Northfleet in Kent. Superb1 point
-
Neil. I have become an expert at taking the unit out of the car, but that is about all. I have very little knowledge of car audio. I think I just got lucky. Anthony. Does the unit load and eject discs normally ? I am always happy to pass on the benefit of my knowledge, even 'though it is very limited in relation to car audio.1 point
-
No - that is more likely where it is going to start. Yaris Cross ends at basically £30k (£29,680) and if we apply same logic as CHR and UX, then starting LBX probably will be like £31-32k and fully loaded one will be like £38k, but I assume you can get decent mid-range trim (like F-Sport) with most of the stuff for £34-35k (which is way way too much). Honestly, Toyota/Lexus are way too expensive nowadays... There is absolutely no way how it can be justified that UX tops out at £46k, even £36k would be too much for what it is. Let's just be clear - LBX does not exit to provide "good value Lexus", it exists to provide justification to sell Toyota for more money.1 point


.thumb.jpg.f22745b97884560f08007d4ab75c4aa5.jpg)


