Leaderboard


Popular Content
Showing content with the highest reputation on 06/22/2016 in all areas
-
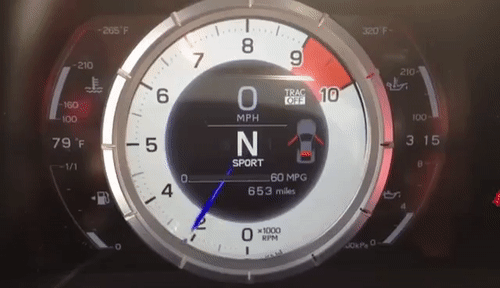
Hi Chaps, So I was asked to compile a DIY for the Apexi throttle controller. Tools you will need: - small flathead screwdriver - medium Philips screwdriver - Bojo trim removal tools (optional, but they will save your soft plastics from scratches). You can use a flathead screwdriver, but I suggest wrapping the tip in some electrical tape. - 3M double sided tape So, first things first, have you got the model specific wiring loom from Apexi? If not, you need it! Should look like this. Here are my set of Bojo tools. These are made from hard plastic, but not too hard to scratch or damage your soft trim. You can grab a set from eBay for £30-40, but if you don't do much DIY stuff, might not be worth the investment. Using the flat headed tool, carefully pry off this side panel. Note you don't need to remove it fully, just need access to the switch panel where we are using a blank switch to house the Apexi button, and feed the switches wire down towards the pedals. See the blank on the far right beside the headlight washer switch, that's coming out. You can push the entire switch panel from the back to make removing the blank switch much easier. If you carefully release the switch panel, you'll see the tabs top and bottom on the blank you need to squeeze to release it. Now pull it towards you to remove it completely. Should leave a hole like this. Now feed the switch wire into the hole, guiding it down by looking at the open side panel we pried open at the beginning. Next, below the knee airbag you will find the panel that contains the OBD2 port. This can be removed by undoing two Philips screws. Now lower the panel to gain access to the pedals. I didn't undo the wiring etc for the OBD2 port, but it is fiddly if you leave it connected. You can now see to feed the wire down from the switch panel to the pedals. Next, you need to look at the throttle pedal, follow up the pedal to the top, you'll see a plug at the top of the pedal. It has a tab to push in on the right side. You'll notice it's identical to the one on the end of your Apexi loom. Connect the loom to the thick black wire from the black box. This can only plug in one way. You'll see that for yourselves. Unplug the one on the top of the throttle pedal. Clip the part that looks identical on to the pedal, now you need to fit the pin connector from the loom to the plug you removed. This bit is a 50/50 shot. Get it the right way round, you're golden. Get it wrong, you could see a lot of dash warning lights, and have the car start with a fast idle, and go into limp home mode! Be warned!! Saying that, if you do get this, unplug the pin connector, turn it around, plug back in, and make sure you can configure the switch per the instructions you get in the box. Provided the switch has no lights on, you can remove the negative battery terminal, give it 5-10mins, now re-connect and try starting the car. It will probably not catch on the first push, that's normal. Push the ignition button again with the brake pedal depressed, and it should fire up without any warning lights etc. Now here's my top tip to avoiding this hassle. There is a coloured blob on one side of the pin connector. This should face away from you when connected (so the side you see under the dash should be plain black). Also, when you first fire up the controller, don't start the engine! Just push the ignition button twice to operate all the electrics only. Using some carefully placed double sided tape, locate the throttle controller button with the word 'APEXI' facing up in the hole we made by removing that blank. Now clip the button harness into the main black box which is the controller itself. Its the multi-coloured wire on the right of the picture above. Look at the pins as it only fits one way around. The thicker black wire below my thumb should lead to the loom we fitted to the throttle pedal switch. You can ignore the white wire, that is for the reverse safeguard hardly anyone has connected up. Now with the button located in the blank on the dash, the ignition on twice but without the engine running(just electrics working), the Apexi switch will be flashing constantly white. You now push the '.' bottom of the switch and hold it till the colour flashes blue. Once it has flashed blue, let go. Switch continues to flash white. Depress the accelerator fully to the floor. Now press the top of the switch '...' And hold it down with the accelerator pedal until the switch flashes red. Once it has flashed red, let go of the switch and pedal. If the switch is no longer flashing white, you are all set. If it continues flashing white, repeat the steps above. Note the installation guide from Apexi does detail this process if you want to double check it. Try it a few times. If it is still flashing white, check your pin connector again. Dis-connect it, and turn the pins round. Push it back together carefully. Try the install process again. If the switch is no longer flashing white, you're ready to go. You need to locate the black control box and excess wiring up inside the dash. There are some mini cable ties in the box to help with this. Once you have it safely tucked away from the pedals, push the panel back into place, and screw the two Philips screws back in. Check no wires are showing near the pedals. If they are, you need to re-feed them up into the dash. Remember you don't want wires getting fouled up on your pedals mid-journey! It could be very dangerous! Now push/clip the side panel back into place. Job done! Now go for a drive and try out the different modes. These are signified by different colours. All the info you need is in the user guide. Hope this helps. If you get stuck, PM or post here and I'll try to help get you sorted out.1 point
-
I feel your pain on this one! I had the same problem on an LS400. I bought a used key, had a new blank cut and went through the programming process. I tried several times, was about to give up but on the last attempt it worked. I don't know why but I can only assume it was my timings. Apparently you can't "un programme" by constantly trying so maybe give it a few more goes?1 point
-
Does part means - part Lexus, part independent? Then it should be fine - just check what is on that "part". If everything was replaced then it should be fine. I won't really be concerned with independent service as long as there are no missed services and no advisories kept for long time. Finally, I guess 3 month warranty tells most of the story - if anythings goes wrong they either fix it or take car back. Good luck!1 point
-
Good on you for owning up.1 point
-
hi you should have changed it long before now,it's 6 years or 60,000mls whichever comes first. I had my 1st cam belt change(including idler,tensioner water pump etc) in 2010 at 55,000 miles and my 2nd change in 2016 with 79,000 miles on the clock(my car is a 2003)1 point
-
Can't remember for sure but think the series IV later models have automatic parking brake shoe adjusters and not the toothed wheel, I couldn't understand why there was no removeable rubber bung on the drum to poke the screwdriver inside to adjust the shoes. Basically calliper off, calliper carrier off,drum off after removing the 2 countersunk retaining screws, clean everything with brake cleaner, check everything that should move does or free off, if the brakes shoes still have minimum lining thickness clean them with some coarse grade sandpaper to remove any glazing. Lubricate all moving parts including where the shoes contact the backplate and pivot points. If the adjuster is manual refit the drum then turn the adjuster until the drum is locked then back off the adjuster until the drum is free to turn again ( very fiddly through the hole, not easy to see or work out which way to flick it with a screwdriver). Obviously make sure the parking brake is fully released and the front wheels are chocked ( there's one in the spare wheel well)1 point
-
No when park is selected the parking pawl is released and this locks up the flywheel not the transmission, it would take an almightly force to shear off the pawl.1 point
-
Yep, there are several plastic pieces on the rad that perish over time so I'm not surprised by what you write. I have bought radiators from eBay in the past on my MR2's and boy they are a pain to change; the RX I imagine will be a lot easier as there is more room to work in the front! Does your mechanics quote include coolant too? It's very important they use the Toyota stuff and not whatever they have to hand. I'd certainly would want as much of that stop leak crap removed as possible with a couple of flushes before fitting the new rad and even then I'd want shot of the car when fixed - those products are very bad on modern cars [emoji17] Sent from my iPhone using Tapatalk1 point
-
Solved. I'm very ashamed to be typing this, but the battery charger / booster was hooked up the wrong way and I never checked. My neighbour has a professional charger / booster and hooked it up the wrong way. There is a thick red wire going from the VVTi actuator to the negative side of the battery so this was confusing. Even with the battery charger disconnected, the fuses would still blow. Turned out the battery had taken a reverse charge. Fitted a new battery and replaced all blown fuses (7 in engine bay incl the 120amp alternator fuse and 6 under dash) It is working all fine now1 point
-
So, great day at Tuner Fest South today at Brands Hatch. Even more so after I was announced 'Car of the show' in the Kleers show 'n' shine!! Here's some photos I took. And I saved arguably the best photo till last!1 point
-
I traded my IS300H Fsport in for a GS300H. I got over book for the IS and paid below book for the GS. I buy a car because I like it and it suits my needs. Even if Peugeots do depreciate less which I doubt, I would not touch one with a barge pole because I cannot stand them. Life is to short to drive around in a Peugeot!! The Lexus NX is one of the slowest depreciating cars and no Lexus is in the below average section. Prices vary between dealers to as I found out when trading in my IS for a GS. I walked away a few times before I was happy. Ed1 point
-
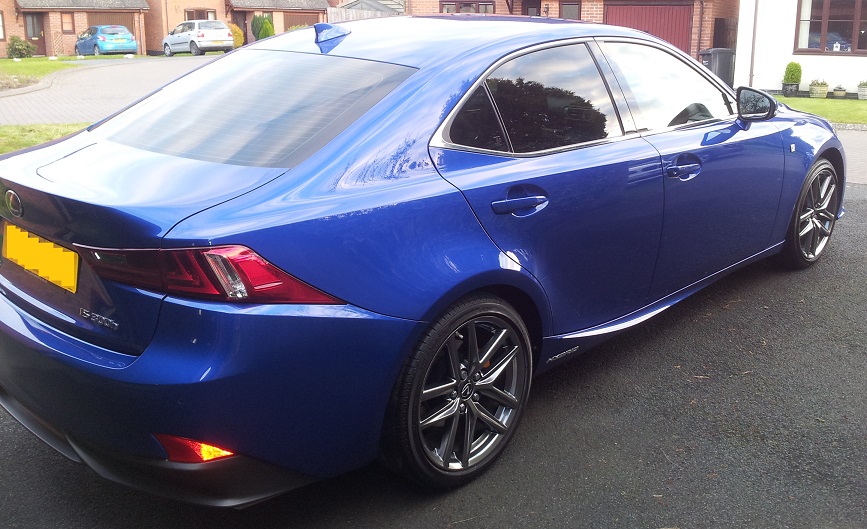
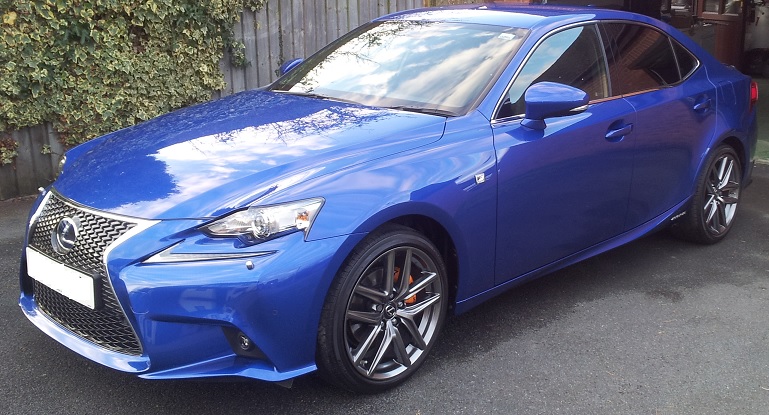
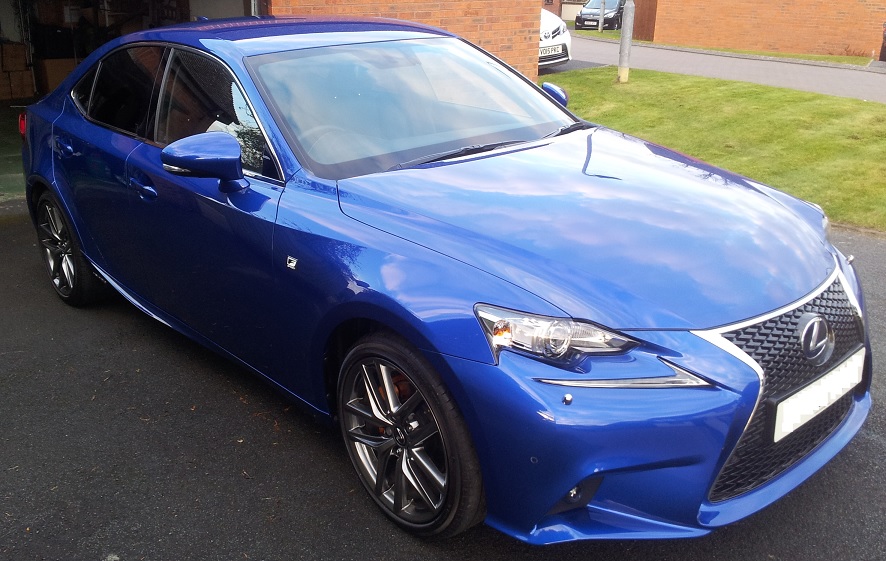
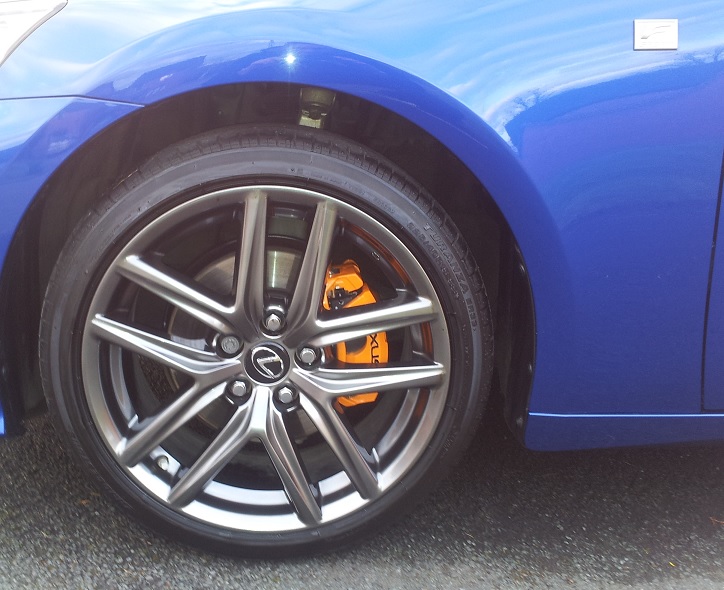
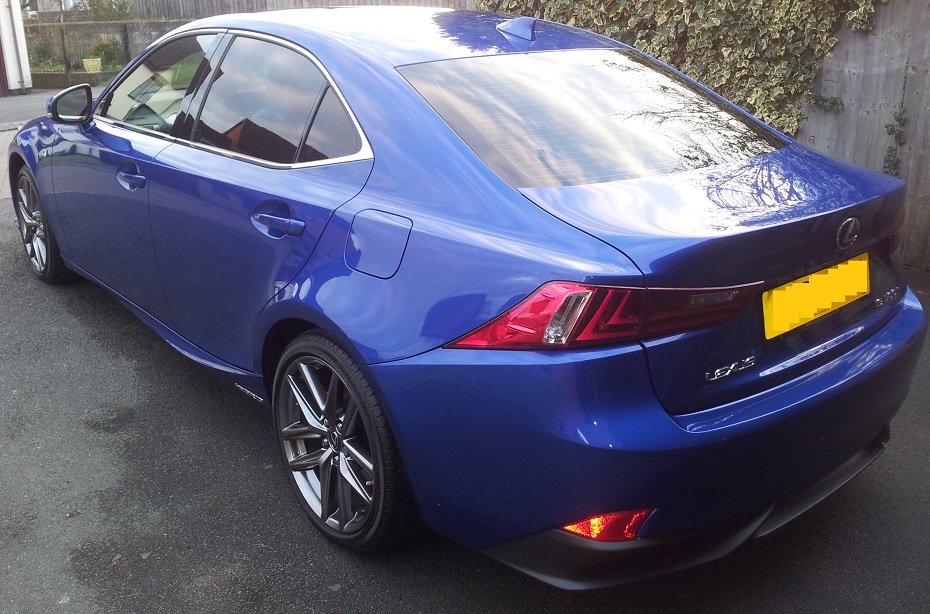
Hi All, So I finally took some photo's, I followed rayaans detailing guide not using all the exact same products but near enough the same process. Taken me all day, the missus won't stop moaning at me for how long it took but I got pics of it looking it's best so here they are.
 1 point
 -
Good afternoon all! Just placed an order for a IS 300h Premier I spent some time debating if I should go for the BMW 330e but I don't have an option to charge a car at work or at home for that matter! Once the battery runs out in the BMW 330e, you are in effect driving a 2.0l petrol car with no further assistance from the electric motor. The Lexus hybrid made more sense for now. I think I have made the right decision Hope I am right?1 point
-
Yes, yes I am, I'm stating to think I may have taken my choosing of a car bit too seriously. I just like to really research things before I make a decision.1 point
-
Hi guys sorry to bump this thread - Toony, did you find out where to wire the chip, also which chip did you end up using? I notice youre local too - maybe when mine arrives off the boat we could have a mini meet! cheers Phil1 point