Leaderboard


Popular Content
Showing content with the highest reputation on 02/23/2016 in all areas
-
Oh, Dave, Dave, Dave - why buy the Mona Lisa and then pencil in a moustache?3 points
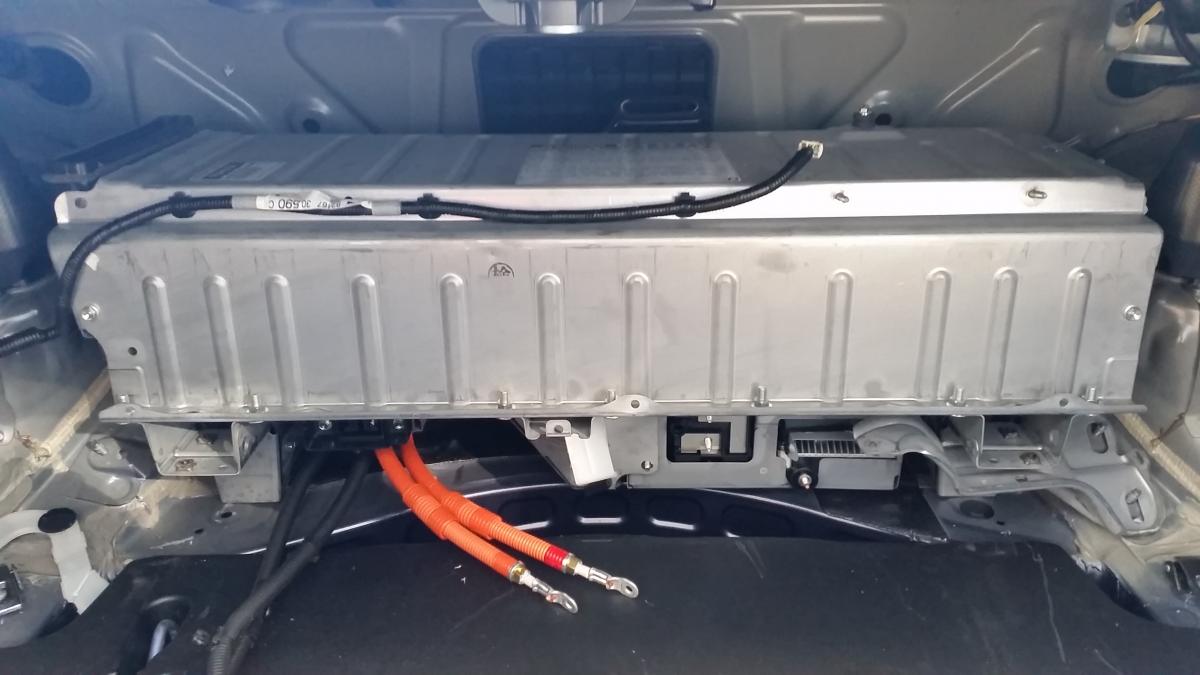
-
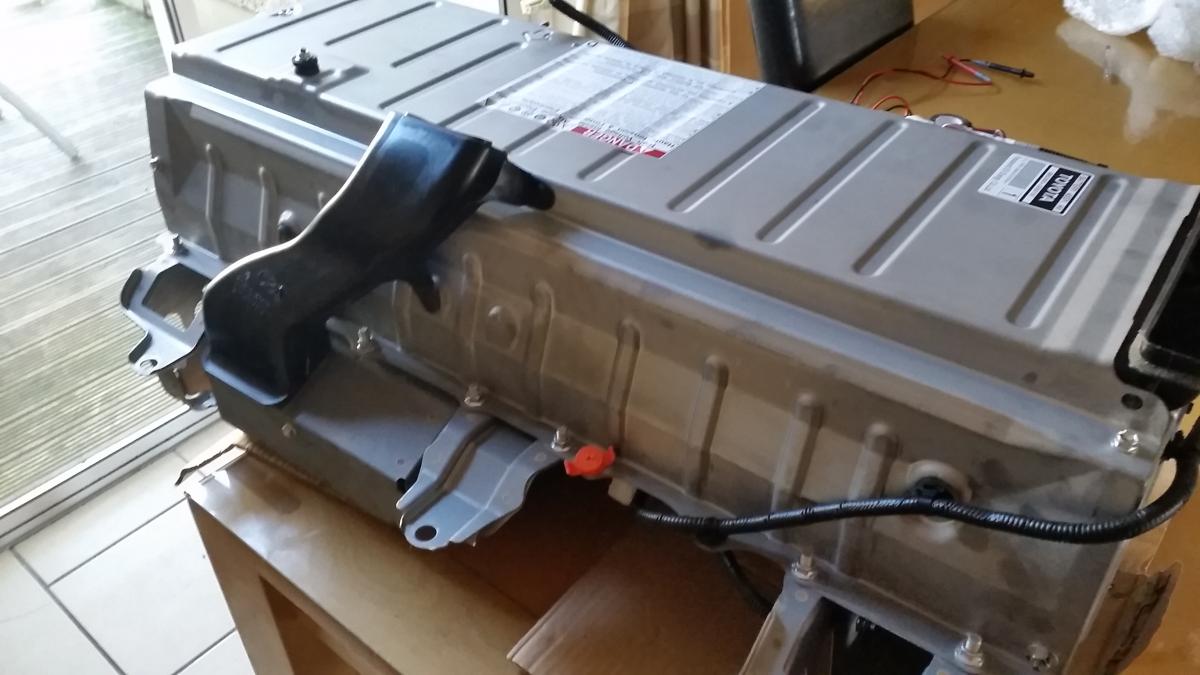
I got the dreaded Check Hybrid, Check VSC and Check EBC warning lights. Fault code readings P0A80 Hybrid and P3017 (battery cell block number 7 fault). Having gotten a quote for around €6000 to fix it, I decided to do it myself. I ordered a battery cell on ebay for €45.00 delivered to Ireland. Tools needed: Socket set with 8mm, 10mm and 12mm. Flat head screwdriver, long nose pliers and a multi meter to read voltage. (You may also need a slow trickle 12v battery charger, I'll explain later). Time needed: about 4 hours, more if your connections a very dirty. 1: Remove ALL carpeted paneling from the boot (trunk if you're in the US). This is done by inserting the flathead screwdriver into the black plastic rivets and popping them out. Remove the boot flooring too, just leave the tool tray in place. You will need the 10mm socket to remove the rear boot floor luggage anchor points once you've popped open their plastic covers. The upper hanging points need to be squeezed to remove. Disconnect the power supply to the light on the right hand panel. 2: Remove the orange circuit breaker on the HV battery by sliding to the right and then pulling towards you. 3: Remove the black air duct on the bottom of the HV battery by popping the 2 black plastic rivets. 4: Unplug the power supply to the white cooling fan on the upper right of the HV battery and remove the 2 nuts holding on the fan. This should allow the 2 upper black ducting to move sufficiently to be able to remove them. 5: Open the panel covering the 2 Orange Cables (3 x 8mm nuts) and disconnect the 2 orange cables, (you can tape them up with electrical tape if you so wish). Pull back the rubber cover on the Black cable and unbolt that too. You should now look something like this: 6: Disconnect the cable running from the HV battery to the 12v lead battery. Continue to remove the 12v battery by disconnecting the +ive and -ive terminals and the white connector plugs attaching it the the HV battery. Also need to take off the temp sensor and the vent hose on the 12v battery. Remove the 12v battery support bracket and the battery tray itself. 7: Remove the last 2 bits of black ducting that was clamped by the 12v battery tray. 8: Remove the white tubing on the right of the HV battery. 9: Remove the 4 12mm nuts holding the base of the HV battery in place, 2 on each side. 10: You need to unbolt the nuts hidden behind the back seat headrests. 11: Pull the rear seats forward enough to remove the large plastic panel in the center between the rear seats and the boot wall, its hidden behind the fireproofing fabric. Use this panel cover to hold the seats away from the boot wall by wedging it between seats and wall. 12: Pull back the fireproofing to reveal 2 smaller access panels covered by a black sticky rubber square. Now remove the 3 12mm nuts holding the HV battery to the boot wall. 13: Now the tricky bit, lift the HV battery over the bolts in the boot and slide it out. (I recommend putting cardboard on the tool tray to avoid scratching when sliding the HV battery). If you are strong enough you can lift the HV battery out on your own, if not get help, it weighs about 50 kilos. Your boot should now look like this with the access panels behind the seats visible: You should also have this, I placed mine on some cardboard on my kitchen table: 14: Take off the HV battery cover by opening all the 10mm nuts, and a few 8mm. unclip the black cable while taking off the three cover panels. 15: Unclip the black plastic covering on both sides of the HV battery to reveal the 8mm connector nuts in the orange casing. 16: Number the cells 1 to 40 using a permanent marker. Use your multi meter to get a reading across each of the 40 individual cells, i.e. one lead on the +ive terminal of the cell and the other on the -ive, and record your findings, as you can see cell 28 was low for me: 17: Pull back the rubber vent tubing running along the top of the HV battery until to get beyond your bad cell/cells. 18: Remove the white end panel holding the cells in place: 19: Remove the 80 x 8mm nuts in the orange casing and clean if necessary. I used bleach and some sand paper to clean all nuts a copper plates, if you're gonna do it - do it right). 20: Remove the 8mm nuts holding each cell in place underneath until you reach your bad cell (this will probably involve removing the support leg and the converter assembly unit below the HV battery: 21: Good cells look like this Bad ones like this: 22: Start replacing your cells back into the HV battery, it doesn't matter what order and you can't mess up polarity as it only screws in on one side. I put my new cell in last in case it was a dud. (If your new cell is of a lower or higher voltage use a slow trickle 12v battery charger to get it to the same voltage as the other cells. 23: WATCH THE TEMP SENSORS UNDER THE BATTERY CELLS (3 of them), MAKE SURE YOU CLIP THEM ON AS YOU GO. See the black plastic clip peeping out here: 24: That's it you're done, just reverse everything to put in back in. Mind your back and don't bother touching cell 1 and 40 at the same time if you have the orange connector put back on. Good Luck!
 1 point
 -
After a flight......ferry......and 7 hours on the road, I'm one very happy owner of a 2008 ISF. Purchased from a fellow enthusiast which worked out well. 2 years warranty added today for peace of mind. I look forward to learning more about the car. The info and advice I got from the members of LOC was invaluable, thank you. Mark
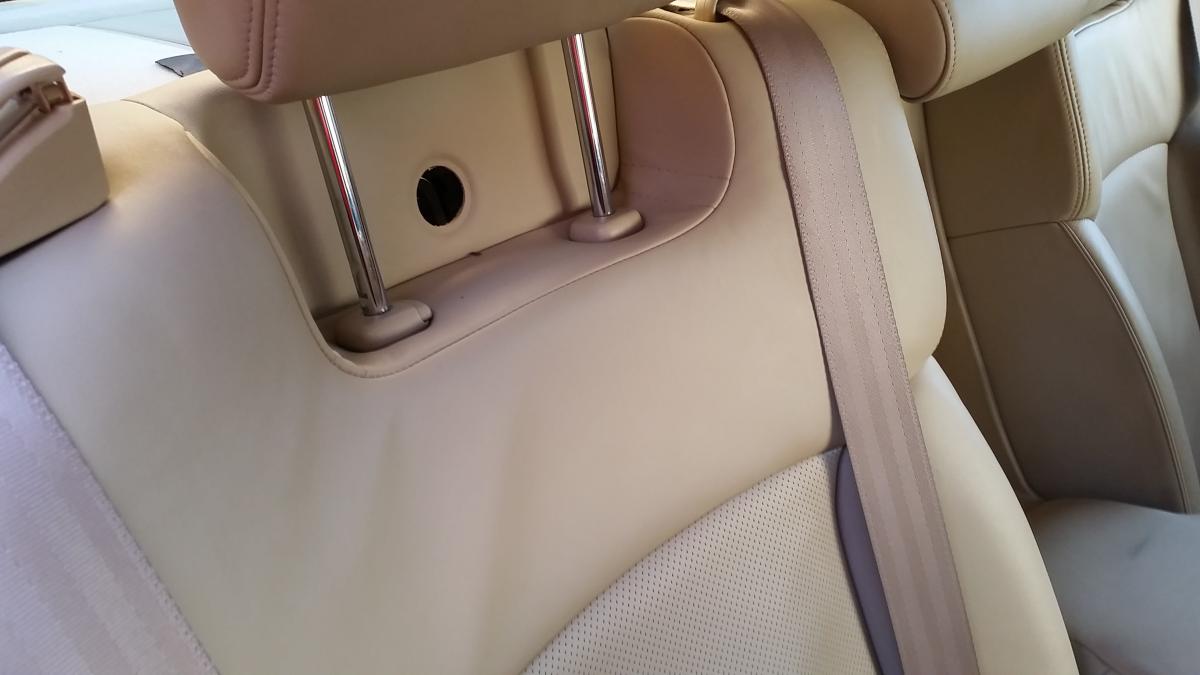
1 point
-
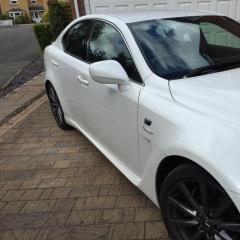
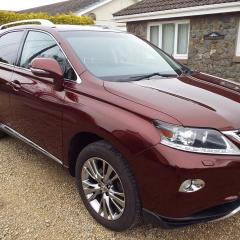
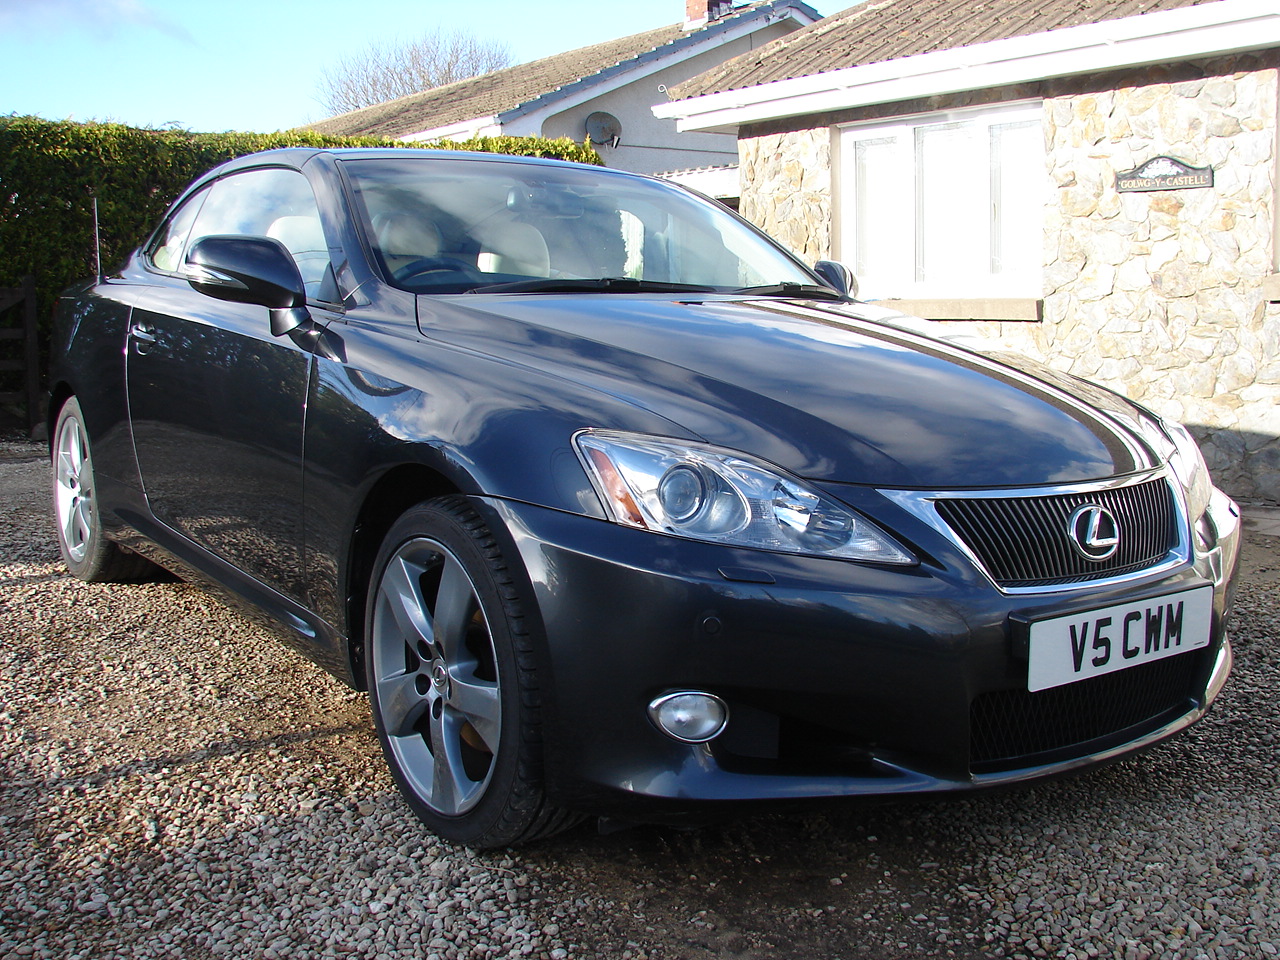
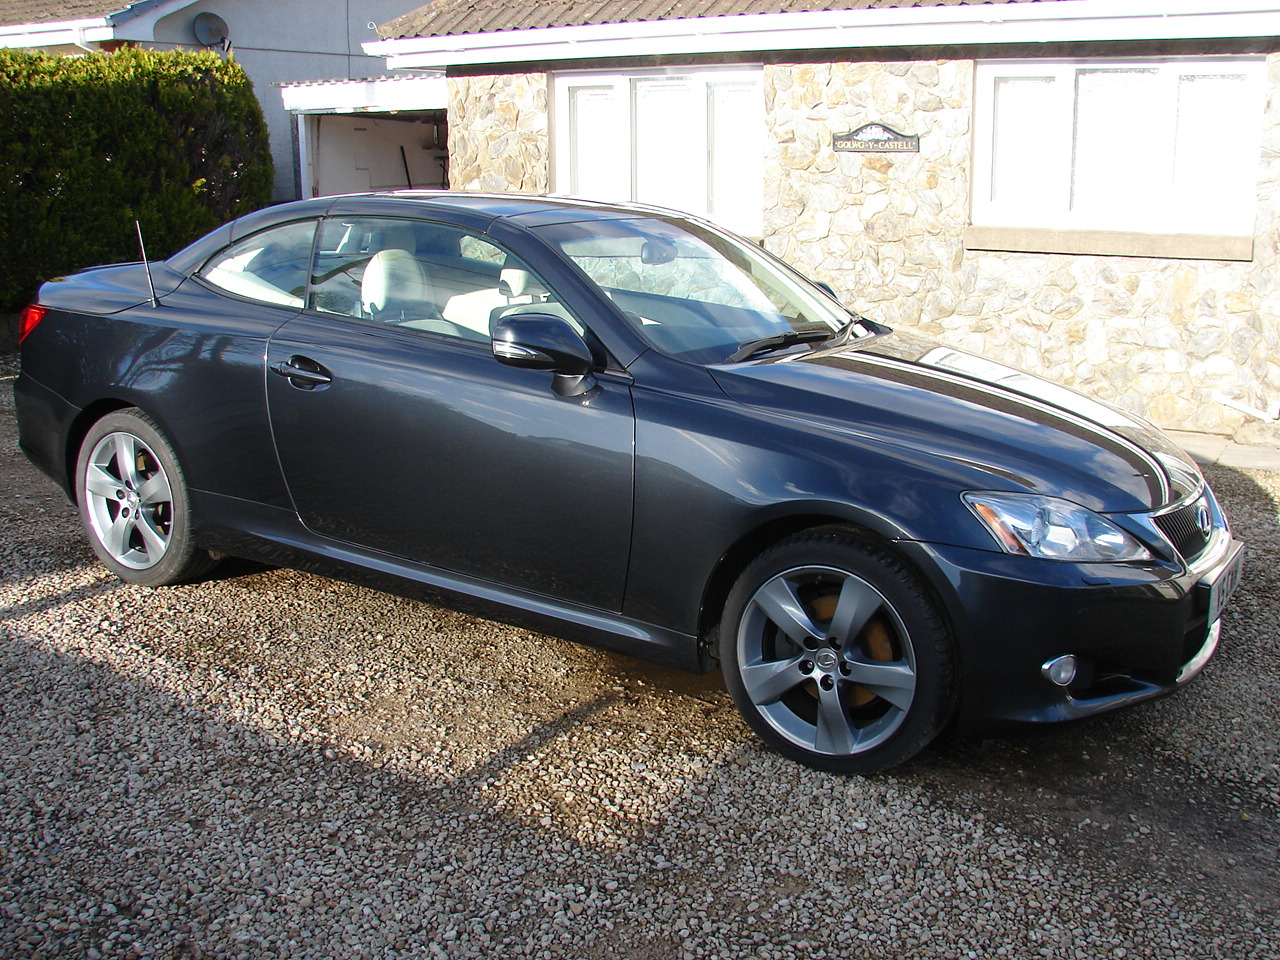
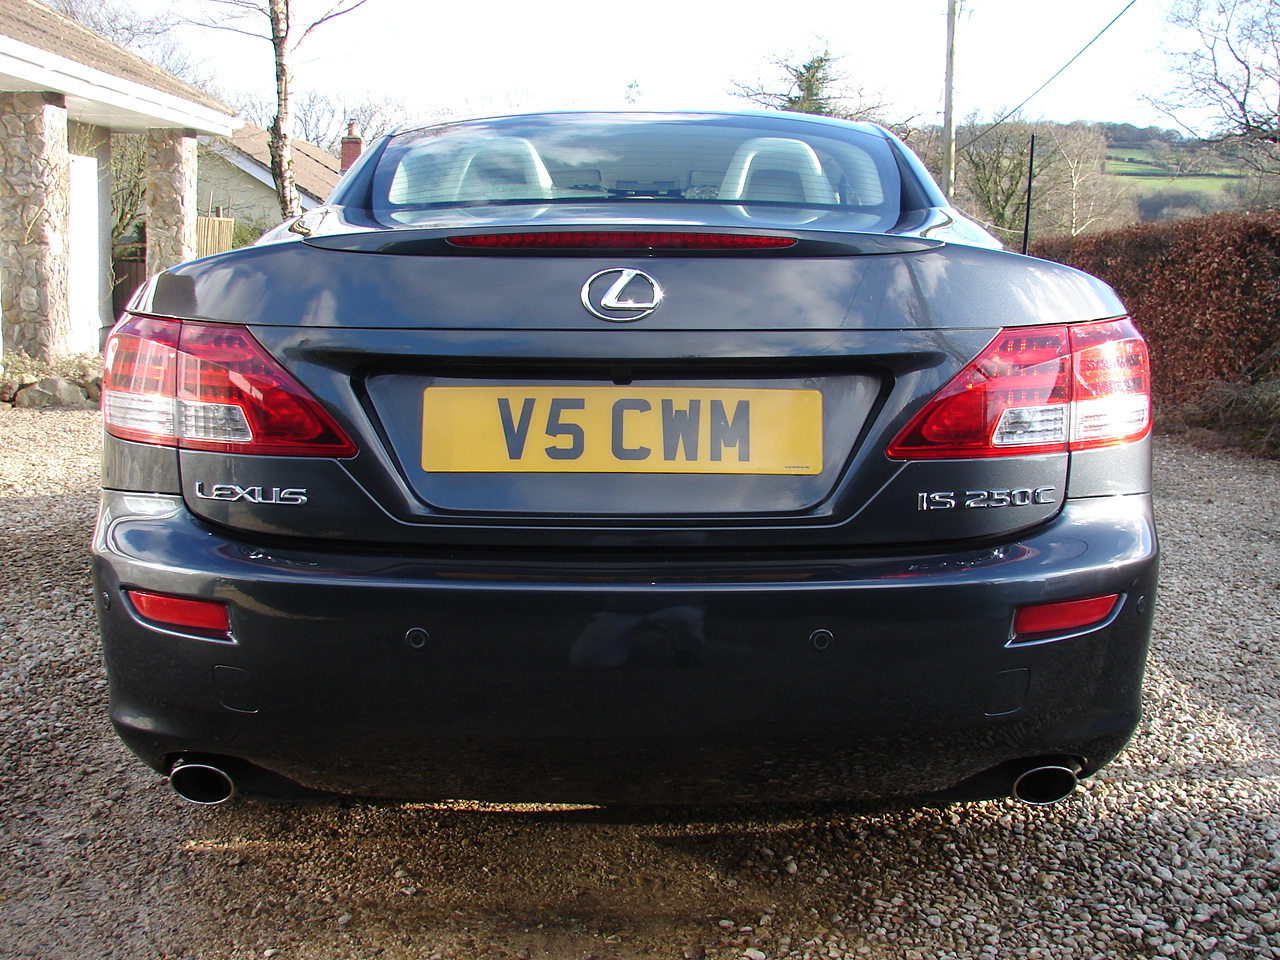
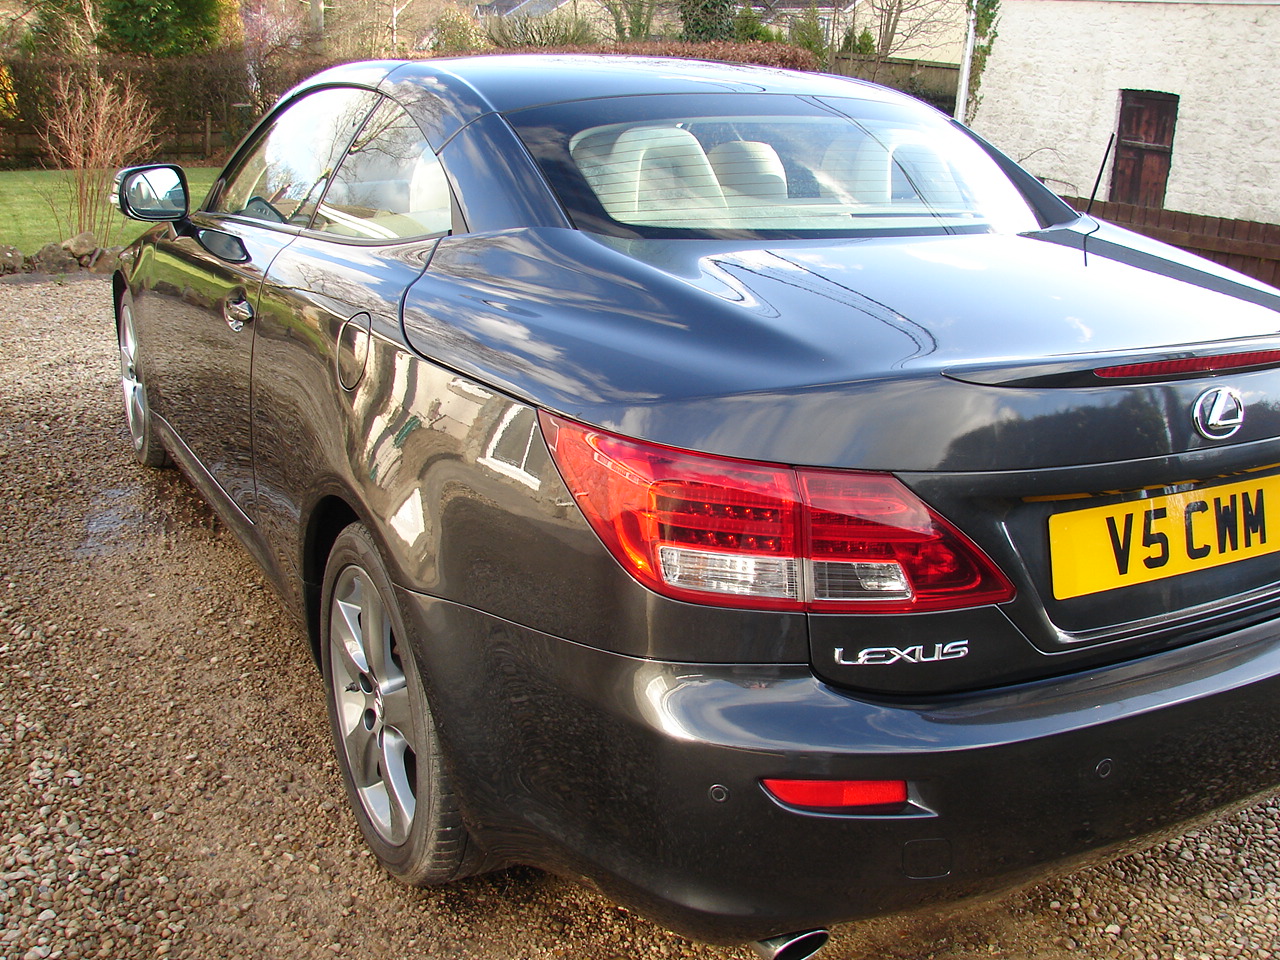
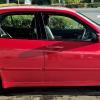
I'm biased but I have to agree the car looks better with the hood down . Image attached (I hope) of the dealer picture when I went to collect mine Dave
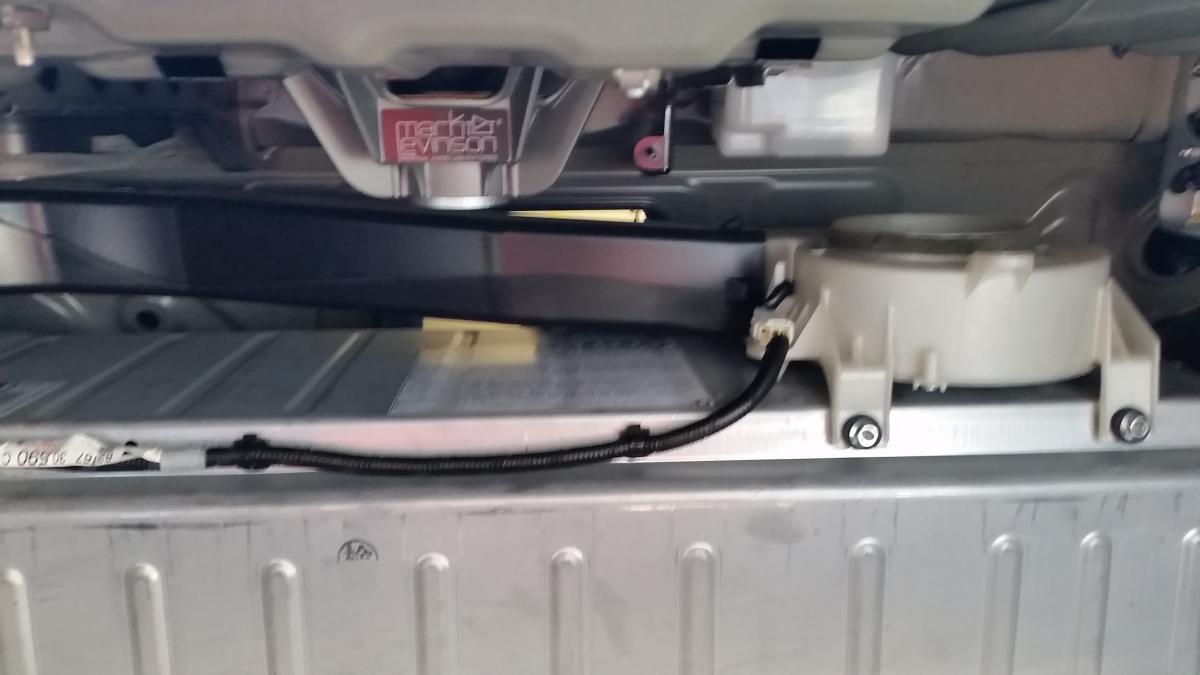
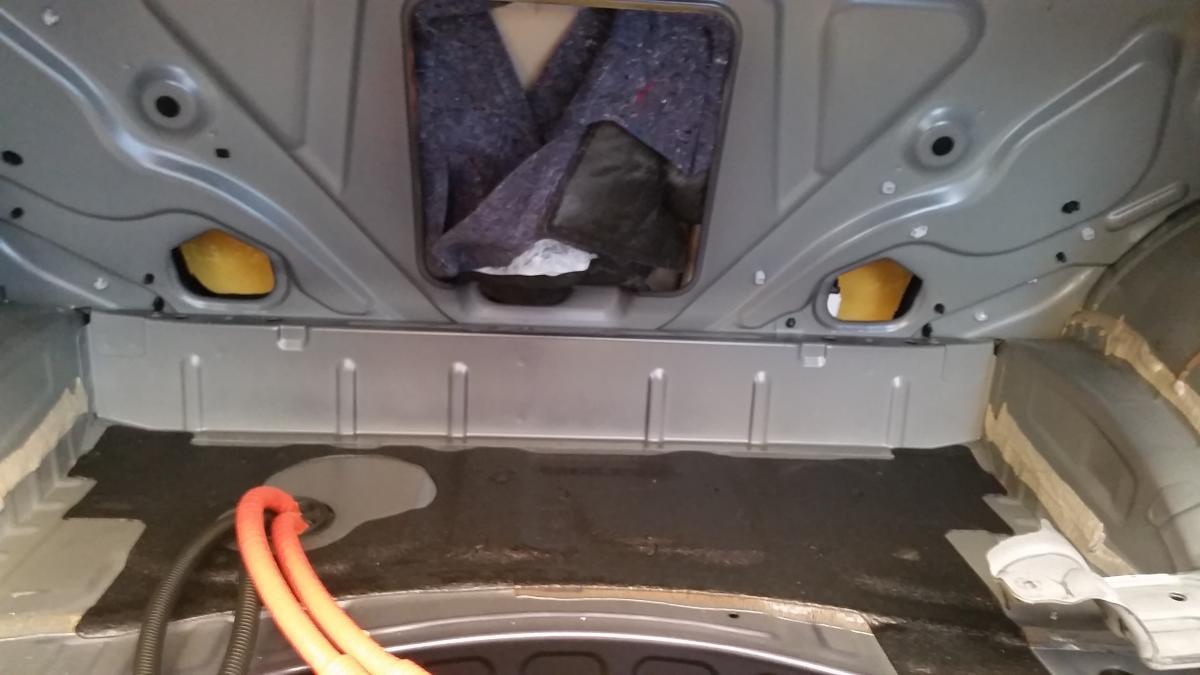
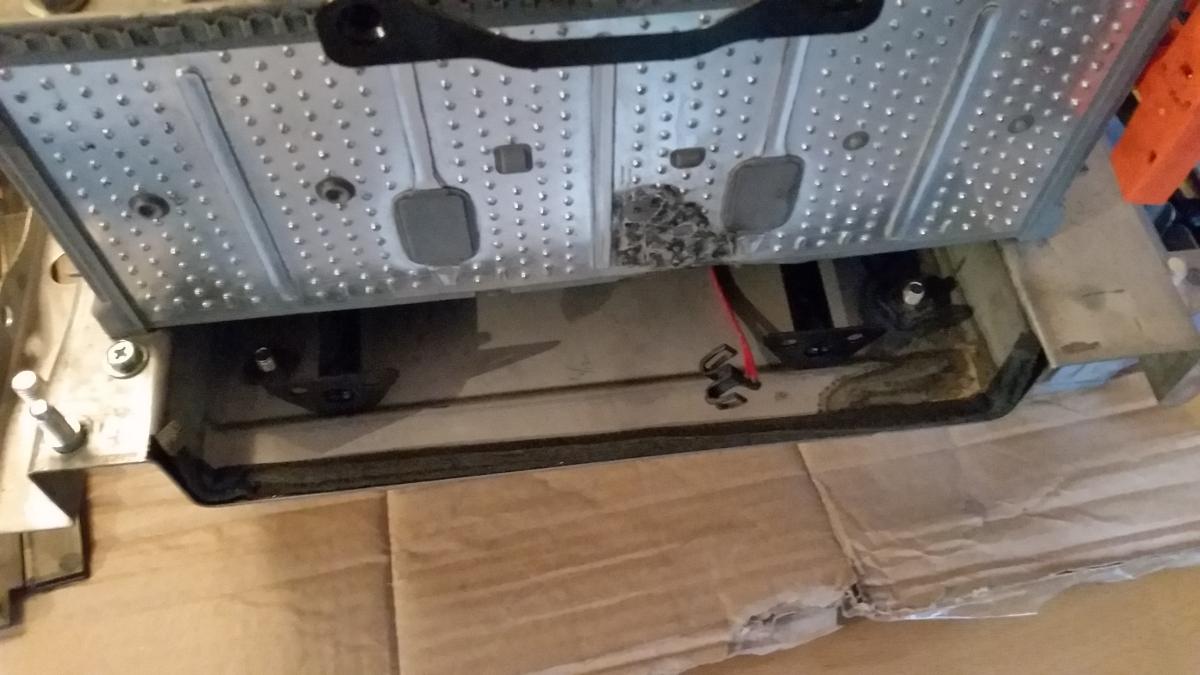
1 point
-
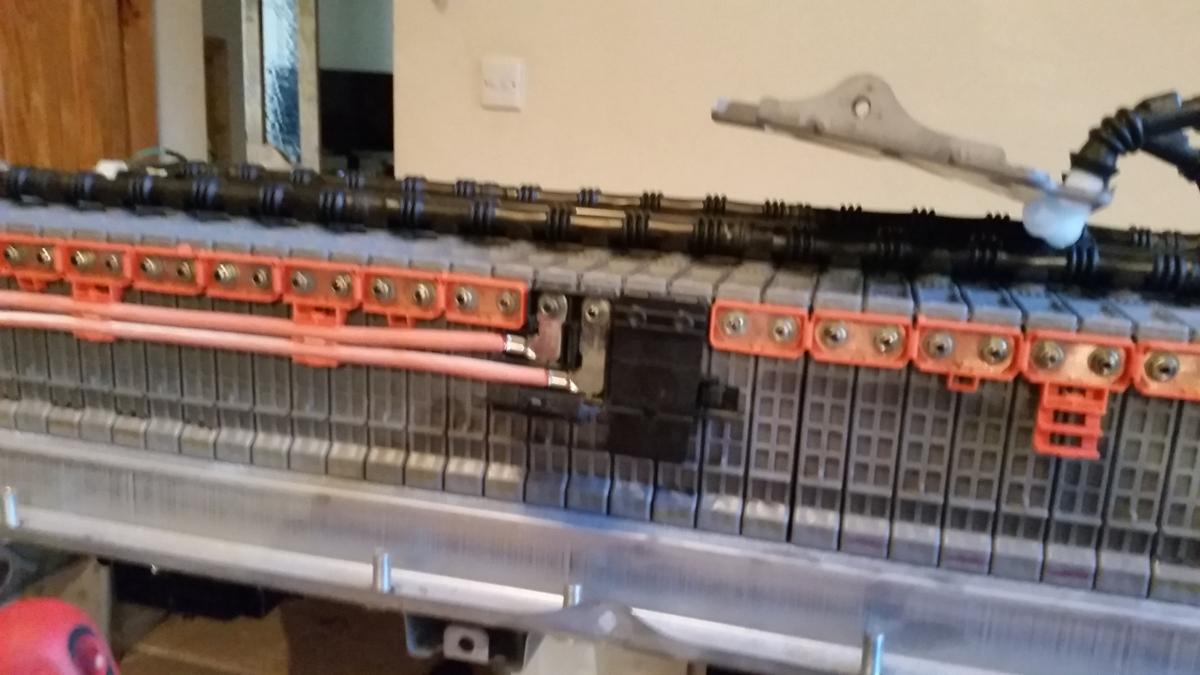
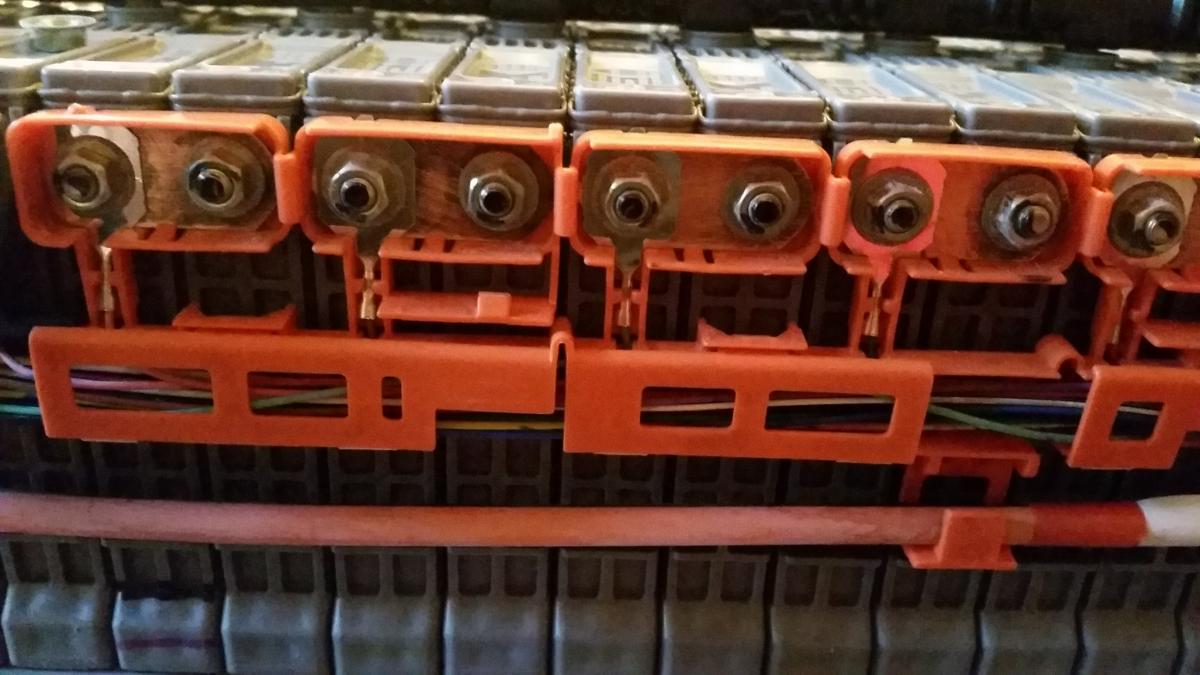
Potentially 151k miles old!1 point
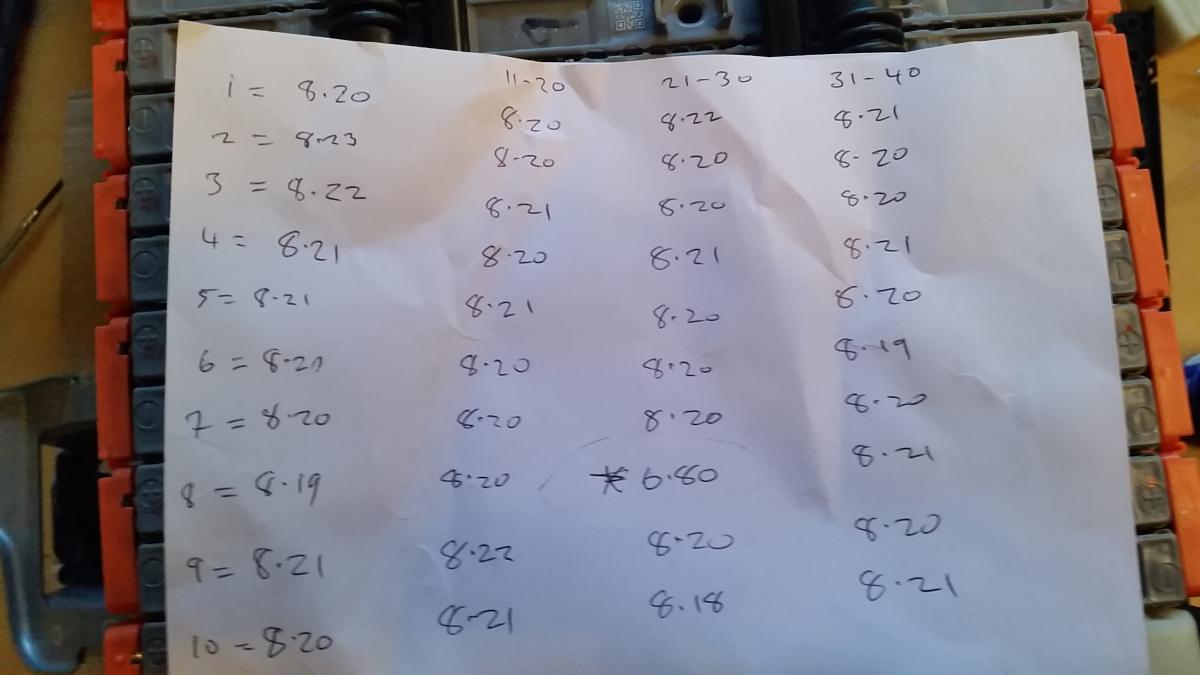
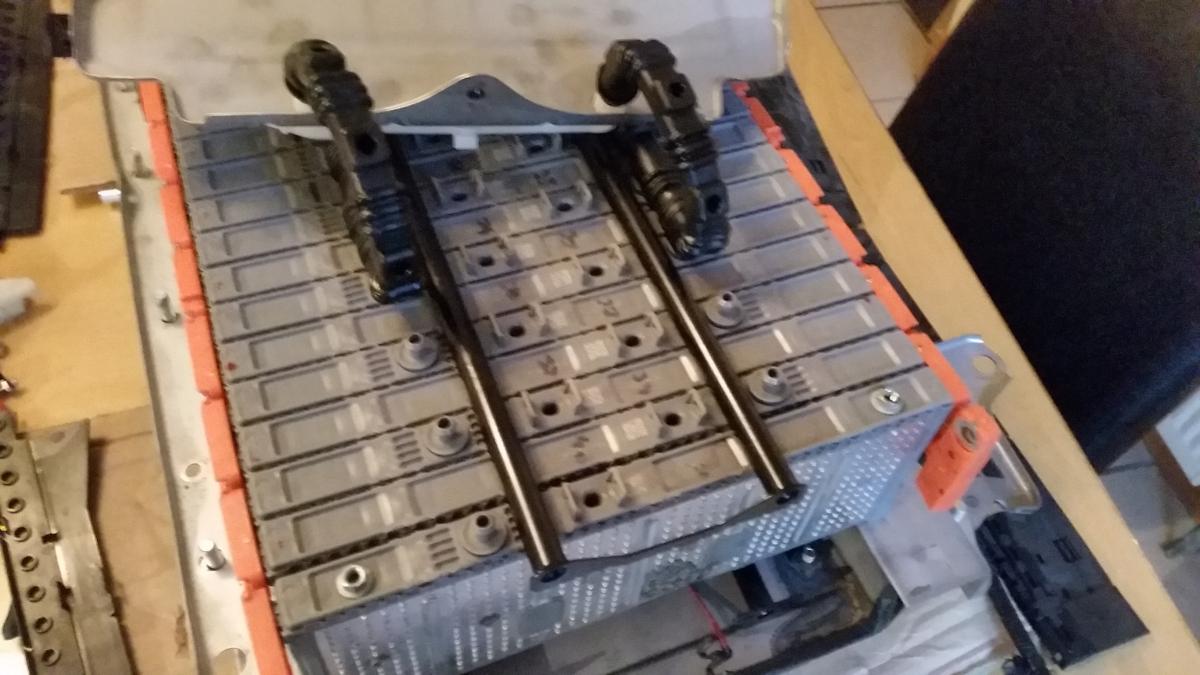
-
Just read back through the post, reads a a bit negative. Delighted to own an isf which I have been pondering for years. They are amazing cars. Have taken on a little project with this isf. Needs a little bit of love and tidying up. Will all be worth it in the end.1 point
-
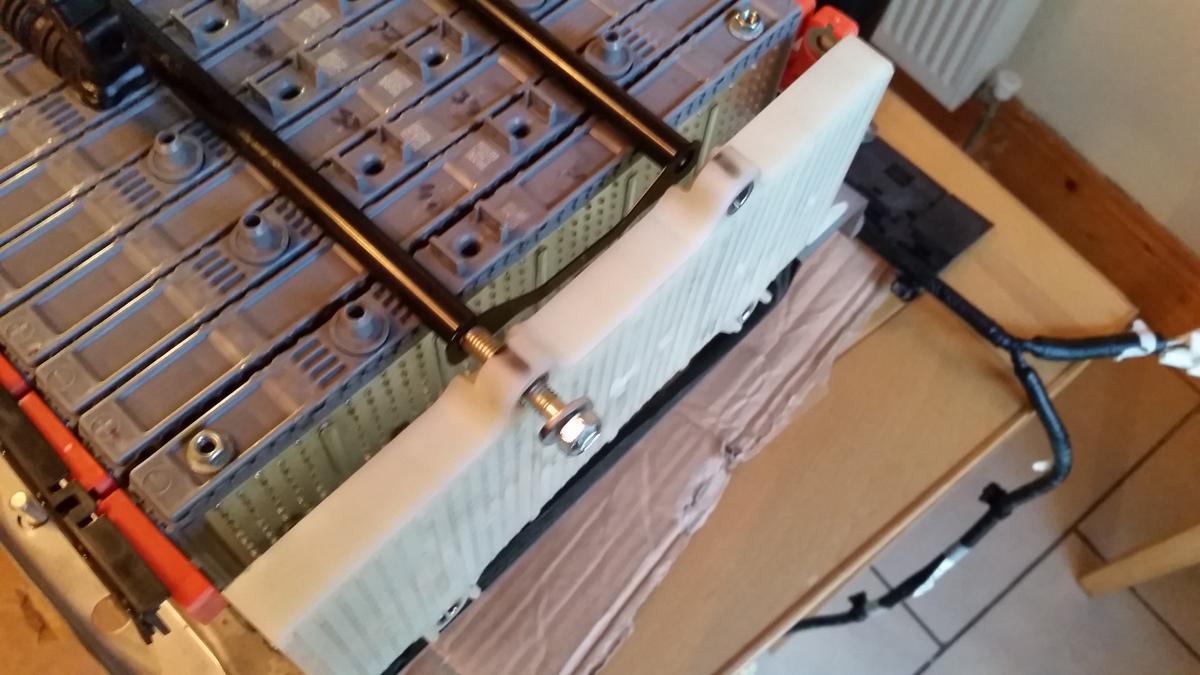
To be fair, all this premium, prestige, etc, etc nonsense is built on sand anyway, as the majority of these motors are on lease.1 point
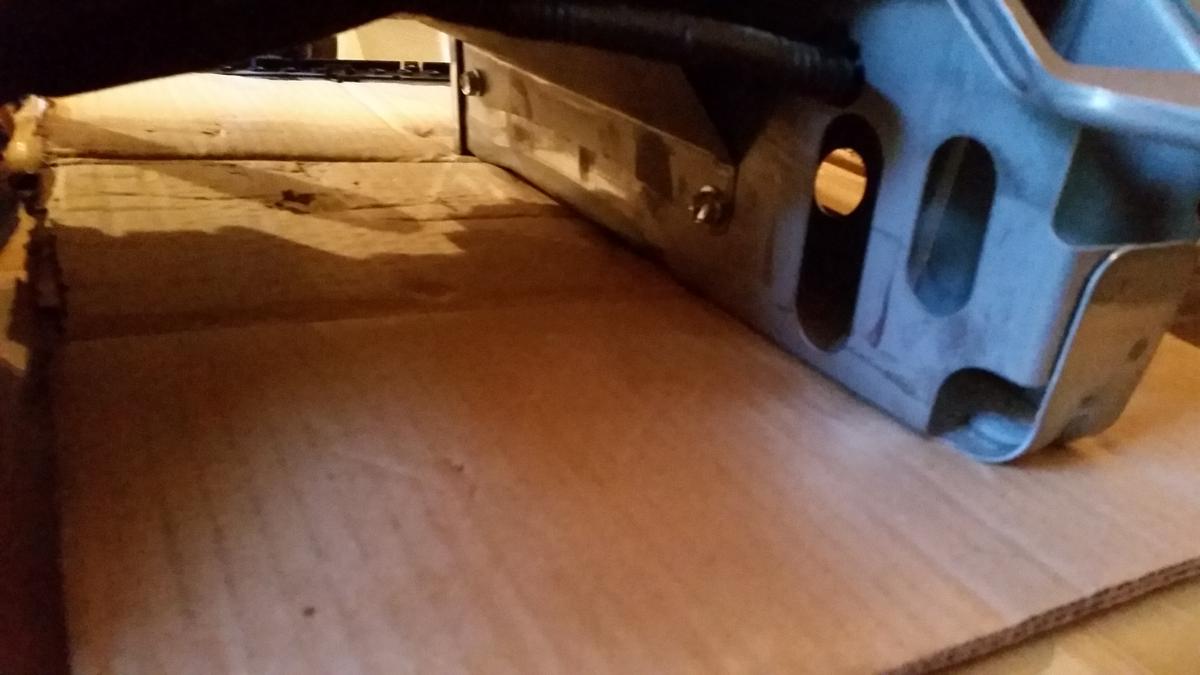
-
When they say "cost price" its not actually cost price. Its actually "cost price" + £100 + profit + VAT which eventually gets you maybe £1k off an RX atm. For an NX, Lexus Scotland are giving £5k off a new one if you're quick.1 point
-
Peace of mind. Piece of mind is quite different LOL. Regards John1 point
-
You may have to go to http://www.rockauto.com/index.php1 point
-
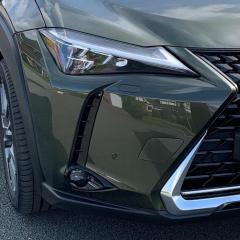
Blimey! You could grow tomatoes in that !! Looks like a miniature allotment.1 point
-
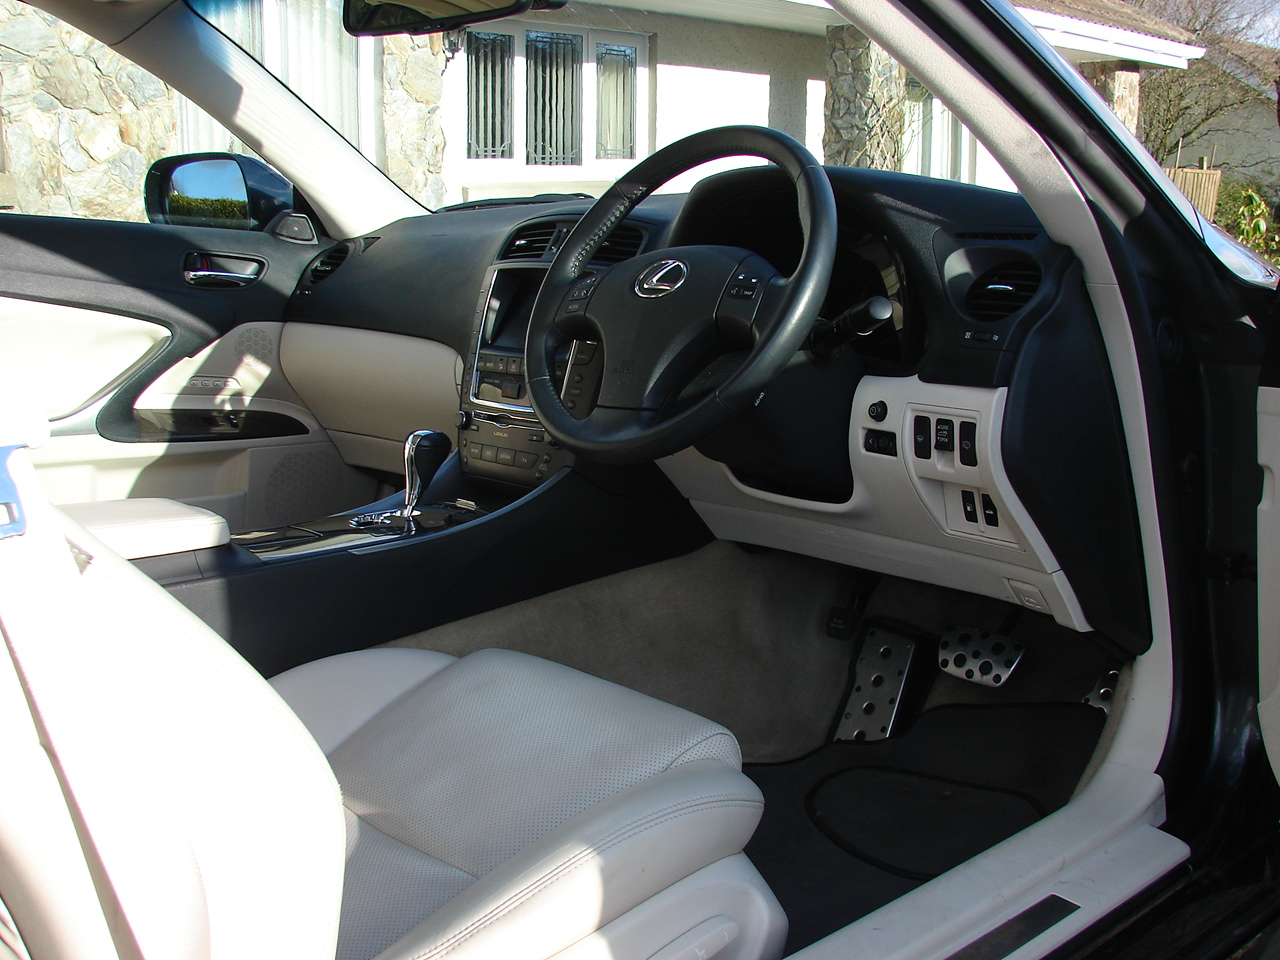
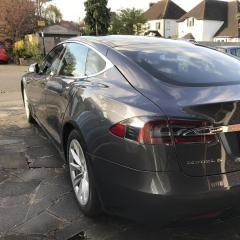
It's taken me until now to get a coat of wax on the car....I'm not idle, it just hasn't stopped persisting down ! It's a one owner with full service history at Lexus, Manchester and only 35k miles, August 2009. I'm delighted with the car, Mrs ledzep loves it too (the car!). Anyway, here's a few pics.
1 point
-
Could easily say the same for waitose and M&S though1 point
-
Definitely look at the NX. I thoroughly enjoyed my IS300h F Sport but if the NX had been around then I'd have gone straight for it. I have the F Sport so a direct comparison to the IS and IMO Rayaan is correct, the interior is definitely a step up. The lack of power I read about concerned me so I had a couple of test drives in an F Sport (suspension sportier then premier) and didn't find it to be a problem at all. The mpg didn't concern me from a financial perspective but since having a hybrid I've become rather anal about it. The IS returned 38 - 42 depending on the weather. I've had the NX since end of Sept, 4000 miles on and lifetime computer average is bang on 35. I slightly miss the memory seats, only for the dipping mirrors on reverse (but also less of a kerbing issue as the tyres are bigger). I have the power tailgate which is great and the adaptive cruise which IMO is superb. I also have the Sport+ AVS which to me makes no deference at all. Hope this helps [emoji4] Sent from my iPhone using Tapatalk1 point
-
Yes it was, much appreciated! It is/was stressful buying a car from outside the UK but I'm very happy with the car and the previous owner has been great. Made all the research/logistics worth while.1 point
-
Congratulations and welcome to the club! Is this the one I sent you a pm about?1 point
-
It's because the people who buy the premium brands want piece of mind. After three years with no warranty and having to have an MOT, many of the drivers can easily be tempted to buy another new car. In effect they sell more of the more expensive cars.1 point
-
The quality stinks though as you can see here I can personally vouch for that as ive seen a pre- production car. Jag leather is awful its not even real I don't think Costs a lot of money too for what it is really. The NX has a better quality cabin and more kit whilst the RX is on another level quality wise. I should say I wasn't impressed with the XE either, too much cheap quality buttons in the cabin which are also used in the F Pace. Same with armrests and pleather. The IS cabin is better quality IMO than the XE especially the leather seats1 point
-
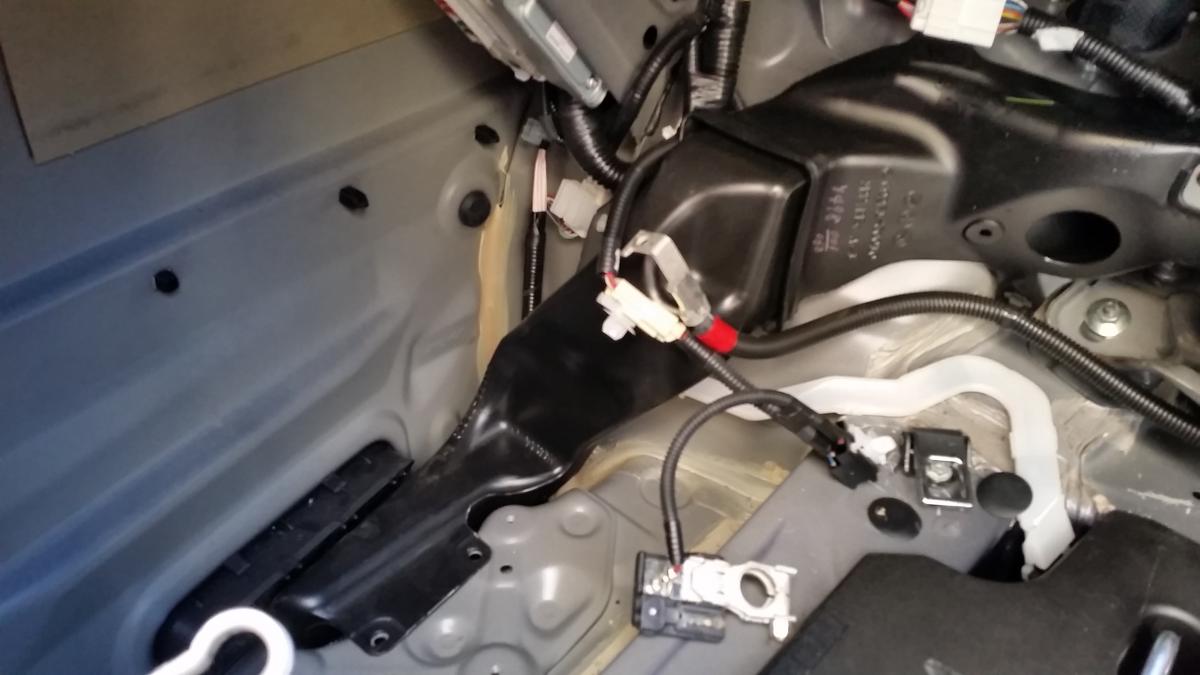
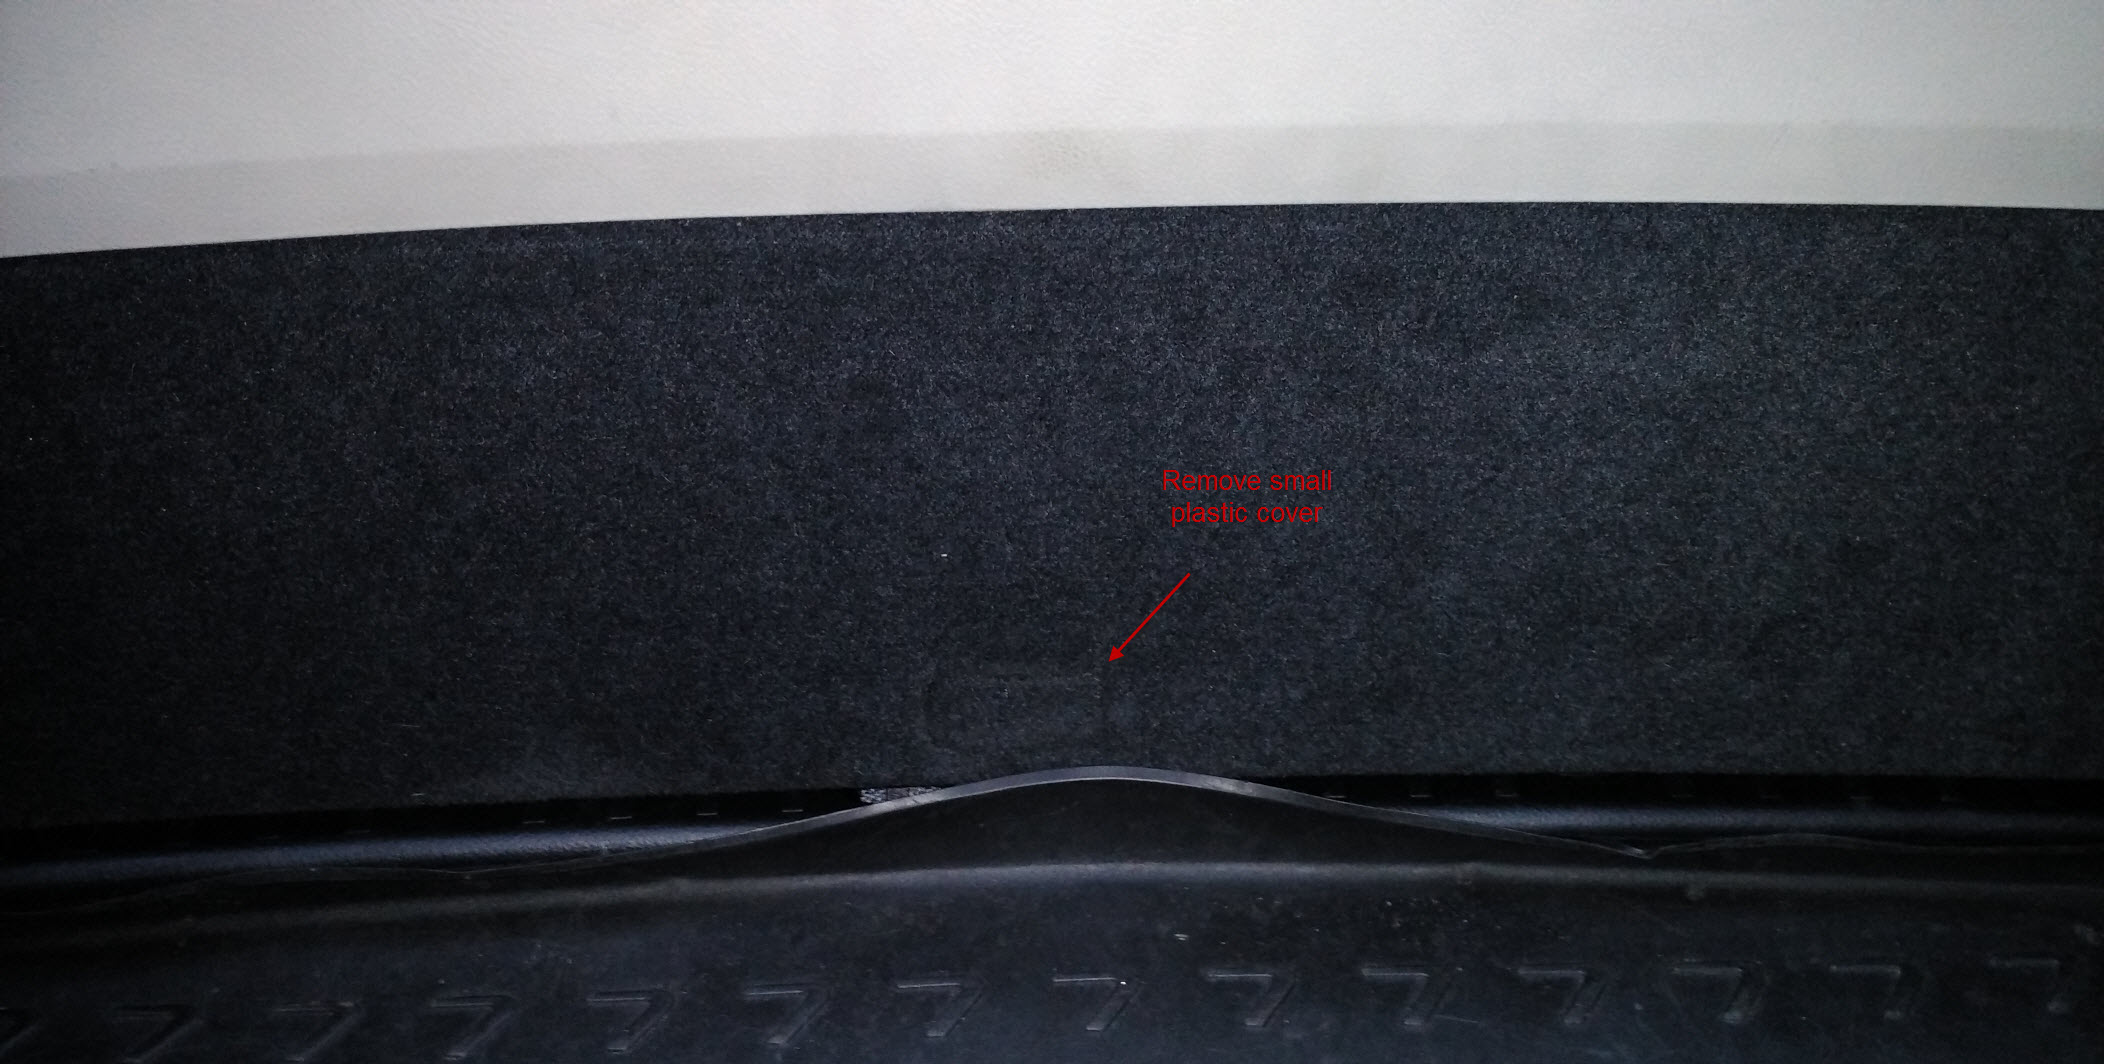
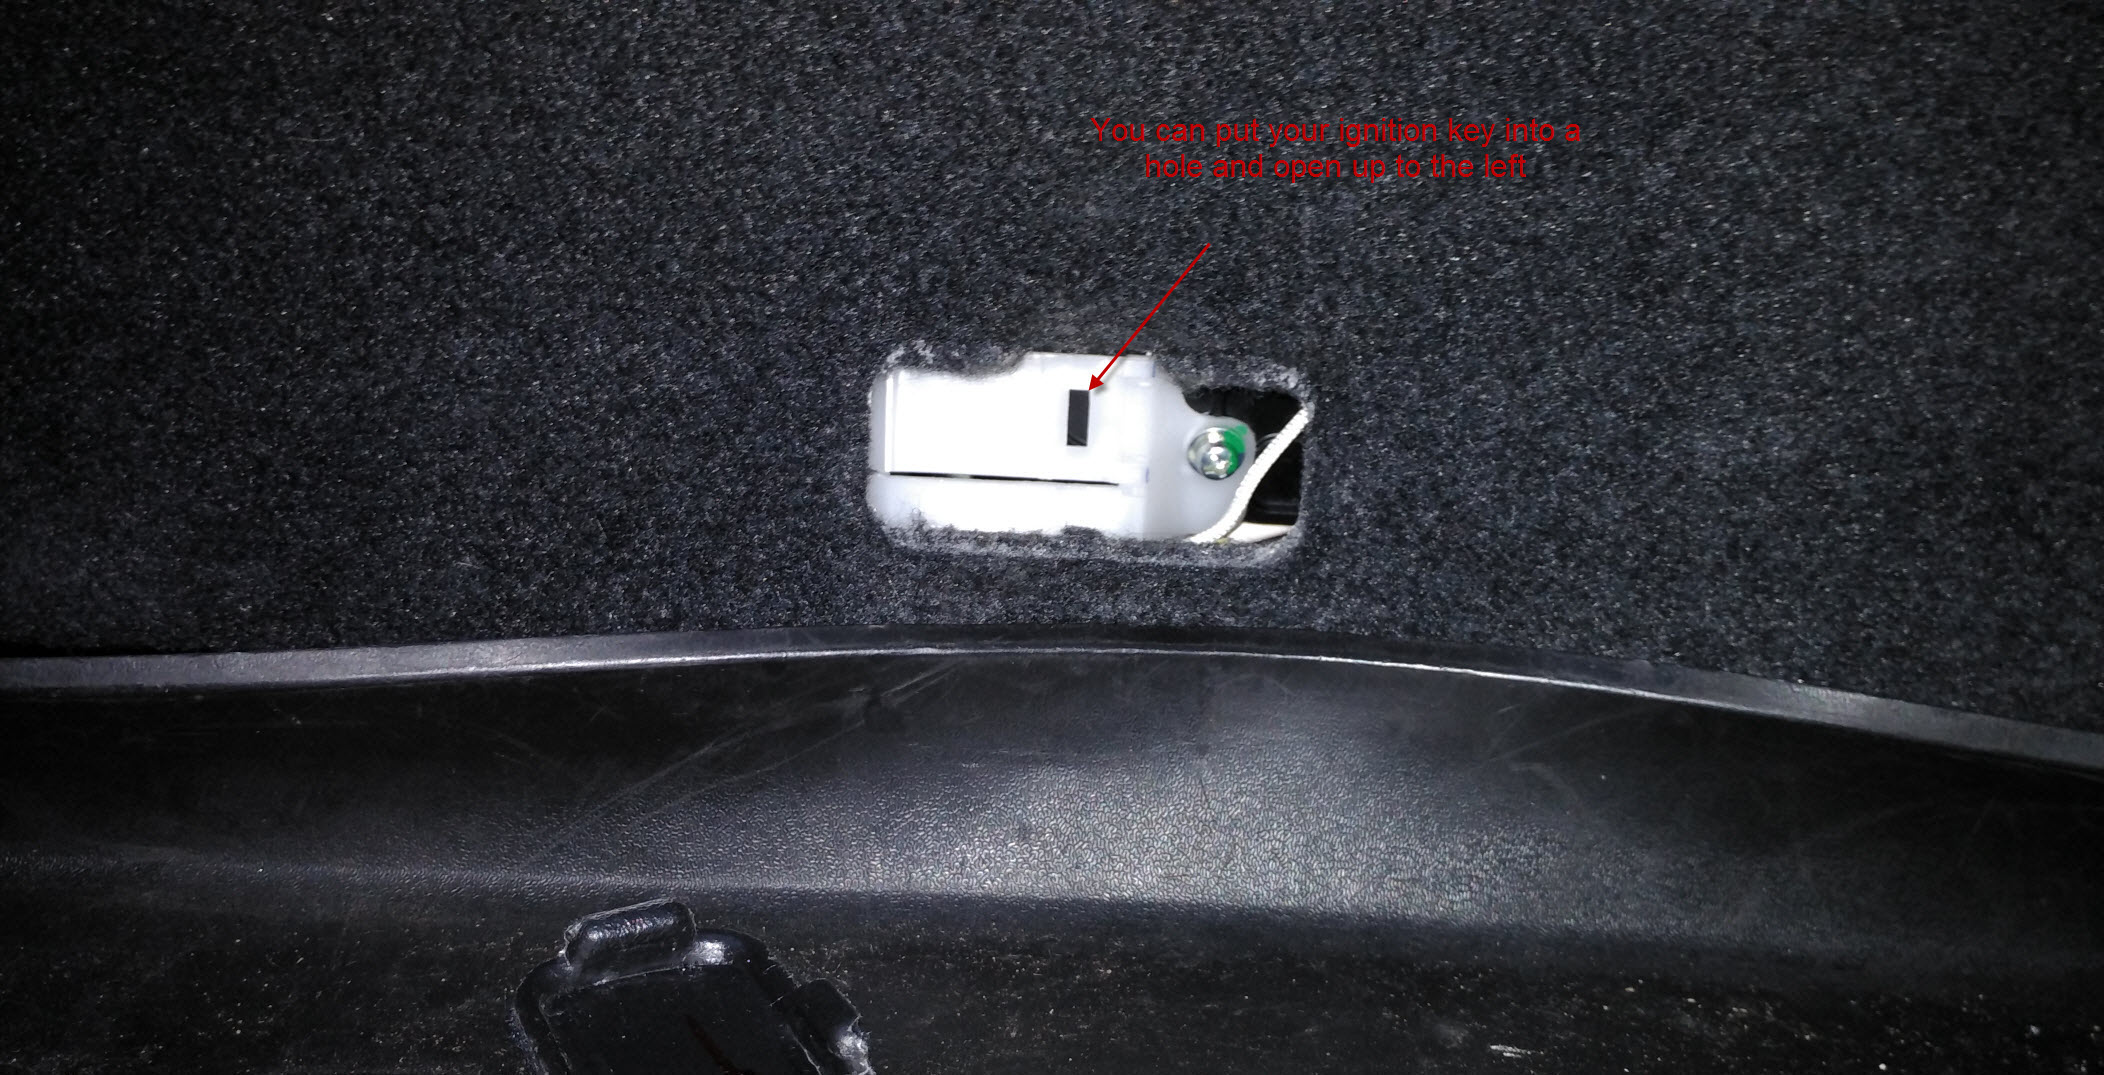
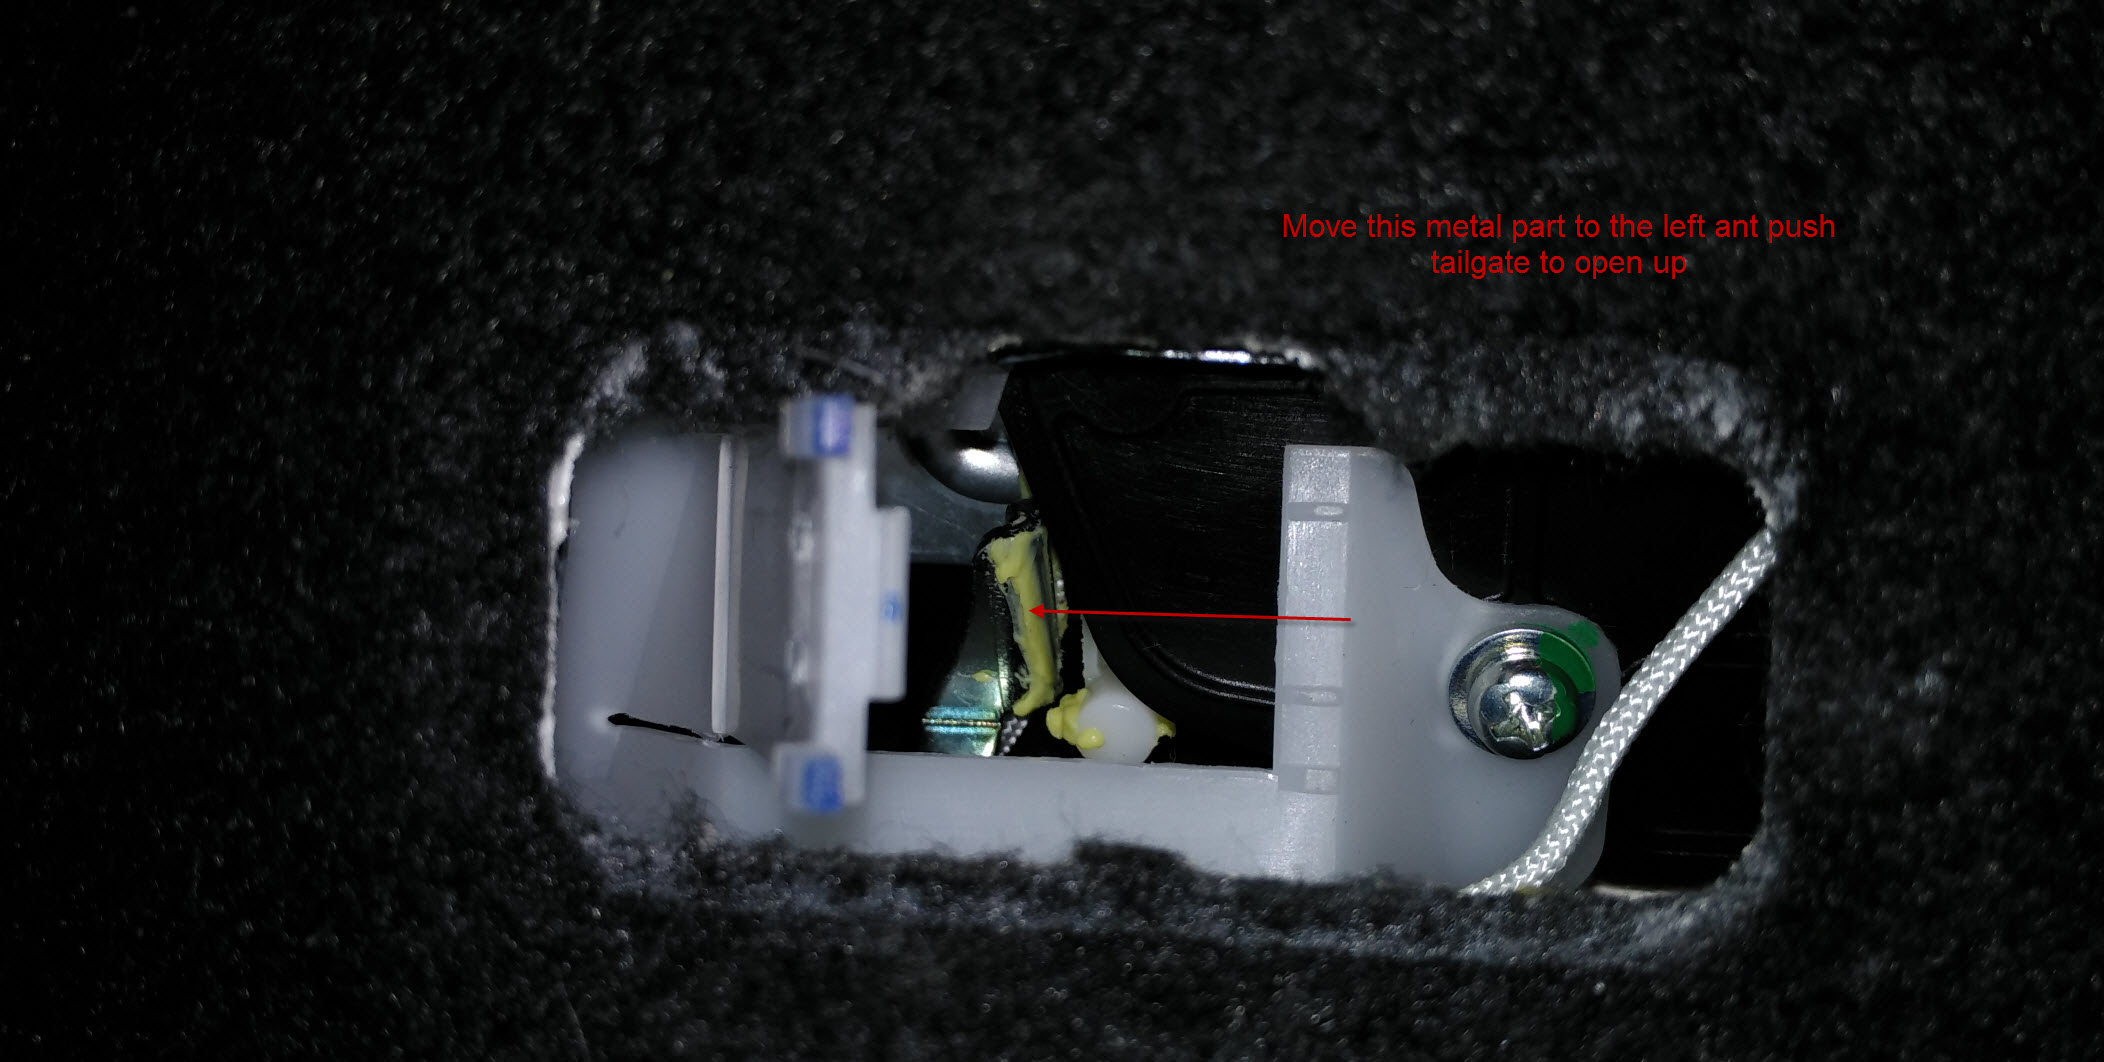
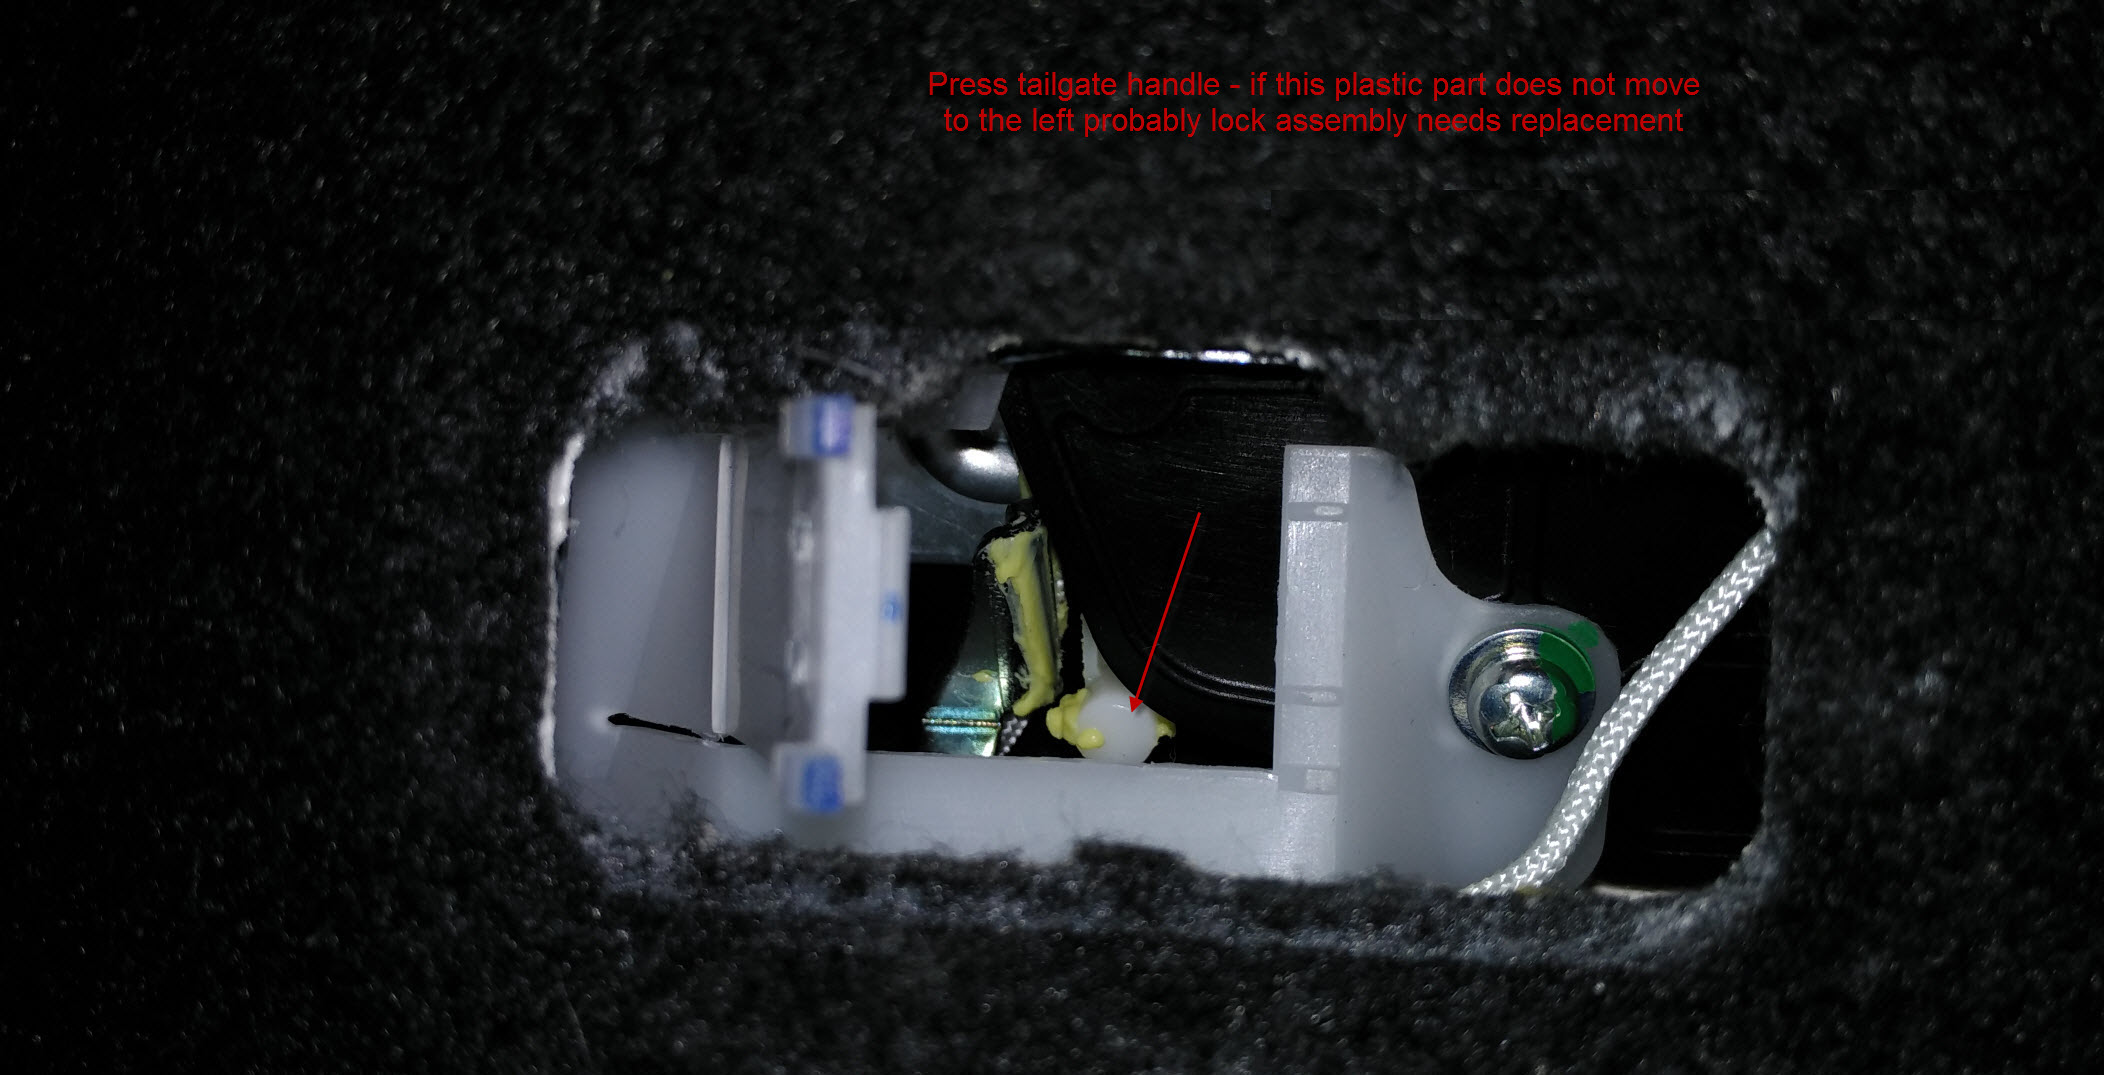
Hi Paul, I have recently replaced my tailgate lock assembly because of faulty electric motor, here are some pics, hope this helps
1 point
-
It seems to me you're hankering after the new RX but don't want to wait. I suspect if you give in to the itch you may end up suffering from buyers remorse and regret not hanging on for the new RX. That's my take on it anyway. Good luck! Sent from my iPhone using Tapatalk1 point
-
Just to let you know, sorted out the wierd 3 line streaking of my drivers side wiper which was driving me nuts. This may be useful for somebody. So, the first step was change the wiper refills - this didnt work, 3 line streak on the drivers side was still there. Then I got bored and did everthing so it could be one of these factors but obviously Im unsure about what it is: 1) Washed the glass thoroughly with a NON-wax shampoo. Im using car chem 1900:1 (leather oak scent is LUSH btw). Rinsed off but left the glass wet. 2) Used my clay cloth on the glass until it was smooth. There was slight roughness upon doing the plastic bag test. 3) Used Astonish Car glass cleaner with anti fog 4) Used Autosmart Glass Glow polish with an applicator sponge on the windscreen and removed with a microfiber 5) Applied rain x to the windscreen Also a note about RAIN X. I get a lot of comments from people about glare, smearing and what not. I can't stress enough that this is due to poor application of the product and not the product itself. Here is the process for applying rain x properly: 1) Make sure the glass is clean - this means use a GLASS POLISH and not just a glass CLEANER. Glass cleaners contain nothing but ammonia or isopropyl alcohol. These will remove grease and minor dirt. However, tree sap, diesel crap and other hard wearing gunk will remain bonded to the glass. Something like Autosmart Glass glow or Autoglym Glass polish is what you want to remove the film your glass has on it. 2) Apply rain X to a KITCHEN ROLL and buff over half the screen. You have to be extremely quick and thorough with this. Keep buffing for 1-2mins on each half (doesnt sound like much but its actually a long time when you're buffing continously). Finish in straight lines and then do the other half in exactly the same way. Wait for it to haze (2-5 mins) and then remove completely. The most common problem is applying too much causing intense glare at night. 3) Apply a second coat. This is to ensure there is even application and will prevent wiper skipping/juddering. Remove the haze with a microfibre. 4) Now here is where the trick lies - Use a glass cleaner (RAIN X's own weatherbeater is great for this) and buff it in until the glass is clear with no streaks. Then sprinkle some water on the glass and buff the water into the glass using a microfiber. Now it shouldn't smear and you won't get the crazy glare that people get when they apply it in a weird way. Also ensure you clean the wiper blade with some glass cleaner as this can also cause smearing.1 point
-
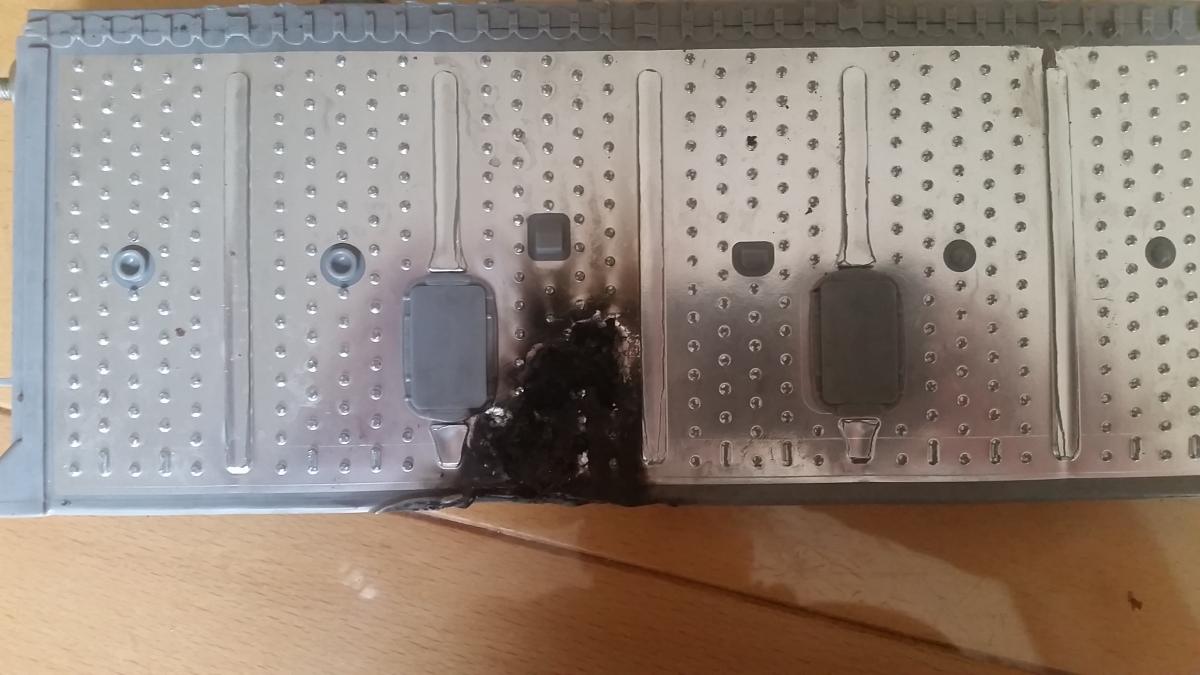
Just wanted to post a big thank you from across the water. I got the Check Hybrid system at 107,000 miles and dealer wanted $7,500 to replace the traction battery. But after checking around a few other resources and this thread decided to give it a go. Ordered 3 cells from Belarus just to be sure I had extra parts. Took me an hour to remove the traction battery. All of my cells tested at 7.3 - 7.6v though and I didn't have to replace any individual cells. But my copper bus bars were quite corroded. Was quick work with a rotary tool with sandpaper attachment to polish them up and have it reassembled. If it helps anyone though, I used a small power drill to remove and replace the nuts on the bus bars...bad idea. I didn't think it had much torque, but it sheared one of the battery posts off. Doing it by hand it much was more reliable. Another dumb move was in reassembling the unit I forgot that the service disconnect had to be inserted and slid all the way over...dumb. On the other hand, I can now reliably disassemble and reassemble the unit in less than an hour each way. An hour to check and clean the battery and voila. No more error codes. I posted a copy of my bus bar before and after cleaning, it seems this is also a common problem, and not just bad cells.
1 point
-
Thanks all for your help. they give a 12 month warrenty on the parts and labour they supply. have been doing this 18 months and completed 15 cars and only 1 came back, but only because it had 200k on the clock and was already blowing smoke and he really didn't want to do it but the guy insisted and it let him down. he has the conversion on his daily driver an IS200 Sportcross and never missed a beat in 18 months. my car has 69k on the clock and always been looked after by a specialist and I have owned it the last 6 years so I know how it has been driven. Going for a stage 1 turbo (approx. 240 bhp. his car does a 1/4tr mile in 14 seconds), lightened flywheel new clutch, recon lsd from a sport model, all fitted and set up for just under £3.5k. I did speak to TDI a few years back when I had my sway bars on order and they wanted £6k just for the turbo. I know some will say what is the point on a car of that age and value, but to me a car (and anything really) has 2 values. the value that someone else will pay when you want to sell it and the value to you of the pleasure you get from owning it. would you rather have a turbo Lexus to drive or a brand new Fiesta 1 litre for 10 grand? Will let you know how it all goes. Life is about putting a smile on your face I say!1 point
-
Whenever I get a new (to me) car I always change them. They are almost always a doddle to change and like you say, they are often totally forgotten. This is definitely top 2 (volvo v70 used for a charity rally was the other) for filth.1 point
-
these are often overlooked - i change mine every year - which is probably overkill but i do it anyway1 point