Leaderboard


Popular Content
Showing content with the highest reputation on 12/22/2015 in all areas
-
my letter did the trick, confirmation verbally, via text and in a letter setting the record straight, cheers.2 points
-
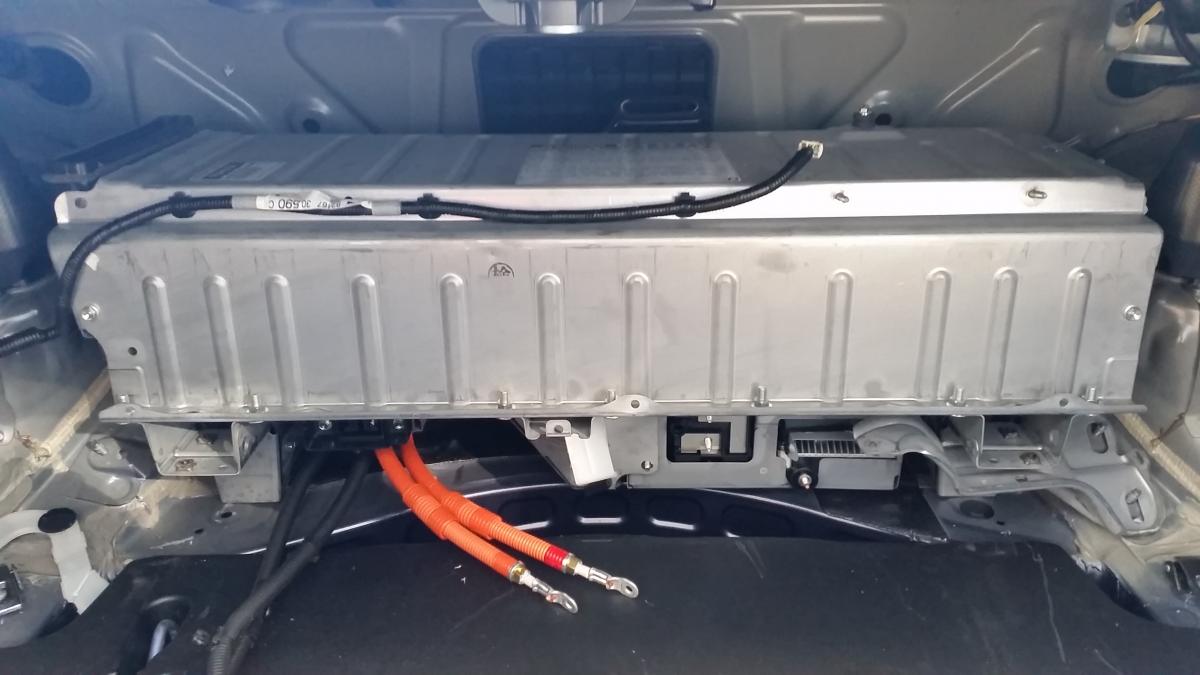
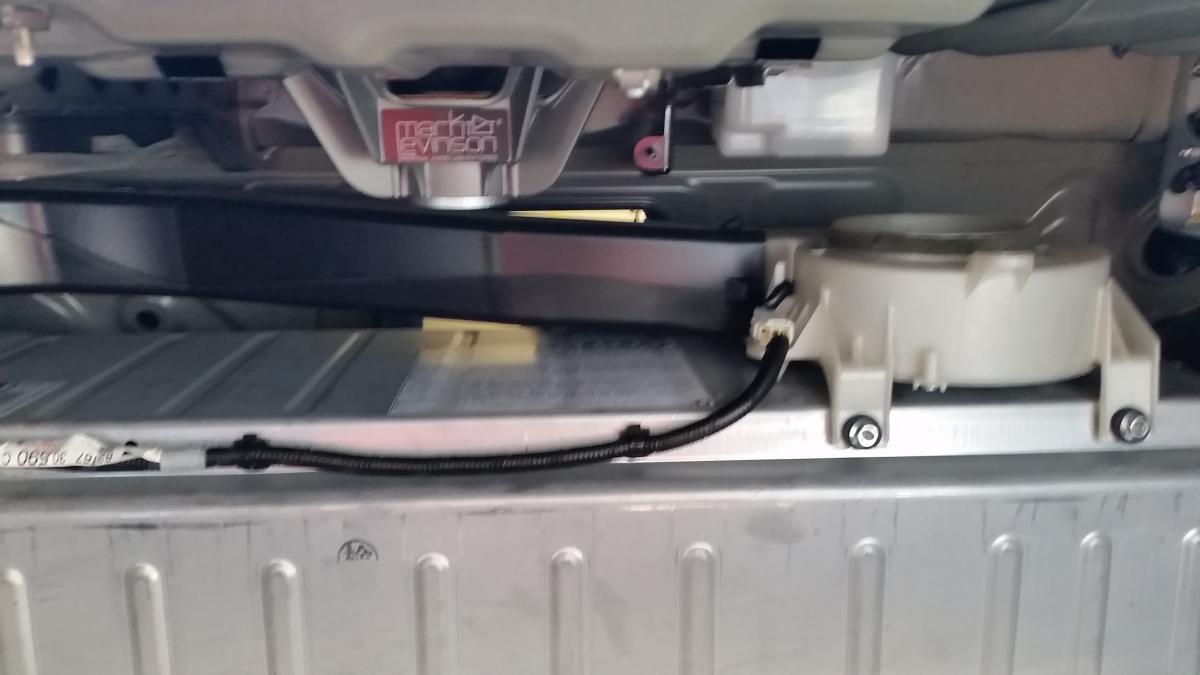
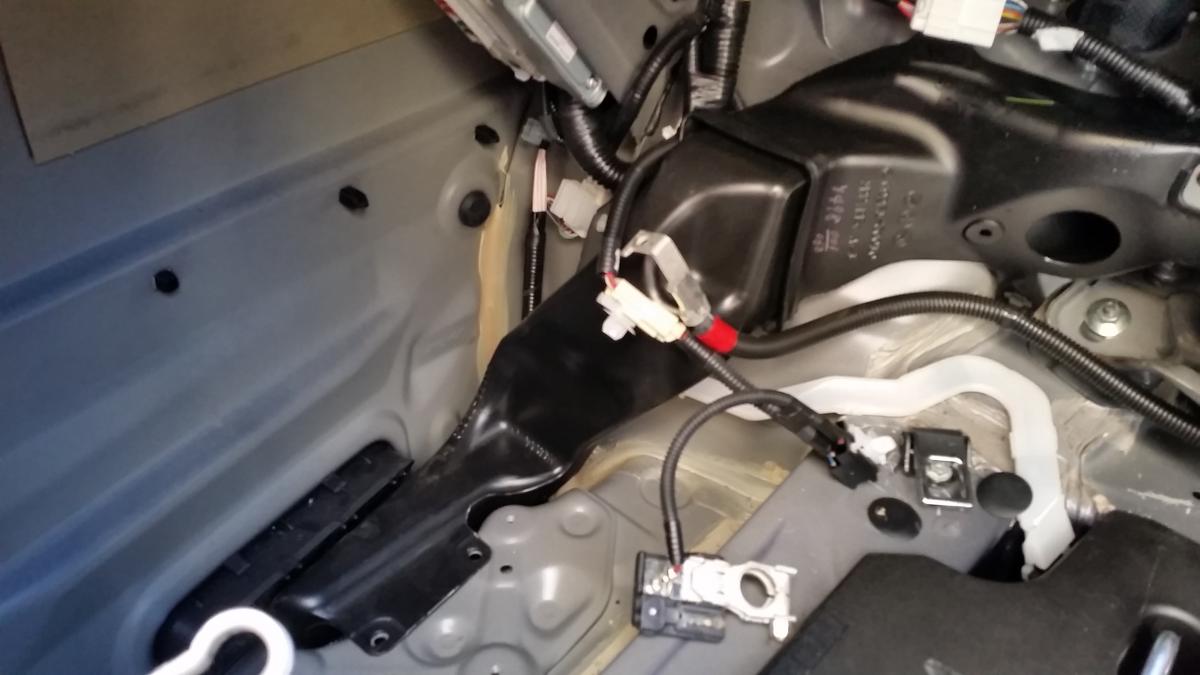
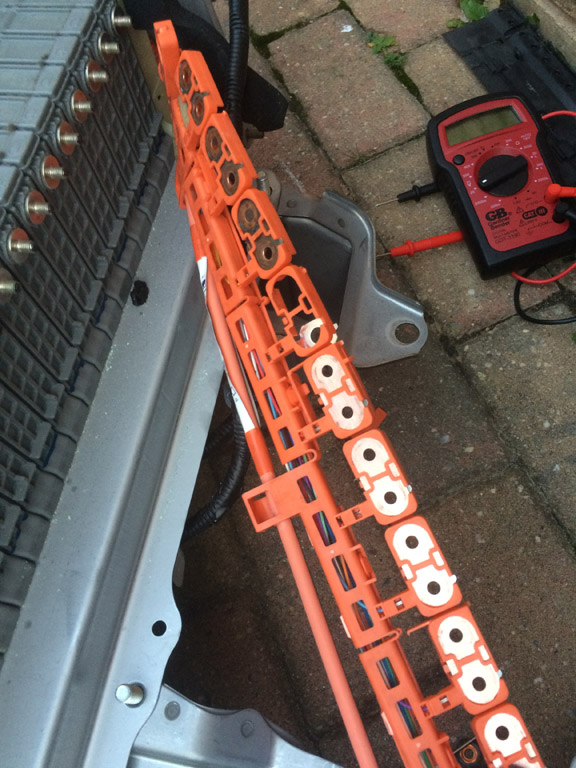
I got the dreaded Check Hybrid, Check VSC and Check EBC warning lights. Fault code readings P0A80 Hybrid and P3017 (battery cell block number 7 fault). Having gotten a quote for around €6000 to fix it, I decided to do it myself. I ordered a battery cell on ebay for €45.00 delivered to Ireland. Tools needed: Socket set with 8mm, 10mm and 12mm. Flat head screwdriver, long nose pliers and a multi meter to read voltage. (You may also need a slow trickle 12v battery charger, I'll explain later). Time needed: about 4 hours, more if your connections a very dirty. 1: Remove ALL carpeted paneling from the boot (trunk if you're in the US). This is done by inserting the flathead screwdriver into the black plastic rivets and popping them out. Remove the boot flooring too, just leave the tool tray in place. You will need the 10mm socket to remove the rear boot floor luggage anchor points once you've popped open their plastic covers. The upper hanging points need to be squeezed to remove. Disconnect the power supply to the light on the right hand panel. 2: Remove the orange circuit breaker on the HV battery by sliding to the right and then pulling towards you. 3: Remove the black air duct on the bottom of the HV battery by popping the 2 black plastic rivets. 4: Unplug the power supply to the white cooling fan on the upper right of the HV battery and remove the 2 nuts holding on the fan. This should allow the 2 upper black ducting to move sufficiently to be able to remove them. 5: Open the panel covering the 2 Orange Cables (3 x 8mm nuts) and disconnect the 2 orange cables, (you can tape them up with electrical tape if you so wish). Pull back the rubber cover on the Black cable and unbolt that too. You should now look something like this: 6: Disconnect the cable running from the HV battery to the 12v lead battery. Continue to remove the 12v battery by disconnecting the +ive and -ive terminals and the white connector plugs attaching it the the HV battery. Also need to take off the temp sensor and the vent hose on the 12v battery. Remove the 12v battery support bracket and the battery tray itself. 7: Remove the last 2 bits of black ducting that was clamped by the 12v battery tray. 8: Remove the white tubing on the right of the HV battery. 9: Remove the 4 12mm nuts holding the base of the HV battery in place, 2 on each side. 10: You need to unbolt the nuts hidden behind the back seat headrests. 11: Pull the rear seats forward enough to remove the large plastic panel in the center between the rear seats and the boot wall, its hidden behind the fireproofing fabric. Use this panel cover to hold the seats away from the boot wall by wedging it between seats and wall. 12: Pull back the fireproofing to reveal 2 smaller access panels covered by a black sticky rubber square. Now remove the 3 12mm nuts holding the HV battery to the boot wall. 13: Now the tricky bit, lift the HV battery over the bolts in the boot and slide it out. (I recommend putting cardboard on the tool tray to avoid scratching when sliding the HV battery). If you are strong enough you can lift the HV battery out on your own, if not get help, it weighs about 50 kilos. Your boot should now look like this with the access panels behind the seats visible: You should also have this, I placed mine on some cardboard on my kitchen table: 14: Take off the HV battery cover by opening all the 10mm nuts, and a few 8mm. unclip the black cable while taking off the three cover panels. 15: Unclip the black plastic covering on both sides of the HV battery to reveal the 8mm connector nuts in the orange casing. 16: Number the cells 1 to 40 using a permanent marker. Use your multi meter to get a reading across each of the 40 individual cells, i.e. one lead on the +ive terminal of the cell and the other on the -ive, and record your findings, as you can see cell 28 was low for me: 17: Pull back the rubber vent tubing running along the top of the HV battery until to get beyond your bad cell/cells. 18: Remove the white end panel holding the cells in place: 19: Remove the 80 x 8mm nuts in the orange casing and clean if necessary. I used bleach and some sand paper to clean all nuts a copper plates, if you're gonna do it - do it right). 20: Remove the 8mm nuts holding each cell in place underneath until you reach your bad cell (this will probably involve removing the support leg and the converter assembly unit below the HV battery: 21: Good cells look like this Bad ones like this: 22: Start replacing your cells back into the HV battery, it doesn't matter what order and you can't mess up polarity as it only screws in on one side. I put my new cell in last in case it was a dud. (If your new cell is of a lower or higher voltage use a slow trickle 12v battery charger to get it to the same voltage as the other cells. 23: WATCH THE TEMP SENSORS UNDER THE BATTERY CELLS (3 of them), MAKE SURE YOU CLIP THEM ON AS YOU GO. See the black plastic clip peeping out here: 24: That's it you're done, just reverse everything to put in back in. Mind your back and don't bother touching cell 1 and 40 at the same time if you have the orange connector put back on. Good Luck!
 1 point
 -
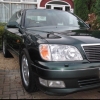
281884990605 301831082827 Hi guys Check these ads out, it's the same car, but guess what he hasn't in the ad?1 point
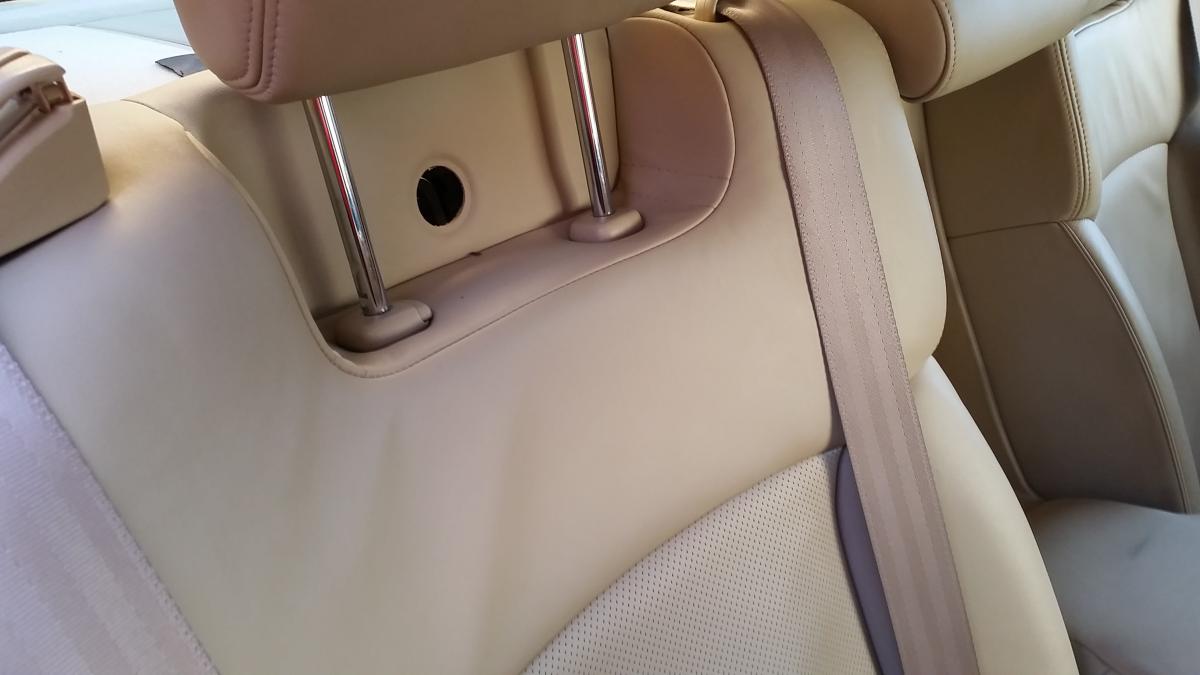
-
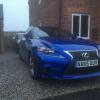
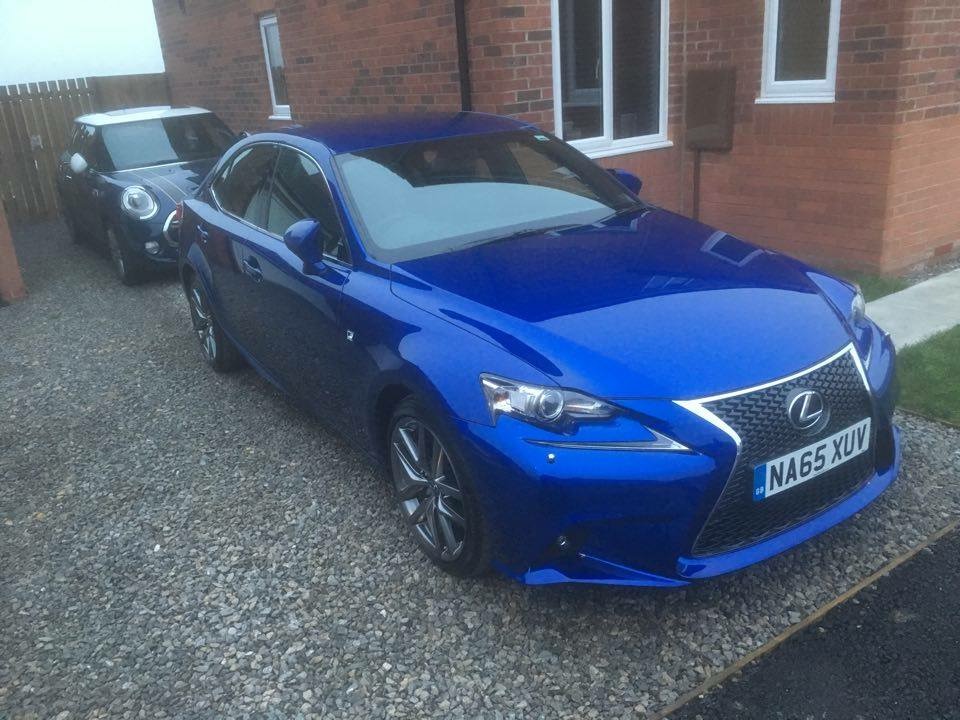
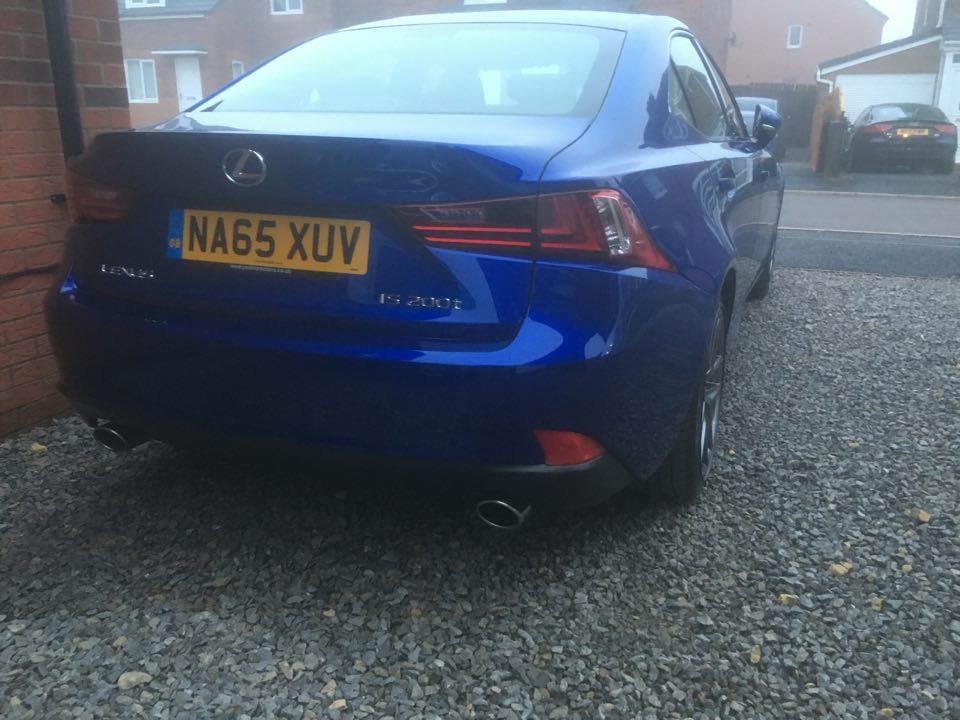
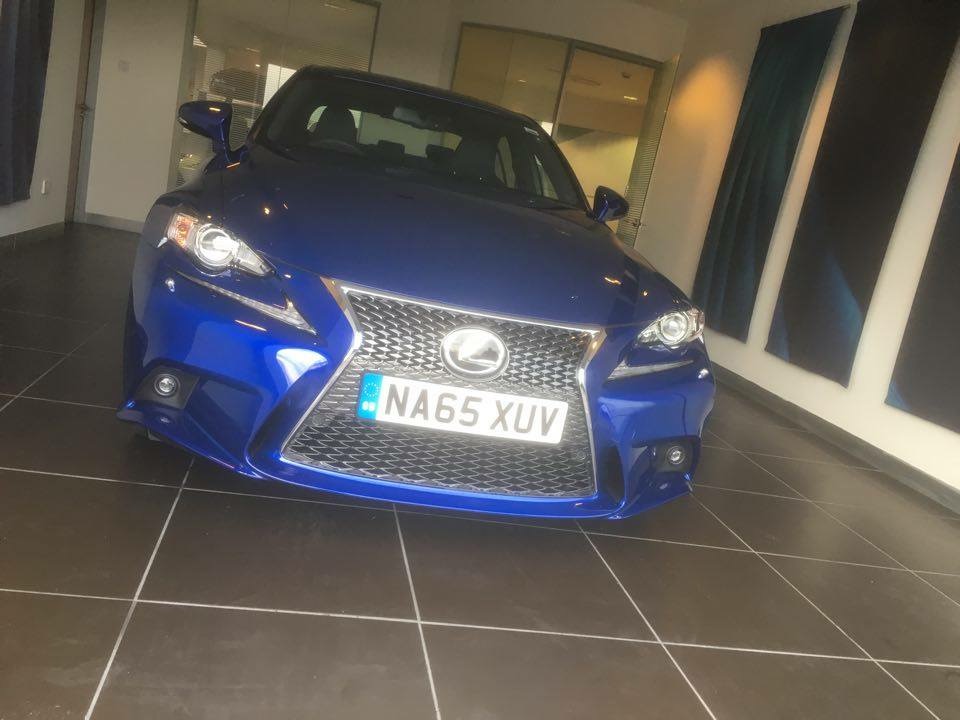
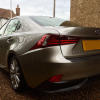
Last week I picked up my Azure Blue Is 200t F-sport. So far I am very pleased with it. I love the colour the way it looks the way it drives and refinement! I find the heated seats don't get very hot but that is just a personal preference along with the foot operated parking brake which I kept forgetting to take off, I am used to it now though. I am currently achieving 31mpg with mainly town driving so very pleased, it may improve once the engine is broken in. I have to agree with the sluggish throttle response from a standstill it is almost like the car has been mapped so that nothing much happens below 2000rpm in first gear, a bit weird but getting used to that too. Cannot wait to put more miles on the car! I have to say Jardine Lexus in Newcastle were brilliant.
1 point
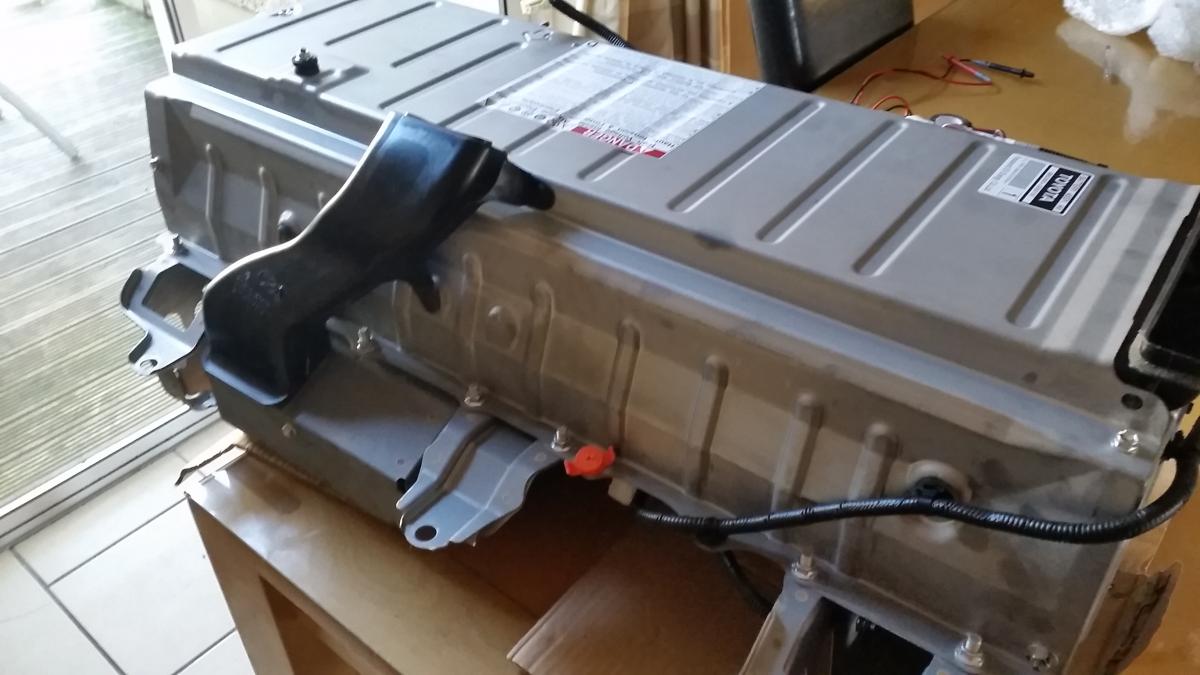
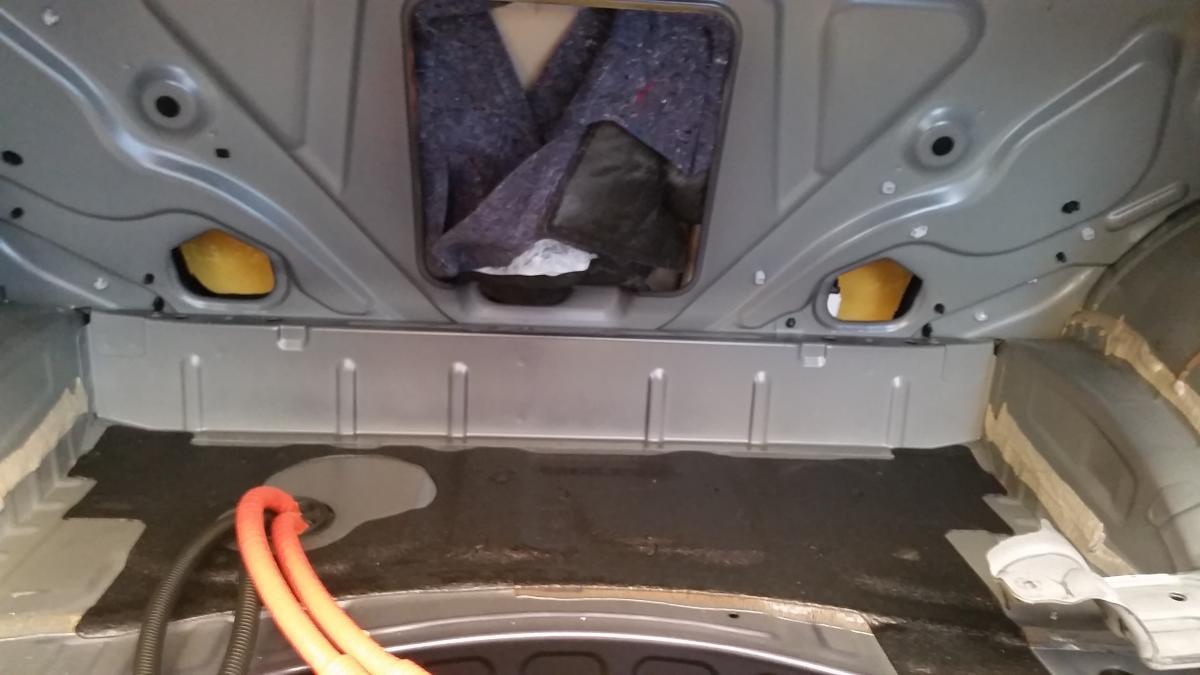
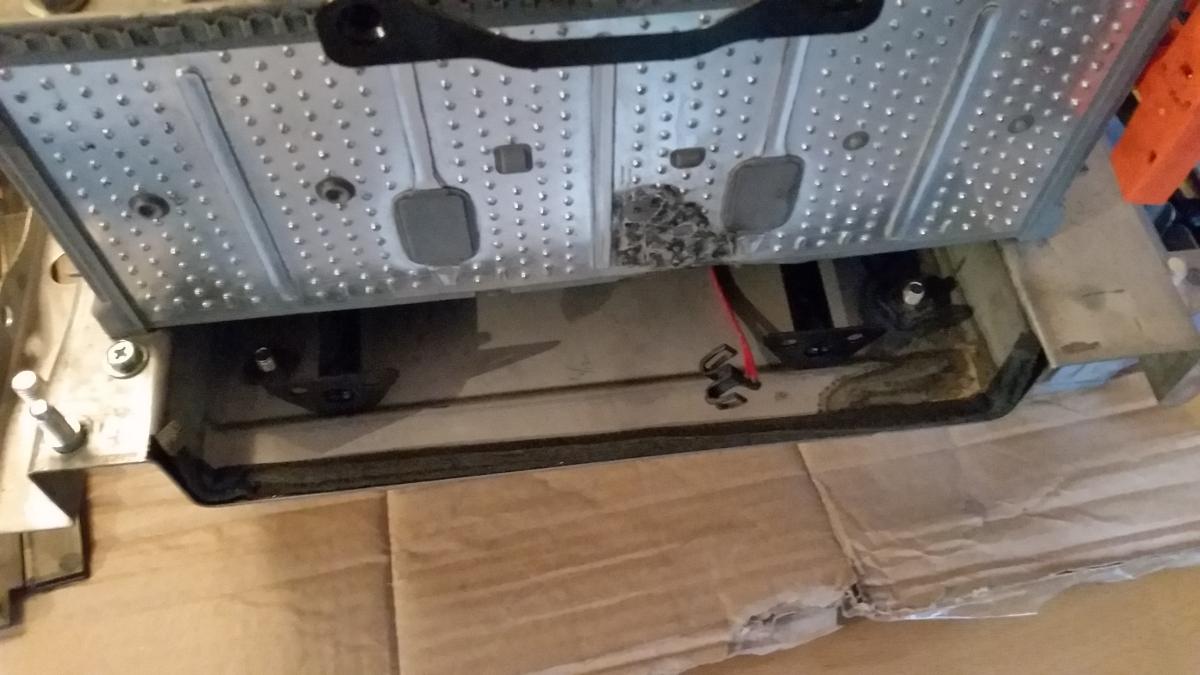
-
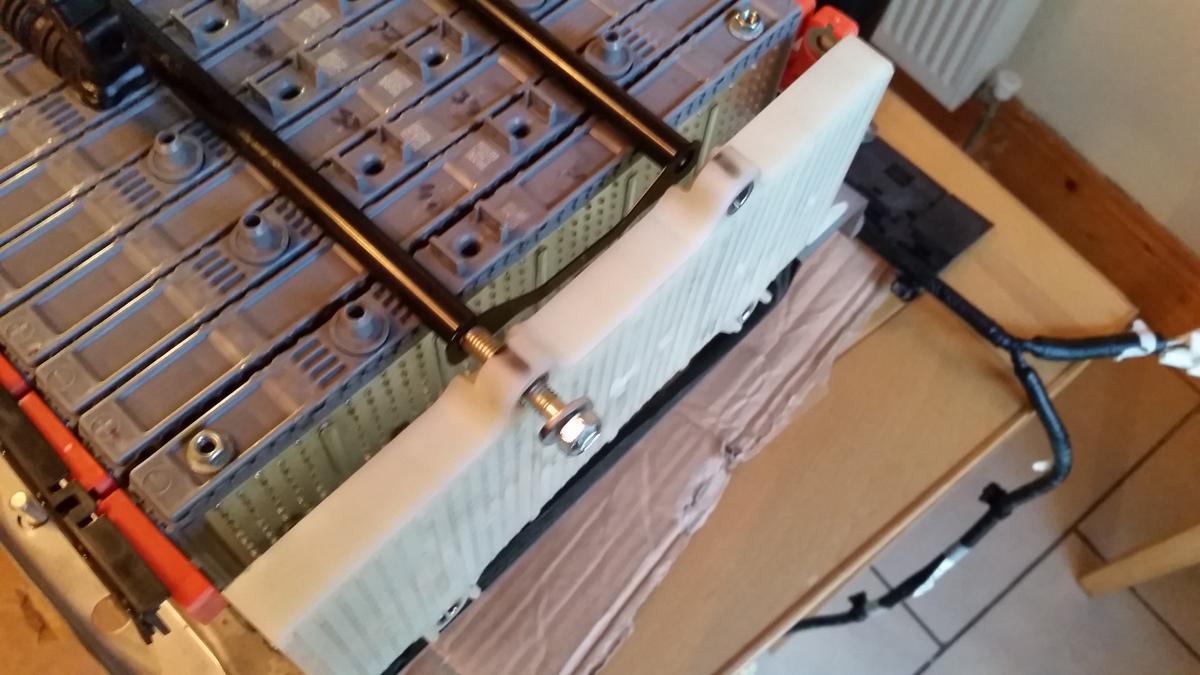
I'm new to the forum and as yet not an ls owner I've had a 9-5 aero. Very quick, even an auto . But I don't think they're well built. And are pretty thirsty for what they are1 point
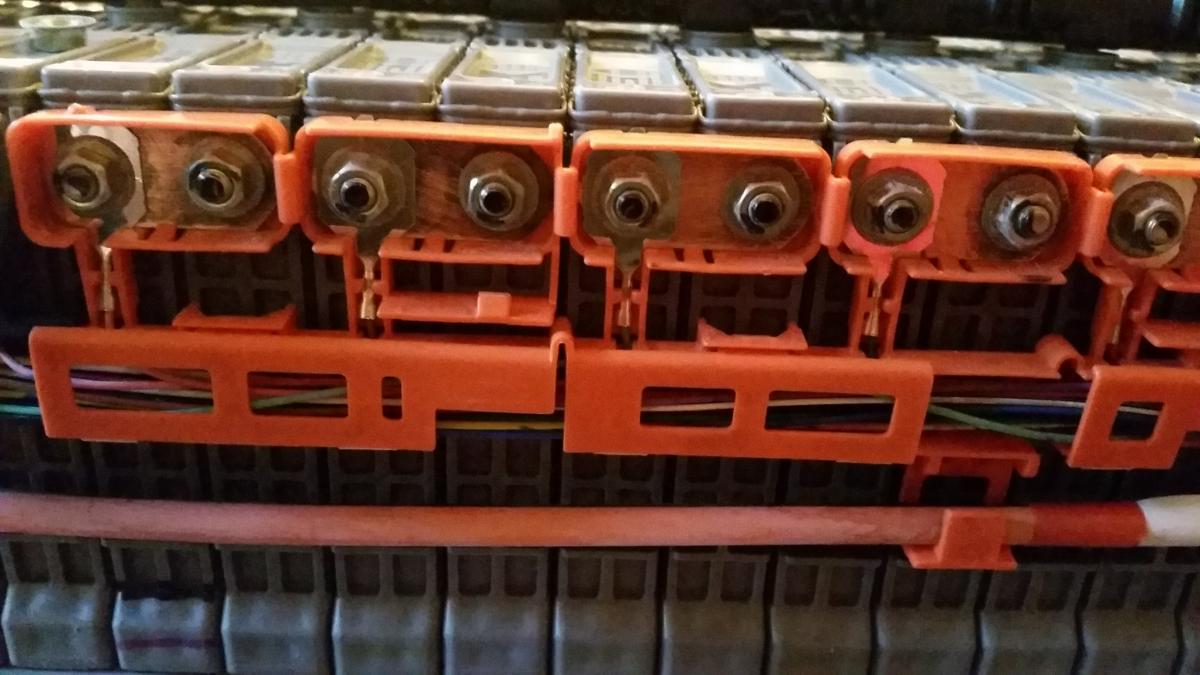
-
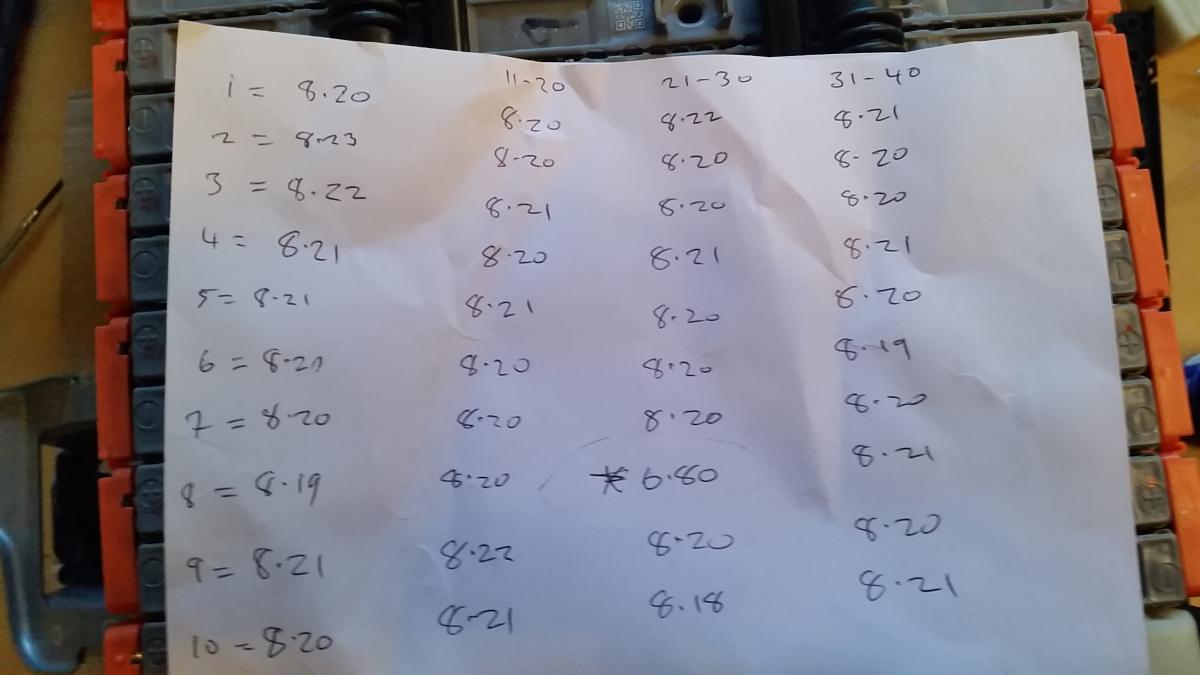
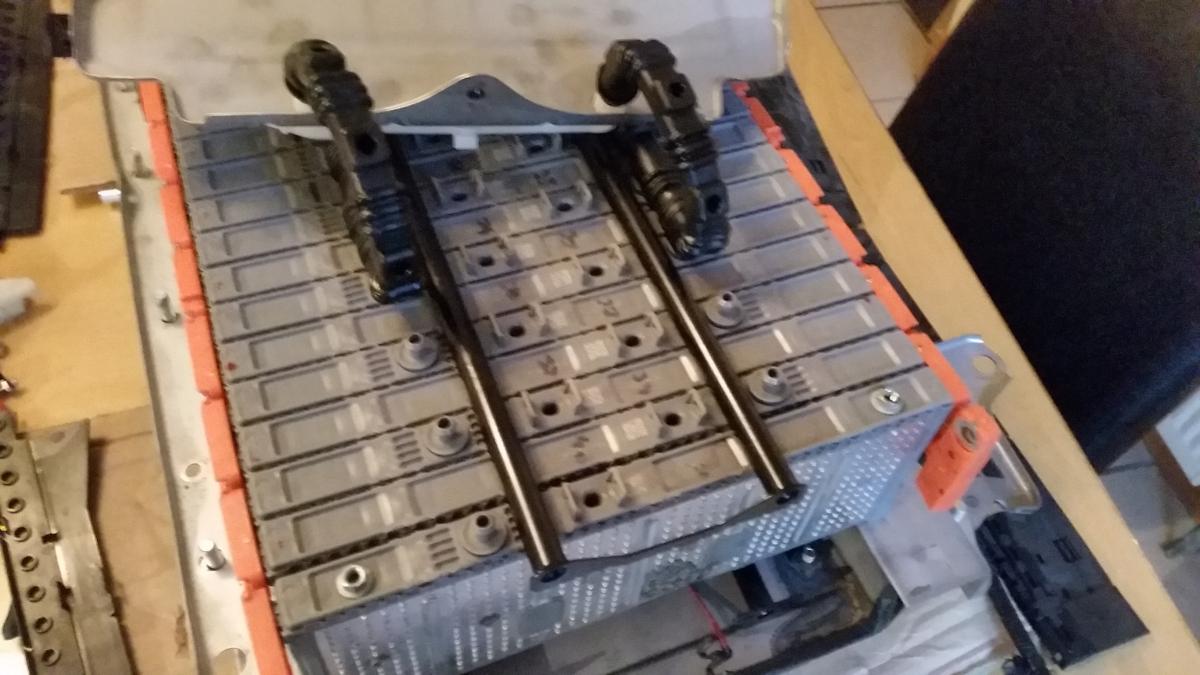
............. the Wolseley 6/110, straight 6 engine and used to be as sweet as a nut !! Bit old aged now ........... . I learnt to drive on my father's a million years ago and I actually bought one in the 1980's but it died ! Maybe prefer the Vanden Plas 4ltr R But the least expensive of them all .................. would be a replacement Ls400 ... and much much better too Malc1 point
-
Just been to Saudi Arabia for 8 days and staggered by how many Lexus I saw. So total count: GS 2nd gen - 1 GS 3rd Gen - 1 GS 4th gen - 2 Rx 1st gen - 1 RX 2nd gen - 2 RX 3rd gen - 1 LS current gen - 3 LX current gen - 7 GX current gen - 4 Bare in mind this was in 8 days! Only saw 2 BMWs and 4 Mercs but no Audi's or Jaguars.1 point
-
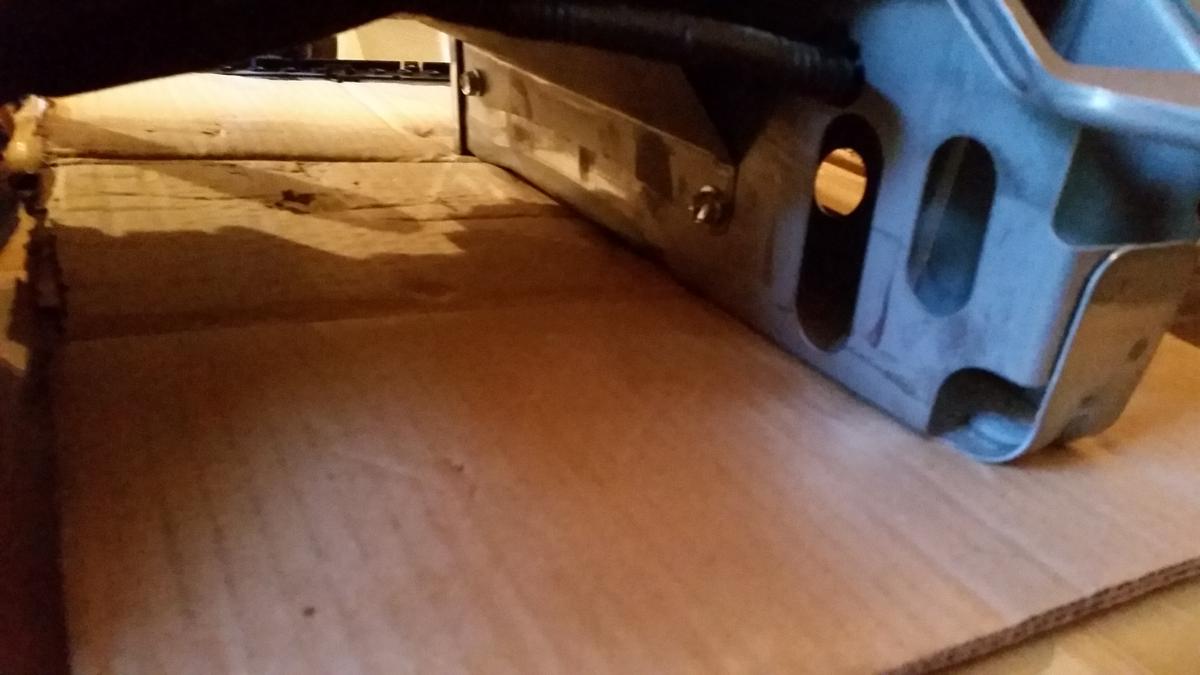
Urgh. Mud guards ruin every car they sit on. Id rather clean the car more often Not having them does have its advantages too - the amount of spray the IS throws out on the motorway helps to keep the tailgaters at bay1 point
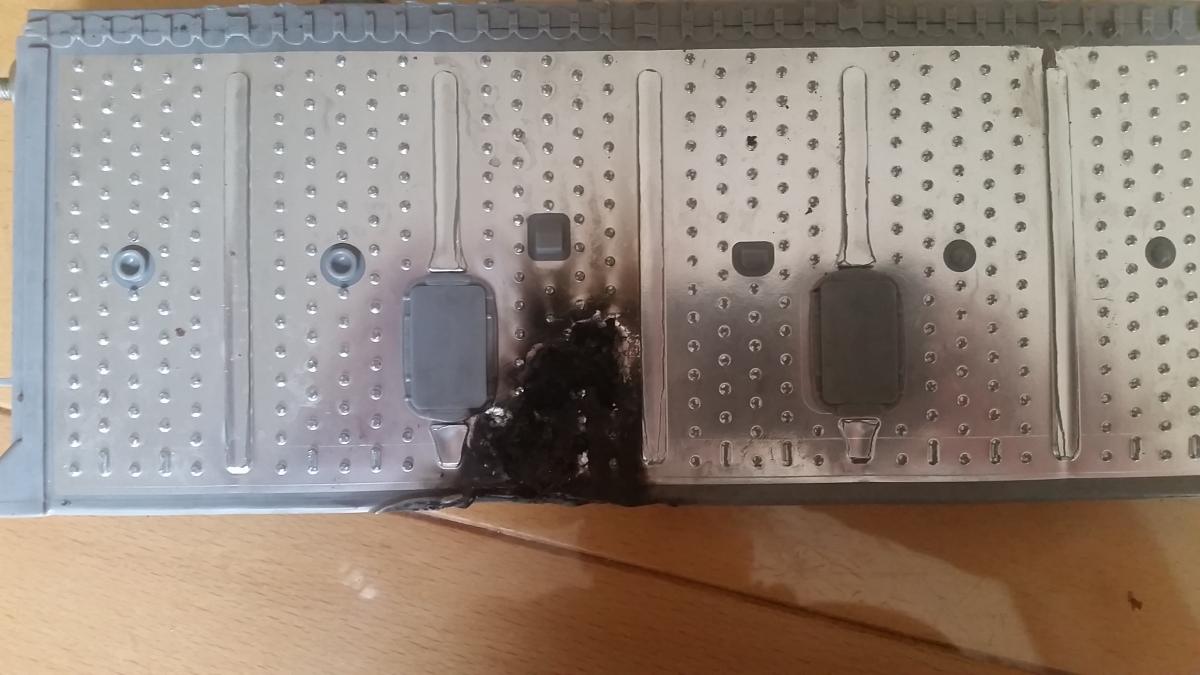
-
John, if it's an auto S-type you're considering, proceed with caution. I can almost guarantee that a certain little light on the dash will start blinking at you. They all do it. Mate of mine only had his for a few weeks, then got rid. Autobox was duff.1 point
-
Lesson to be learned here, having invested all that time and fuel getting to him, you were ripe for the picking, in terms of lowering your price, rather than having to drive back with nothing. He, of course, would have insisted on full payment, plus a delivery fee in advance of making the trip, had he been the seller. Better still, let the buyer invest in travelling to you, then you have the upper hand. :)1 point
-
Sorry to hear your news John. I dread something similar happening to mine. Have you thought about a GS? My mechanic might have one for sale. Not as comfy as the LS, of course, but then most cars feel hard and bumpy in comparison. I sat in an Insignia once and couldn't see out of it. It felt a bit claustrophobic, and the back window was the size of a letterbox.1 point
-
Jag floors are a bad rotting point make sure you get it in the air, Have a good prod and poke.1 point
-
I'm definitely happy with it but as others have said, my driving style has changed somewhat. I was following a colleague down the motorway yesterday behind his 2013 3series and I just didn't fancy keeping up and instead sat at 75 while he disappeared into the distance. Sent from my iPad using Tapatalk1 point
-
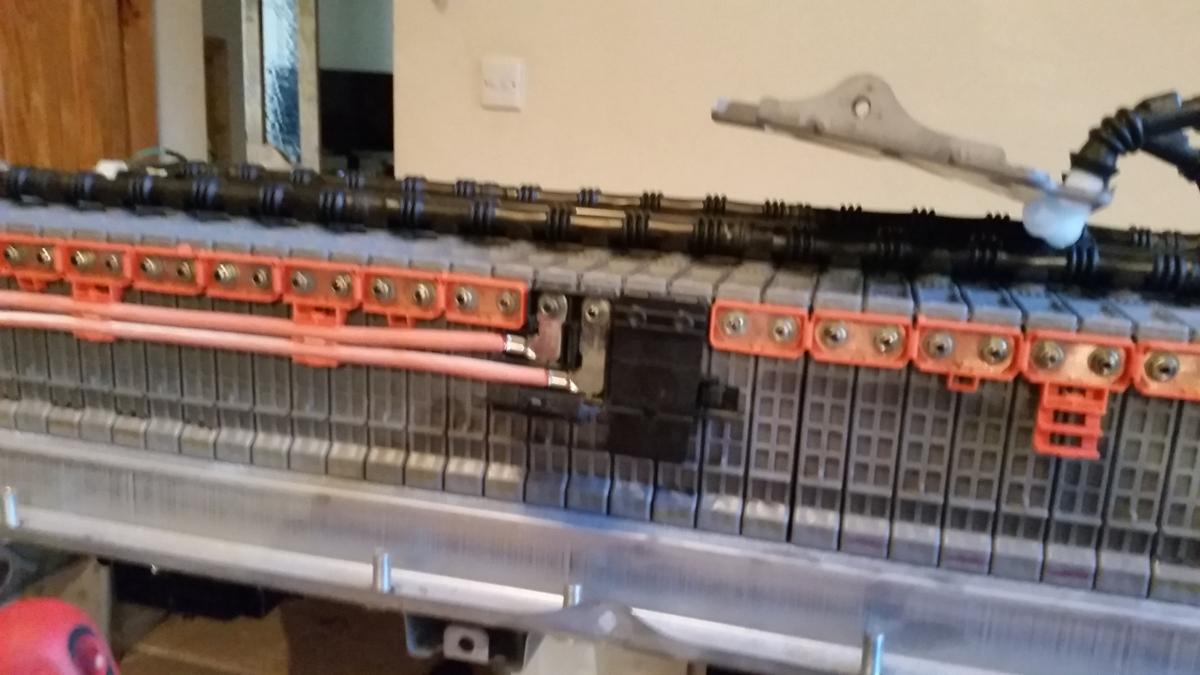
Just wanted to post a big thank you from across the water. I got the Check Hybrid system at 107,000 miles and dealer wanted $7,500 to replace the traction battery. But after checking around a few other resources and this thread decided to give it a go. Ordered 3 cells from Belarus just to be sure I had extra parts. Took me an hour to remove the traction battery. All of my cells tested at 7.3 - 7.6v though and I didn't have to replace any individual cells. But my copper bus bars were quite corroded. Was quick work with a rotary tool with sandpaper attachment to polish them up and have it reassembled. If it helps anyone though, I used a small power drill to remove and replace the nuts on the bus bars...bad idea. I didn't think it had much torque, but it sheared one of the battery posts off. Doing it by hand it much was more reliable. Another dumb move was in reassembling the unit I forgot that the service disconnect had to be inserted and slid all the way over...dumb. On the other hand, I can now reliably disassemble and reassemble the unit in less than an hour each way. An hour to check and clean the battery and voila. No more error codes. I posted a copy of my bus bar before and after cleaning, it seems this is also a common problem, and not just bad cells.
1 point
-
That's some whack John, what state was the mini in! I was hit in the summer by a Pug 206 and was surprised how much damage that did at low speed. Hope you get sorted.1 point
-
Try to keep it off the windows, difficult I know, but it's a sod to remove.1 point
-
it wont throw up any errors using the leds ,i think the canbus system monitors the systems that are required and not a supplementary lighting circuit for convienience that has no importance as such1 point
-
all sorted now, silly me had not tightened the locking wheel nut on the offside front, it had come loose and was rattling inside the wheel trim, oops, all the other nuts where tight though silly me1 point
-
hefty clout that,i should imagine thats buckled the floorpan somewhere,hope you find another,best of luck1 point
-
Gents . . . it's 2015. We're talking about a "Premium SUV" from one of the world's alleged best car makers. And I am suposed to jump-start my car like its a 1965 Ford Anglia - or ask the pvalet-parking company to jump start it so they can bring it to the airport? No . . . they have to do better than that. Until they fix this, I have to go back to gas-guzzeling non-hybrids. I have not yet tried the new Mitsubishi which looks as good as the new Grand Cherokee. Either way, the Lexus sadly has to go. Unreliability in a £50K car is not acceptible.1 point
-
Well my RX300 has done 103,000 miles and the front shocks where we'll and truly mullered when I took them off, there was no pressure to the Pistons. It will all depend on where and how a car has been driven I guess, but it feels much better now I have new shocks.1 point
-
The bounce test for shock absorbers is very hard to do on modern cars and especially so with the RX being a big heavy car. I noticed on the lexus website front shock replacement cost was £400, but I wasn't sure if that was for just one side, which I think it probably is. Still in the end I bought new shocks, springs, strut mounts and bearings for both side for £300 and have just finished fitting them myself. Only been on a short drive since, but car feels transformed, especially as no more dipping when braking hard. Heavy components, but one of easiest cars I have worked on, quality of construction was obvious.1 point