Leaderboard


Popular Content
Showing content with the highest reputation on 10/26/2015 in all areas
-
2 points
-
Pete Select the climate page on the screen, press the circulation button for 5 seconds and the smog detector page appears on the screen. It is factory set at midway if you need better, say in traffic city centre, move it up.2 points
-
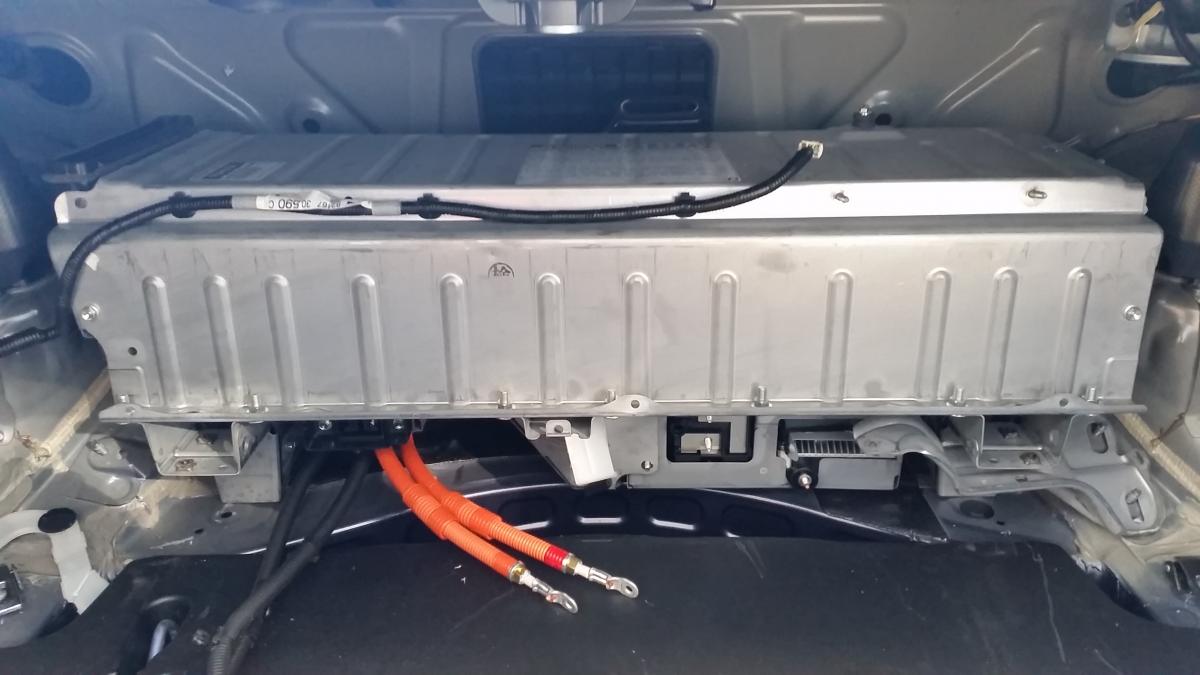
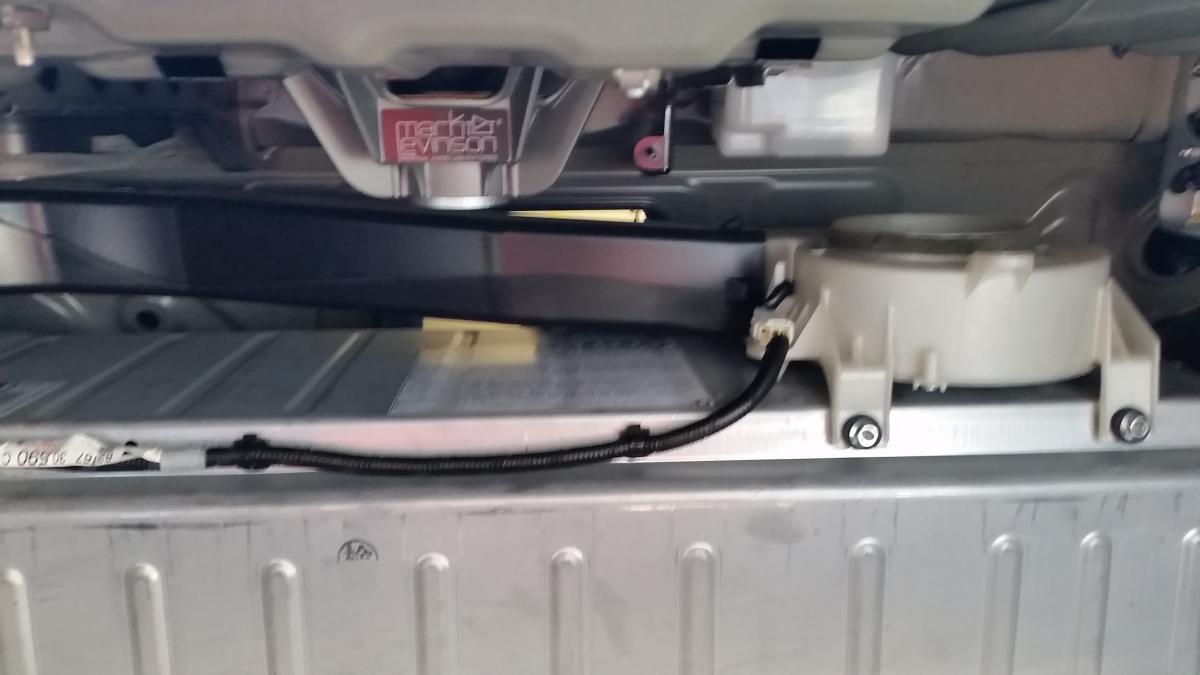
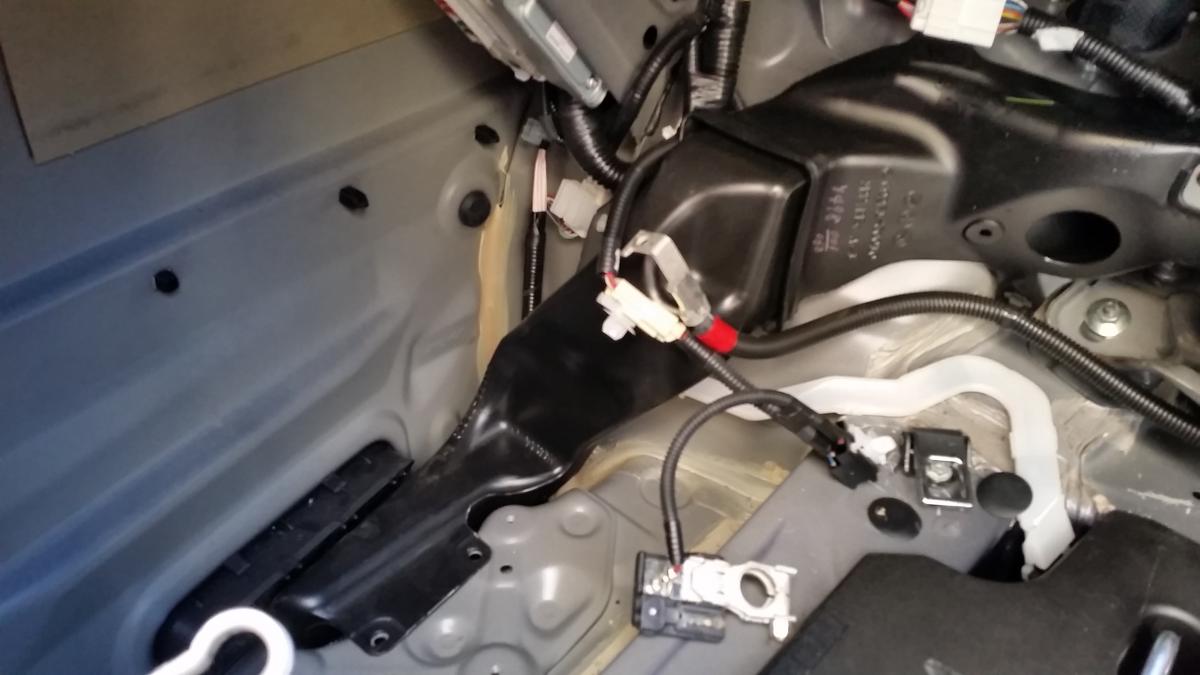
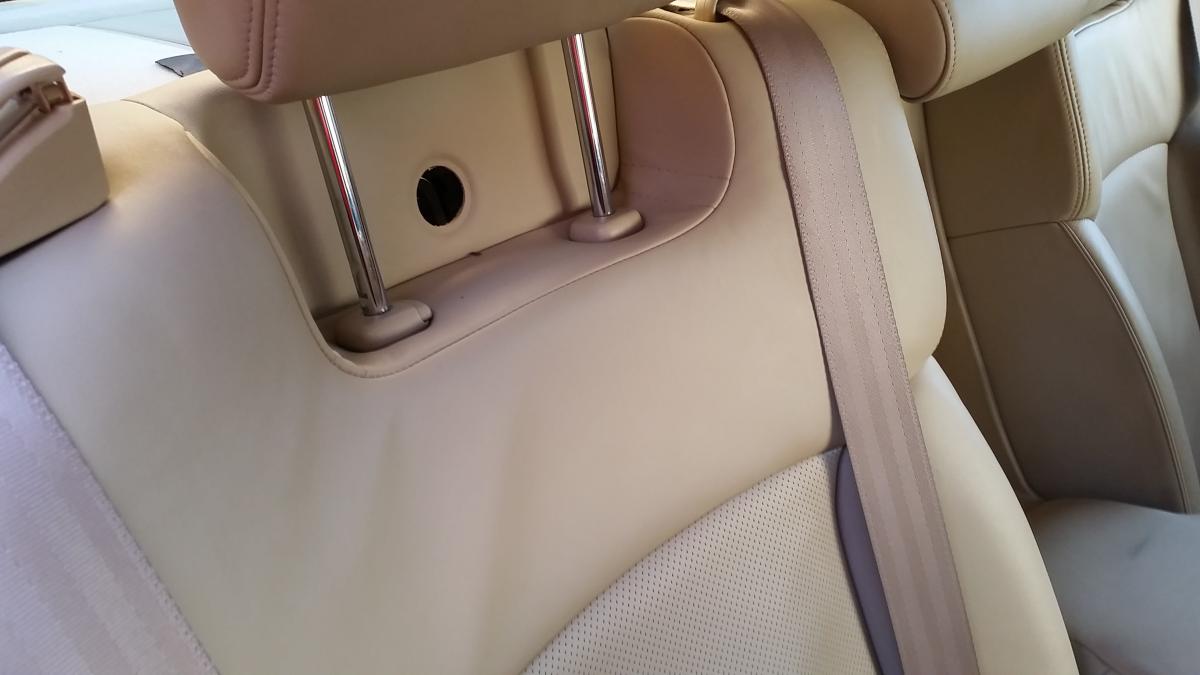
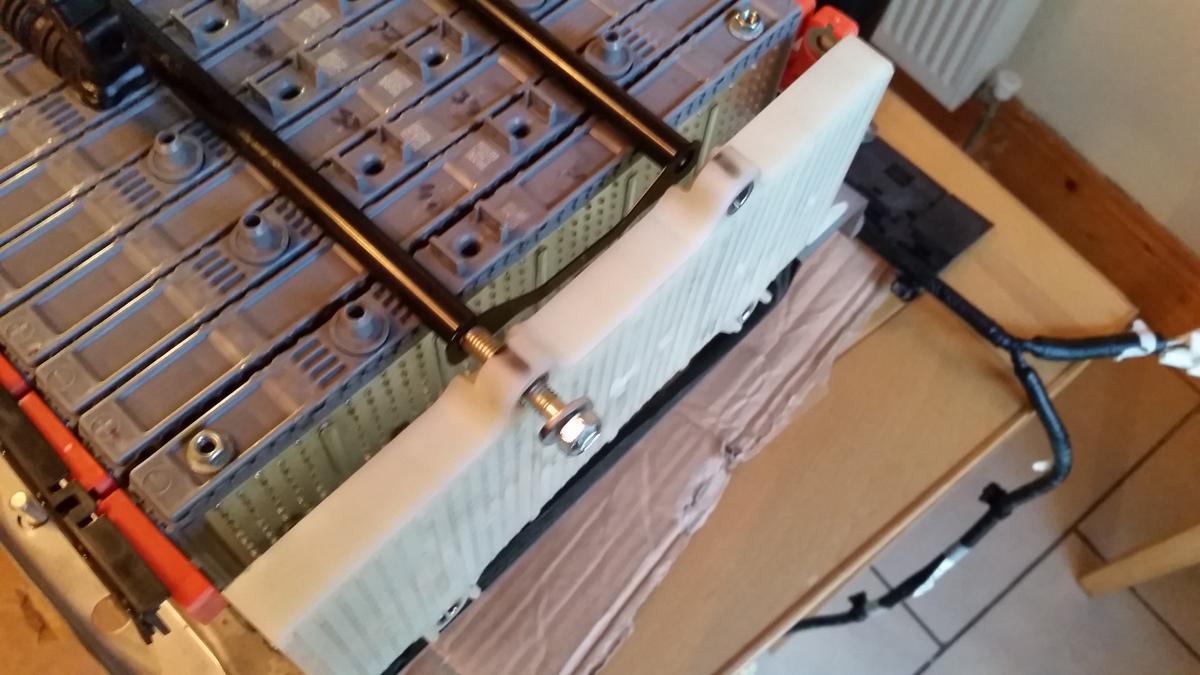
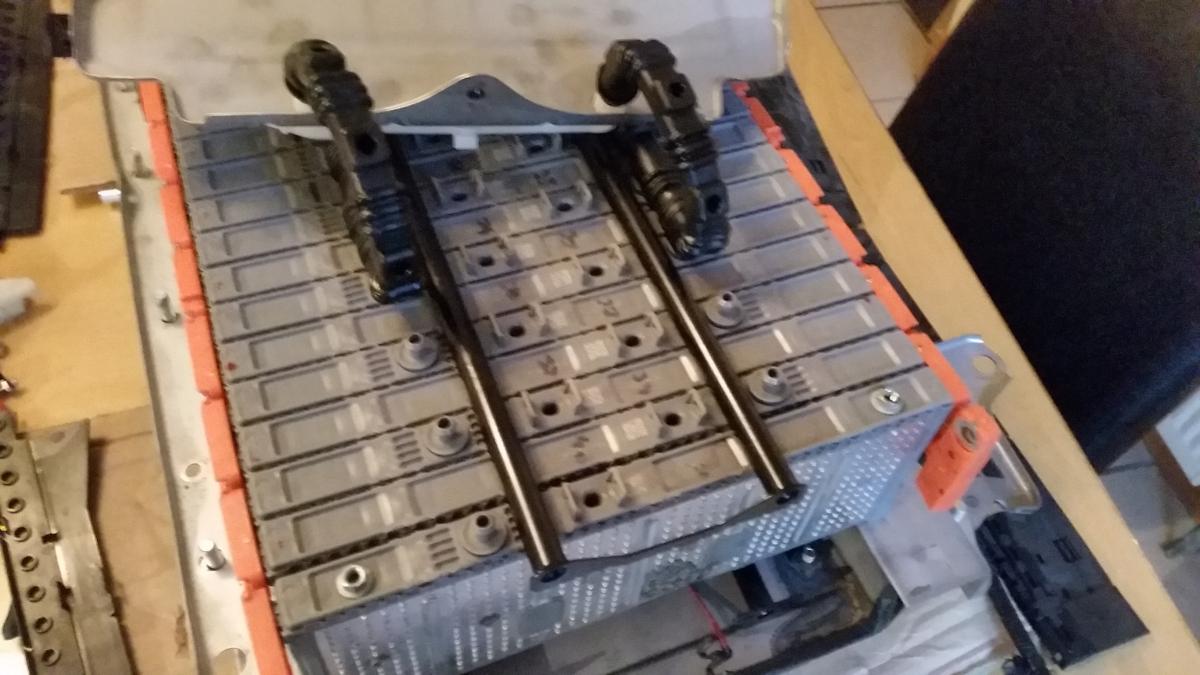
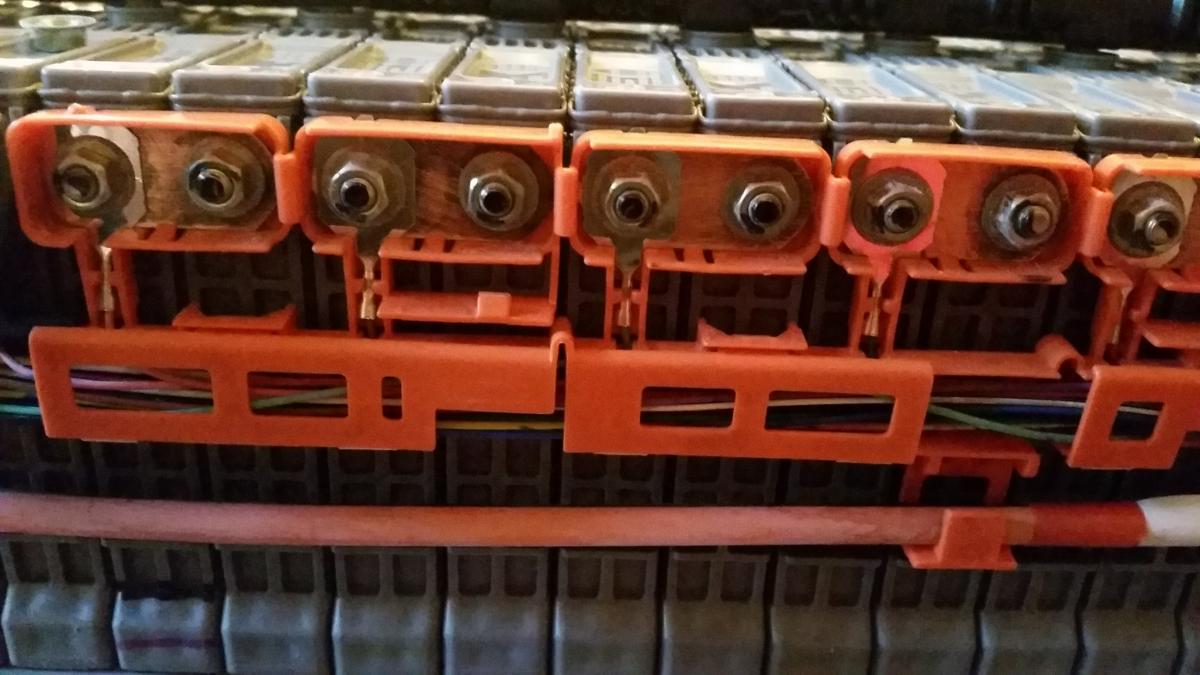
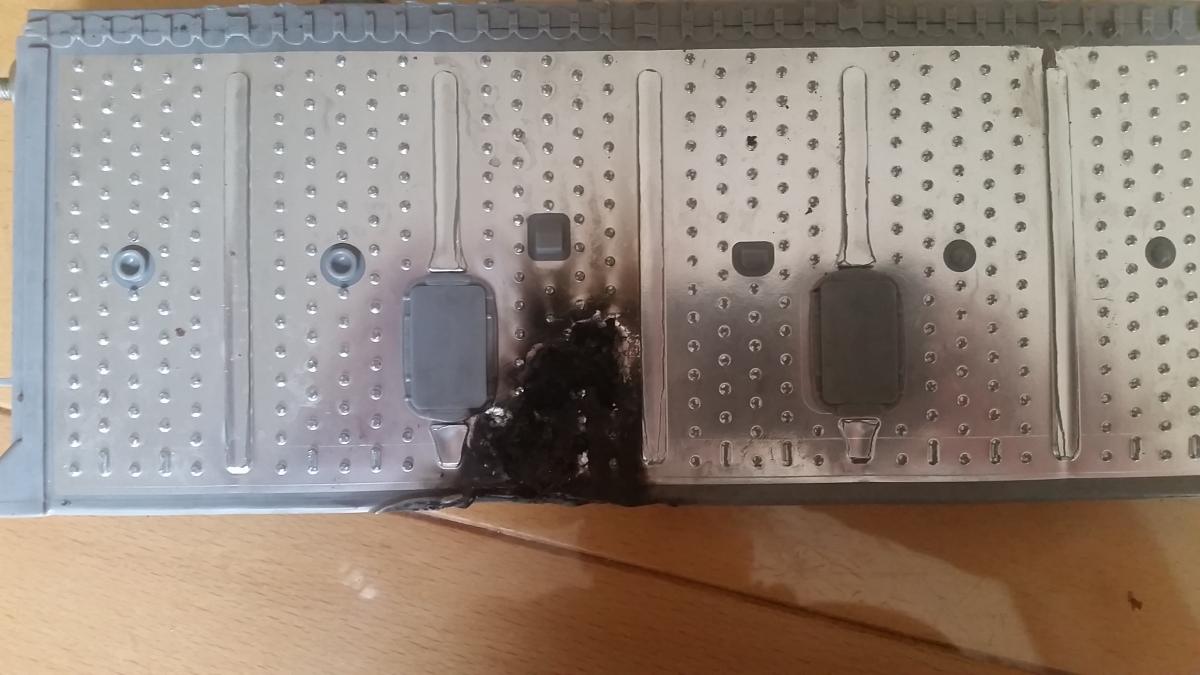
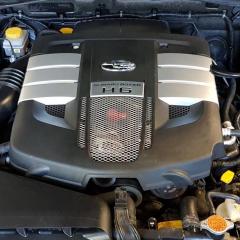
I got the dreaded Check Hybrid, Check VSC and Check EBC warning lights. Fault code readings P0A80 Hybrid and P3017 (battery cell block number 7 fault). Having gotten a quote for around €6000 to fix it, I decided to do it myself. I ordered a battery cell on ebay for €45.00 delivered to Ireland. Tools needed: Socket set with 8mm, 10mm and 12mm. Flat head screwdriver, long nose pliers and a multi meter to read voltage. (You may also need a slow trickle 12v battery charger, I'll explain later). Time needed: about 4 hours, more if your connections a very dirty. 1: Remove ALL carpeted paneling from the boot (trunk if you're in the US). This is done by inserting the flathead screwdriver into the black plastic rivets and popping them out. Remove the boot flooring too, just leave the tool tray in place. You will need the 10mm socket to remove the rear boot floor luggage anchor points once you've popped open their plastic covers. The upper hanging points need to be squeezed to remove. Disconnect the power supply to the light on the right hand panel. 2: Remove the orange circuit breaker on the HV battery by sliding to the right and then pulling towards you. 3: Remove the black air duct on the bottom of the HV battery by popping the 2 black plastic rivets. 4: Unplug the power supply to the white cooling fan on the upper right of the HV battery and remove the 2 nuts holding on the fan. This should allow the 2 upper black ducting to move sufficiently to be able to remove them. 5: Open the panel covering the 2 Orange Cables (3 x 8mm nuts) and disconnect the 2 orange cables, (you can tape them up with electrical tape if you so wish). Pull back the rubber cover on the Black cable and unbolt that too. You should now look something like this: 6: Disconnect the cable running from the HV battery to the 12v lead battery. Continue to remove the 12v battery by disconnecting the +ive and -ive terminals and the white connector plugs attaching it the the HV battery. Also need to take off the temp sensor and the vent hose on the 12v battery. Remove the 12v battery support bracket and the battery tray itself. 7: Remove the last 2 bits of black ducting that was clamped by the 12v battery tray. 8: Remove the white tubing on the right of the HV battery. 9: Remove the 4 12mm nuts holding the base of the HV battery in place, 2 on each side. 10: You need to unbolt the nuts hidden behind the back seat headrests. 11: Pull the rear seats forward enough to remove the large plastic panel in the center between the rear seats and the boot wall, its hidden behind the fireproofing fabric. Use this panel cover to hold the seats away from the boot wall by wedging it between seats and wall. 12: Pull back the fireproofing to reveal 2 smaller access panels covered by a black sticky rubber square. Now remove the 3 12mm nuts holding the HV battery to the boot wall. 13: Now the tricky bit, lift the HV battery over the bolts in the boot and slide it out. (I recommend putting cardboard on the tool tray to avoid scratching when sliding the HV battery). If you are strong enough you can lift the HV battery out on your own, if not get help, it weighs about 50 kilos. Your boot should now look like this with the access panels behind the seats visible: You should also have this, I placed mine on some cardboard on my kitchen table: 14: Take off the HV battery cover by opening all the 10mm nuts, and a few 8mm. unclip the black cable while taking off the three cover panels. 15: Unclip the black plastic covering on both sides of the HV battery to reveal the 8mm connector nuts in the orange casing. 16: Number the cells 1 to 40 using a permanent marker. Use your multi meter to get a reading across each of the 40 individual cells, i.e. one lead on the +ive terminal of the cell and the other on the -ive, and record your findings, as you can see cell 28 was low for me: 17: Pull back the rubber vent tubing running along the top of the HV battery until to get beyond your bad cell/cells. 18: Remove the white end panel holding the cells in place: 19: Remove the 80 x 8mm nuts in the orange casing and clean if necessary. I used bleach and some sand paper to clean all nuts a copper plates, if you're gonna do it - do it right). 20: Remove the 8mm nuts holding each cell in place underneath until you reach your bad cell (this will probably involve removing the support leg and the converter assembly unit below the HV battery: 21: Good cells look like this Bad ones like this: 22: Start replacing your cells back into the HV battery, it doesn't matter what order and you can't mess up polarity as it only screws in on one side. I put my new cell in last in case it was a dud. (If your new cell is of a lower or higher voltage use a slow trickle 12v battery charger to get it to the same voltage as the other cells. 23: WATCH THE TEMP SENSORS UNDER THE BATTERY CELLS (3 of them), MAKE SURE YOU CLIP THEM ON AS YOU GO. See the black plastic clip peeping out here: 24: That's it you're done, just reverse everything to put in back in. Mind your back and don't bother touching cell 1 and 40 at the same time if you have the orange connector put back on. Good Luck!
 1 point
 -
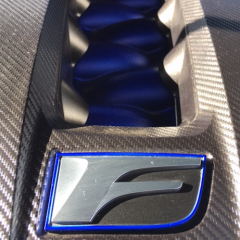
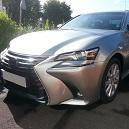
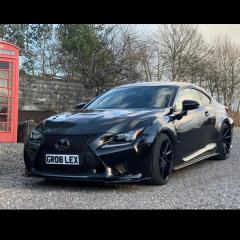
I have one, had it about 2 months , 1500 miles There is also a forum section on them here http://www.lexusownersclub.co.uk/forum/forum/181-lexus-rc-owners-club-rc-200t-rc-300h-rc-f-club/ It's fast, loud and stunning interior, the outside looks divide opinion (some love it, others suggest it's a bit ugly) I know it doesn't matter to you, but the rear seats are really useful (compared to a 911). It is however a a heavy car, so much more muscle car that "sports car" (think BMW M6, F-type jag, Merc SL/CL etc) (I've come from a series of 911's, NSX, GTIs and a couple of RS4 avants) It definitely as fast any any of that much (perhaps faster) but perhaps not A to B On a track I imagine it would be fun, although it can be just a little dim witted. If I had to drive to south of France , I would take it in a heart beat, on a special Sunday morning blast with no kids...an older 911 or even something like a F-type convertible might be better. Mine will be for sale soon (I swap out every 4 or so months) it's already on the Hatfield web site (blue one). My suggestion is try and get an extended test drive in one, it's truly is beautifully crafted (and full of tech).1 point
-
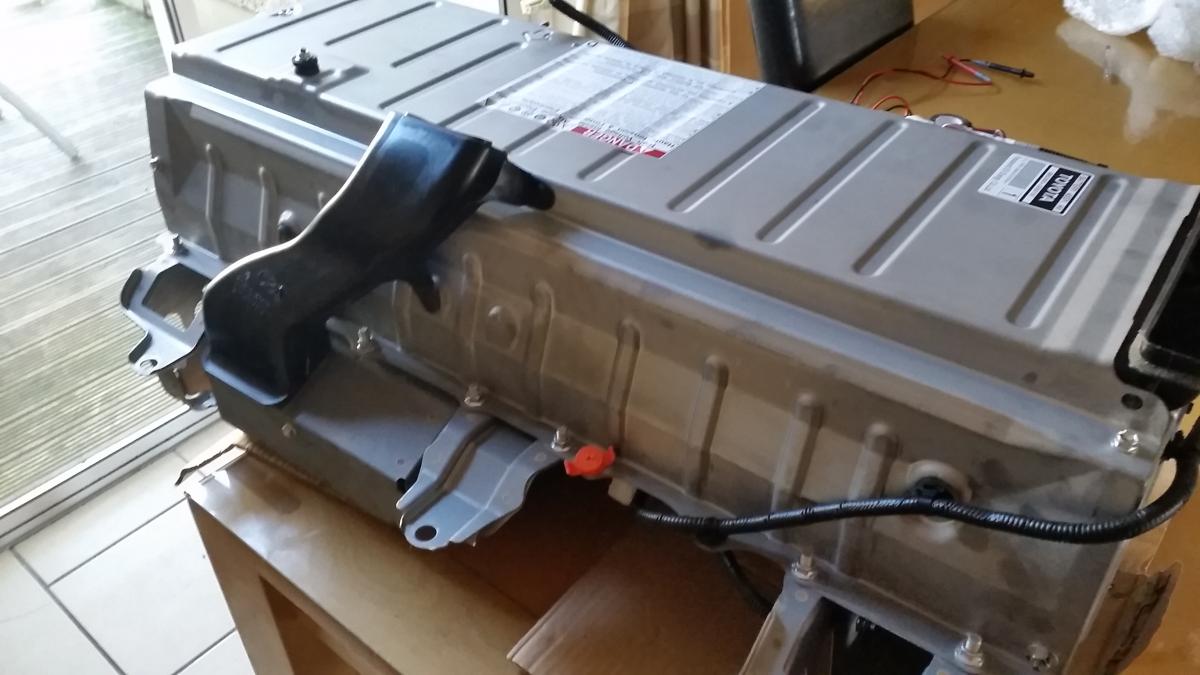
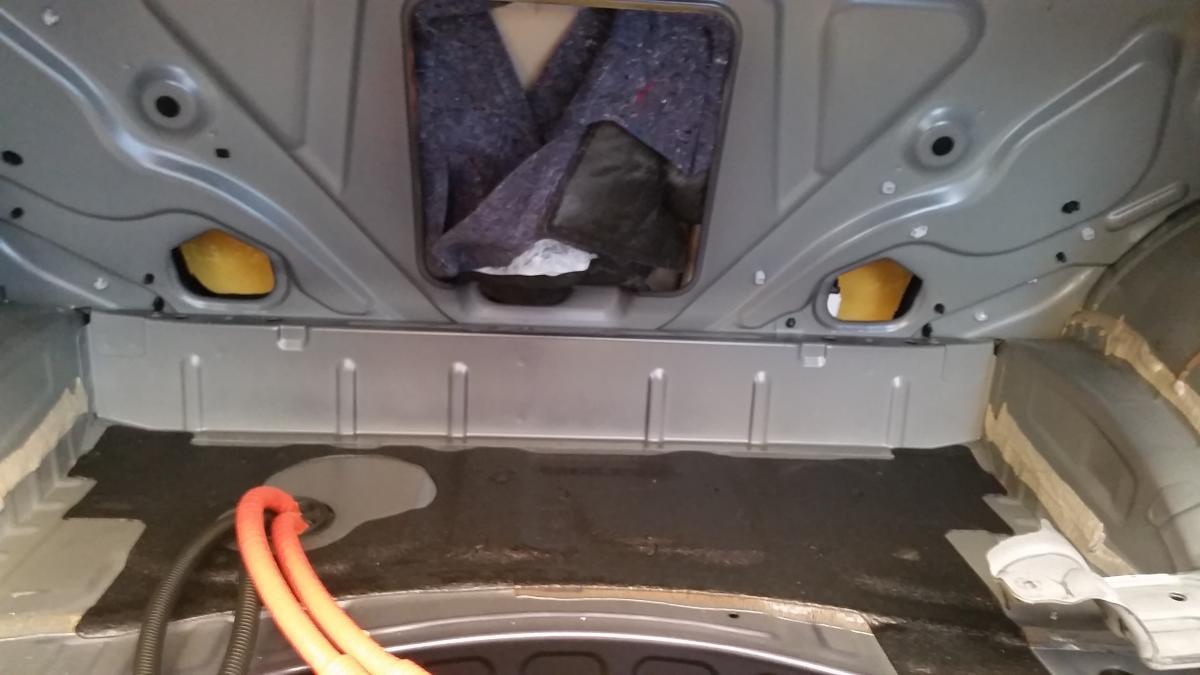
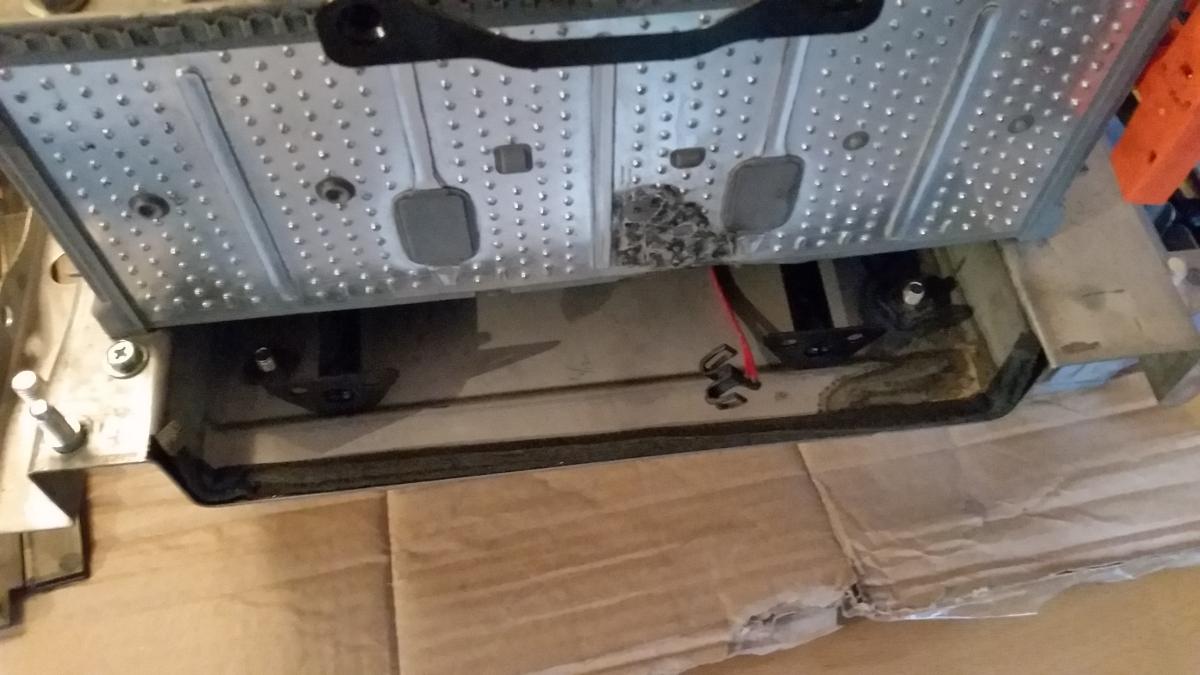
Hi!. I'm a new Ct200H owner (5months) and I had to use the tyre repair kit yesterday. Initially I was amazed that within 10mins I was up and running and on my way home. Just plug in the kit, break the seal, connect the hose and switch it on. You don't need to jack up your car so you barely get your hands dirty. 24 hours later and I am beginning to see what can be a simple easy task result in some huge headaches: It's only a temp fix. You're supposedly limited to 55mph and 50miles. I'm already up to 30miles and I don't have time to visit a tyre supplier until Thursday. So I'm on public transport till then. I don't really want to drive and have the sealant fail on me. Maybe someone here can tell me that they have driven for longer after using the TRK. I too have heard of a lot of fitters will bin your tyre after filling it with goo/sealant.This wouldn't be an issue except the the sealant is costing me £109 to replace from Lexus (or £180 for the whole unit!) For the cost of 2/3 budget tyres I get a small bottle of sealant which can only fix only tyre ... temporarily. The TRK can't handle sidewall or huge lacerations in the tyre. My local Lexus dealer also is being a bit shady about what tyres they are fitting for me. I finally get through to someone who can quote me a figure for new tyres and I get £119 per tyre. I managed to get it down to the correct size and now it's only £62 per tyre. So this one puncture will cost me £171 min. I'm still not decided on which is better. £300 for a space saver/full size tyre (and all the confidence you get with that), boot adapter to store it, loss of boot space and cost of repairs to tyre OR the ease of repairing your own tire and then £170 per puncture for a new tyre.1 point
-
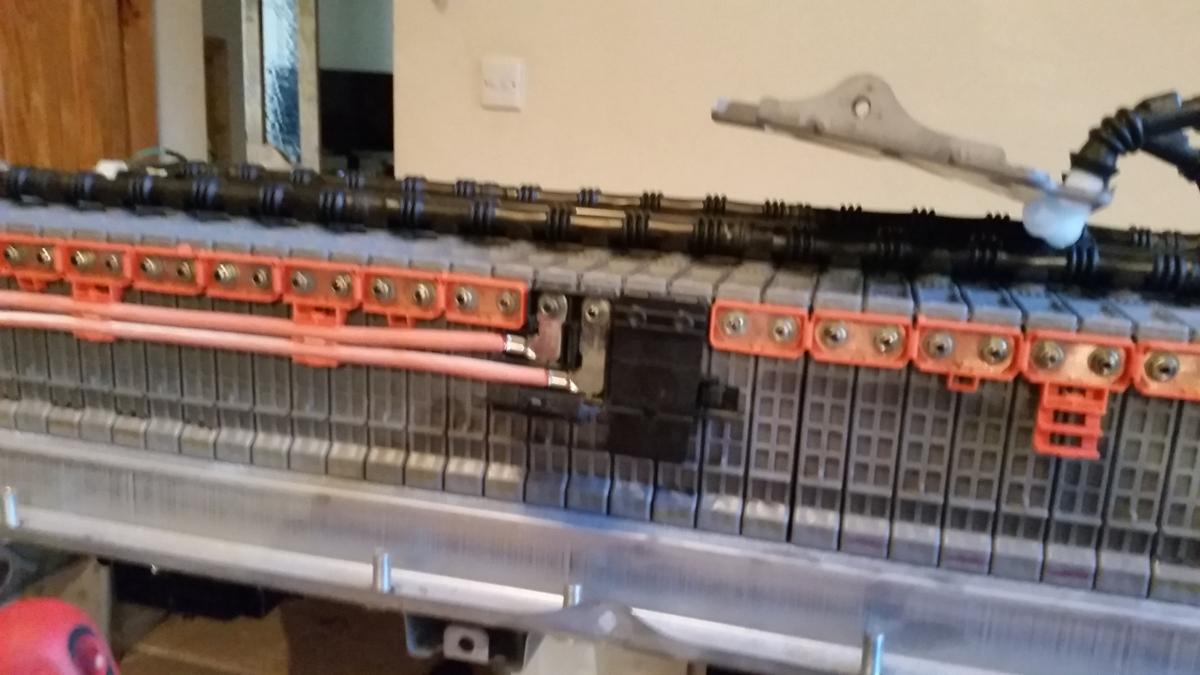
Welcome to the club Rich1 point
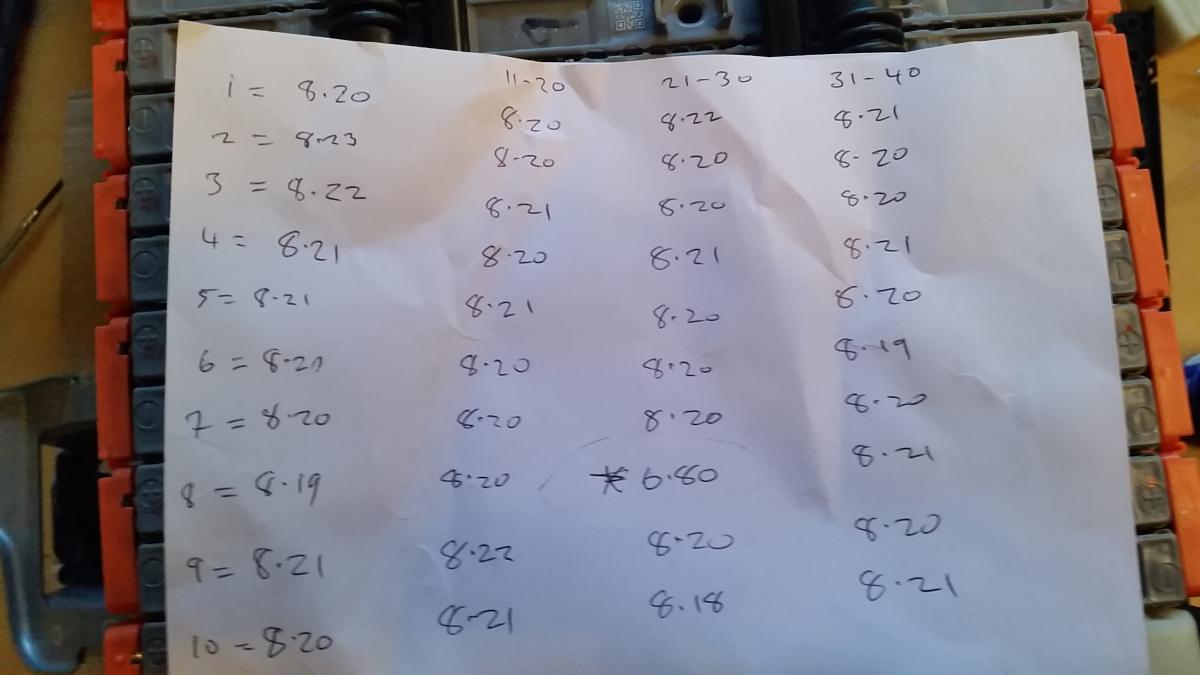
-
You must feel like King of the Road driving that. Bet it's not too bad driving that big lorry as well.1 point
-
hi have a read here about prius cells compatibility: http://www.lexusownersclub.co.uk/forum/topic/102648-lexus-gs450h-2006-re-hydrating-hybrid-battery-cells/1 point
-
Those 2 toys must've been fun! Clean too :)1 point
-
are these 18650 batteries connected up in series? very good tear down and fix btw.1 point
-
MOT passed with flying colours, managed to get a good look underneath to and it's like new. A very happy man, I will get some pictures posted sometime this week 😀1 point
-
i am not saying have it as a permanent repair but how often have you had to change a wheel over the last few years, a space saver is only a get you home measure just like the kit but the kit will take up less space and cost you far less . i only mentioned a timescale to demonstrate how well the kit seals. these kits are sold with motorbikes in mind except for a bike you have a co2 cannister aswell for re inflation so they must have a proven track record and be regarded as safe.1 point
-
http://www.ebay.co.uk/itm/Car-Van-Tyre-Tire-Puncture-Repair-Kit-With-5-Strips-New-High-Quality-Tools-/351418788513?hash=item51d2312aa1 i have used this type of repair in our hybrid jazz and it has worked really well,i repaired the tyre using this kit approximately 2 months ago and the tyre hasn't lost any air. it takes about 5 minutes to complete the repair all you need is a compressor / pump to re inflate the tyre. the other benefit is that it takes up next to no space so you still have your under storage.1 point
-
You can always leave the kids/mother in law by the side of the road and put the wheel on their seat.1 point
-
Read up on the car first - any car can go wrong whether its bought from a garage or dealer etc but you reduce the risk if you do a bit of homework first and this forum has a lot of topics on what to look for Both options of buying have their good and bad points What to out look for: Seized callipers (rears are more common than the fronts) White crust around the coolant expansion tank Exhaust corrosion All the electrics working Mileage can be considered a factor - if its below 60k then prepare yourself for a good chunk of money to go towards a spark plug change at 60k Check tyre rotation indicators on tyre walls (garages may swap these around to hide uneven wear) an easy spot. Check radio / DVD is fully working A quick check on the cars health can be done if you take along an ODB reader and plug in during your test drive (if they let you drive it on your own) it will give you an indication of any previous faults if they have not reset them. Also, I am always wary of a newly cleaned engine bay as it masks any evidence of leaks etc. Don't let the above put you off - these are reliable cars but do your homework on them first to know what to look for.1 point
-
My work commute is 1 mile (each way). Half of that is in a residential 30mph zone, the other half on 60mph roads. I try and get the EV mode on for the residential bits, but find that I disable the EV mode by pressing the accelerator pedal 1mm too far (should it really be that hard to keep in EV mode ???). I've worked it out that at 31mpg, the NX is costing just under 15p to do 1 mile (at £1p per liter). So that makes my daily commute, a total cost of about 29p a day, £1.46 a week, £5.86 a month or £70.30 a year. Even if I could get 55mpg, that changes to 17p a day, 83p a week, £3.30 a month or £39.62 a year. I don't think fuel economy is a concern for me lol My biggest driver for getting the NX was getting my company car tax bill down. My previous car (BMW 330d) was reducing my tax allowance by 10k ! I'm hoping the NX will be a little less than that1 point
-
It turns out it uses a different engine. It seems the IS engine isn't designed to be fitted transversely in the engine bay. The NX is using the same engine as the front wheel drive ES300h in the states.1 point
-
In the snow and ice, I just try to avoid anything other than the smoothest application of the either the stop or go pedals and also the steering wheel. Traction is the key at all times. The 4x4 crowd make me smile sometimes they know they have 4 wheel drive but forget that we all have 4 wheel brakes. Four wheel drive helps you to go but is only of limited use in helping you to stop. M+S tyres seemed to help in the distant past, the modern day winter tyres definitely help with traction due to better coefficient of friction. I have never been able to afford the expense of winter tyres; you pay to put them on and you pay to take them off, they wear out much quicker and are only actually needed only a small percentage of the time. If I had enough money to spare, I would use them, if I had enough money , I would just own season dedicated vehicles...... Snowcat anyone?1 point
-
If your averaging 85 don't get a hybrid.1 point
-
I agree with you, a car "should" keep its looks for more than 12 months. Unfortunately, the way the brakes are prepared on these cars by Lexus/Toyota falls short of that expectation. Brakes work in a harsh operating environment: brake dust, grime, water, salt, cycles of hot and cold. The calipers on an RX just aren't able to keep their cosmetic looks, and the dealers themselves destroy the plating through using aggressive alloy wheel cleaners. Other premium brands like Audi make a much better job of painting the calipers so they are alot more durable. It niggles me too and I have thought about re-plating the calipers, without taking them off the car, using a paint on electroplating kit from Frost Automotive, the classic car care supplies people. I got a nasty surprise on my RX 300 when looking inside the passenger seat. At 2 years, the internal frame was oxidised and rusty all over. My 2007 RX 350 has rust on the frame under the back seats. I noticed this when vacuuming the car interior out as my 2 year old can make some mess. I had to retrieve some sweet papers and crisps from under the seat, and had a shock when I looked under the back seat using a torch to see all of the oxidation. Now I don't expect THAT to happen on a premium car, always garaged, and not 2 years old. Very disappointing, and I will probably take that up with a dealer before the warranty expires. The problem in my experience is that many Lexus technicians are still not sympathetic when working on someone else's car and that they can cause more damage, marks, scratches etc in the process of 'fixing' something. In the case of the back seat frame, I do not know whether that means a complete back seat or not, but I can imagine that the paintwork in the door shuts would get scraped if they had to exchange the seat. It sucks.1 point
-
The rust does nothing for the appearance of the vehicle but thanks for your comments. As far as I am aware, the 'as new' finish on brake calipers is a result of passivate plating. Unfortunately, this comes off in time - but the worst thing is alloy wheel cleaners! They absolutely strip the plating off leaving them looking like untreated metal, which essentially they then are. Although I don't like the 'rusty' look, I would find it hard to hold Lexus responsible for this in say the same way as alloy wheels corroding. I think I would feel a little sheepish going into a dealer and asking them to put my car on the ramp, strip off the wheels, the brakes, replace calipers (and hence also the pads) with new ones, bleed the brake hydraulic system - when within 2 years, it will have gone like that again. If you were to go through all that trouble, I would ask to collect the new calipers from the dealer and have them professionally enamelled up somwhere before being fitted. In that way, their durability of appearance will be greatly enhanced and much more resistant to acidic alloy wheel cleaners that they use when they valet a car at service time.1 point
-
There are many factors involved here, but bearing in mind that even on the hottest day in the UK, once the car interior has cooled down, the aircon compressor will run pretty infrequently (When compared to say somewhere like Dubai, where the ac compressor will run constantly) , cycling on and off as needed. Although the use of the compressor will use a little more fuel you must also consider that the cycling of the compressor will cause accelerated wear of the clutch plate and stress on other components, repair of which you may find yourself paying else where... There is no right and wrong answer here, so do as it suits you.... Use of the ac will help dry the air coming into the car from outside, use of the recirc to my mind is pointless as it is only really useful in really hot climates, all it does in this country is cause your cars ventilation system to become smelly and cause the windows of cars without a working ac system to mist up.... Next time you are driving in the rain, see how many cars there are with badly fogged up window... Yep, they are the numpties who cannot work their ventilation system. When washing your cars at this time of year, don't forget to give your ac condenser a good flushing with clean water from your hose as road salt is the main cause of corrosion on alloy condensers... So keep 'em clean1 point
-
make sure to put the air to fresh and not recirc. you should also use the aircon each month to prevent the seals drying out.1 point
-
Halfords night before deicer is an awful product that is actualy very very dangerous in winter.. I used it a couple of times last winter and yes.. it does reduce the amount of ice on the screen.. But.... Its a silicone like substance that on your side windows and front gives a foggy/blury view into the world... and once its been on there its a nightmare to remove.. Tried over 4 different brands of cleaner before using an industrial panel wipe to remove it! each time you put the window down it would smear and recoat the glass! Luckily at the times this happend i was carrying my "emergency box" which is filled with everyhing from 1st aid stuff to gloves, foil blankets... and glass cleaner etc.. So was enough to get me home at night.. NOT RECOMENDED AT ALL.... Even complained to halfrauds1 point
-
I have somthing called my partner and when my lex is iced over i send her out to talk the ice off the car, it doesnt stand a chance with all the hot air she puts out1 point
-
The stuff you spray on the night before is rubbish, I've got 2 cans of it. It makes a mess and you have to clear it off the next morning, it goes everywhere1 point
-
I'd just start the car, air con on hot to screen, and side blowers onto front side windows, heated rear screen on, then go do a bit of scraping, by the time you have cleared the front screen, the engine temperature will be nicely up, then sort out the sat nav for the journey, pick some nice music, connect the bluetooth etc...... After this has all been done, screens are clear, tunes are on, sat-nav set....time to go :)1 point
-
Which series RX do you have? SNOW mode, as people have said, alters the transmission shift pattern. Shifts up earlier, shifts down later etc to prevent wheelspin etc. If you have a vehicle equiped with an electronic throttle (series II only, not series I) then it also makes the throttle less sensitive.1 point