Do Not Sell My Personal Information Jump to content


  • Join The Club

    Join the Lexus Owners Club and be part of the Community. It's FREE!


Recommended Posts

Posted

Slightly out of sequence, but here's R&R of the inner tie rods and track rod ends. I assume the parts on the car were original from manufacture. Inner tie rod ball joints still good - but rust had got to the adjusting thread and lock-nut so it was all seized together. Track rod ends weren't original I don't think, but were knackered anyway; boots weren't original and joints were quite loose, if not super loose.

I used a 32mm open ended viscous-coupling spanner to get the tie rods off the rack. Aftermarket tie rods aren't a straight match, so rods adjusted by eye - and it'll go for an alignment once all the work is done:

20190105_221422_zpsgonmbv4g.jpg

20190105_232313_zpsd4egrcnx.jpg

Getting the inner tie rod end off the rack was a right pain owing to orientation of the flats for the spanner. I clobbered my thumb hard doing it - and didn't realise how much it had bled until I took my glove off - ouch/yuck!

Doing this is mostly self explanatory, but a good DIY write up is here. Reading these American DIYs always makes me envious of how little rust they seem to have to deal with!


  • Like 1
Posted

That, sir, is ____ing gorgeous. My favourite colour! The tailpipes aren't my thing, but that is a beauty. 

Hope you don't mind the off-topic soujourn in to BMW land... This was my dad's. 1996 in Calypso red, but with the 4.4 and 5-speed:

3cs.JPG

4cs.JPG

7s.JPG

Rear comfort seat package on the LWB was great - recline and 4-way lumbar, and so much legroom. 

I sold the car in summer of 2017 after he died, these are the pictures from after I'd prepped it for sale. 


  • Like 1
Posted
6 minutes ago, i-s said:

That, sir, is ____ing gorgeous. My favourite colour! The tailpipes aren't my thing, but that is a beauty. 

Hope you don't mind the off-topic soujourn in to BMW land... This was my dad's. 1996 in Calypso red, but with the 4.4 and 5-speed:

3cs.JPG

4cs.JPG

7s.JPG

Rear comfort seat package on the LWB was great - recline and 4-way lumbar, and so much legroom. 

I sold the car in summer of 2017 after he died, these are the pictures from after I'd prepped it for sale. 


lovely car - must have been sad to part with it - for many reasons. I hope it went to someone who will keep it in good condition and not mess with it; some cars should be kept as original as it gets; others...not so!


Posted

Sadly no... I'll PM you the story if you're interested. 

Posted

so the front end is now looking like this (with exception of new inner tie rods, boots and track rod ends:

20190105_220802_zpsyyq4fhx1.jpg

20190105_220747_zpsujcswqkg.jpg

Final front end work items:

  • Renew steering rack bushes
  • Renew ARB bushes - remove ARB to scrub/repaint


You'll notice that I've installed some Tein Street Basis Z coilovers! More on those in a bit.

  • Like 1
Posted

So, on to the back-end. This is where things got interesting.

Straight off the bat, I knew I'd be doing the following:

  • R&R of shocks/springs
  • Rear upper/lower track control arms
  • rear discs/pads & parking brake

Stripped old arms off - some already changed by PO - but all quite rotten/knackered:

IMG_20181113_204247_zpseeuti4wk.jpg

The lower arm came, as with the front banana arm, is made by Mevotech and came from the USA in a shipment from Rock Auto; the rear upper arms are First Line items.

Rear ARB bushes (new vs. old) - no wonder the ARB was bent when it came off the car:

IMG_20181114_173000_zpsjkw1hrjt.jpg

Rear shocks coming off, original from manufacture and one of the rear springs had broken right by the lower spring perch - PO and MOT testers probably never noticed:

IMG_20181113_174402_zps0ta6cvz7.jpg

I'll need to re-use the top shock tower for the new coilovers. the old springs/shocks will be kept (just in case) and mounting hardware has been renewed:

IMG_20181113_203940_zpsre5jbwzu.jpg

The old hardware was pretty good, apart from the large O shaped section at the bottom of the picture - exposed to elements for best part of 17 years. For the sake of a couple of quid for a Blue-print kit off eBay, I just renewed the lot:

IMG_20181128_222347_zpsyabh10bt.jpg

Whilst the back was pulled apart, I went at the rear sills again. This time I went up and down with a wire wheel, took everything back to bare metal, kurust'ed, zinc-primed then lots of bodyshop black, to make good on the job I did earlier in the year. This is to ensure the sills and the pinch welds stay good for as long as possible. I also treated the cavities with Dynax - it's a spray cavity wax that comes in a big can and with a wand that you can shove pretty much anywhere:

IMG_20181109_224525_zpsfeu03qa0.jpg

Lots of easily accessible ports on the sill that you can put the wand down, I've used this stuff on my Land Rover Discovery 3 as well, let's see how well things hold up as a result. You can get it off eBay from Opie Oils.


Posted

Here's where things got interesting.

I knew when driving the car that the parking brake wasn't working. Minimal response from only one side of the car - meant (in my mind) that the shoes were likely ruined/poorly adjusted. I stripped it all down and pulled it off the hub, having already purchased new shoes and mounting hardware.

With the disc/caliper off:

IMG_20181104_111138_zps5pm2dbyg.jpg

Doesn't look too bad, maybe it just needs new shoes/adjustment. Stripping the shoes/hardware off, things took a turn for the worse:

IMG_20181104_114029_zpsw3fusgr2.jpg

the parking brake backing plates have rotted through to the knuckle behind - on both sides! There should be a little bracket in the lower portion of the backing plate, that helps to align the star adjuster and one of the tension springs - it wasn't there - nor was any of the metal that it should be spot welded to!

It was at this point that I also discovered that both parking cables were broken, and one was completley seized up. They had both separated at the point the cable connects with with the backing plate:

IMG_20181105_204941_zpsvl6uwlb5.jpg

Find out how this was solved...in the next post!

  • Like 1
  • 2 weeks later...
Posted

The solution to the corrosion on the rear knuckles? I simply purchsed parts from a 2005 car that was broken for spares ... in Texas! The parts & shipping were £280 - almost exactly what lexus wanted for one park brake backing plate alone!

For that, I got 2x complete rust-free rear knuckles with 60k miles less distance on the rear bearings and what appear to be recently replaced rear ball joints pressed in to the knuckles.

Condition on arrival:


20181214_204034_zpsou6le65k.jpg

Backing plate edges got a bit clobbered during shipping - but bent back in to shape easily. There's not a spot of rust on the fittings and you can see the bracket in place under the parking brake cable.

The knuckles are easily changed presuming your driveshafts cooperate. I had to use a hub puller on one side to get the driveshaft out the hub - other side cooperated nicely. I did have to use a picke fork on the ball joints on the top arms up in the wheel arch - luckily I had spare boots to put back on the arms, and those upper arm ball joints are still good - so I just cleaned them out of old grease and packed them with new lithium grease. Mounted to the car with a fresh lick of paint, these now really look the part:

20181215_222926_zps0gmx4nna.jpg

20181216_180020_zpsjdtjhqzs.jpg

Yes - I know I won't see the rear face of the plates behind the discs - but to know they're rust free and clean - as if off a southern american state car - that's pretty cool!

I've replaced the parking brake cables for new items - but the seller did send their parking brake cables - and they look in very good condition - given the atmosphere they were in of course.

If anyone needs a very good condition set of used park brake cables, you can have the ones that were sent from USA - free of charge; just cover the shipping - please PM me.

My new items were, again, First Line items:

IMG_20181109_195806_zpshaarcocw.jpg

Fitting the park brake cables was self explanatory - but not much fun, as you're directly under the car to get at the connections at the driver's end so to speak. This would be fine if the car was on a lift, but under jacks and jack stands - it was uncomfortable... I was glad when it was done shall we say!

  • Like 1
  • 5 weeks later...
Posted

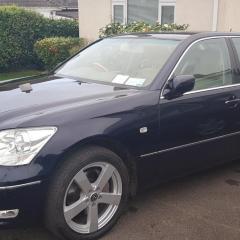
Just had to post a couple of pictures to show present state of the car - clearly quite a jump on from last post, but lots has taken place and I need to find the time to update this thread!4c66d33dfe6934af6c327fff257ade3e.jpg

Sent from my SM-N960F using Tapatalk

  • Like 2
Posted

And some more pics - with kind permission from Lexus Liverpool for use of the forecourt.6c613af400e4a0b2b9c4571927f127e6.jpg28a0e085d3e1a7401a36cb118559429c.jpg7fba52e5434727c4cbfcd24da49cda27.jpg

Sent from my SM-N960F using Tapatalk

  • Like 2

Posted

I've inherited a car with Airbag light ( and now the eml light )  on  so it is in a way a project .   Because of my bad back   😩 I try not to do too much spannering.

  Our local  Dealer Quoted £ 800 to supply and fit a new radiator - .  They said that as they do not change radiators too often - will have to look at the car before giving the final quote.  Trying to find an independent garage who is  willing to replace parts - without suggesting that the car is ancient and it needs to be replaced asap.  🙂 

Best Wishes

Tom 


Posted

800?! Crazy price...

Mine came from adrad.co.uk just over 70 quid to purchase with free delivery.

Not a hard job at all - but you will need to do some of it from below, as the radiator integrates the gearbox oil cooler as well.

At same time, you could tidy up the radiator support member which is likely to be a bit ripe in areas (scrub/kurust/prime/paint) and you may find your aircon condenser is falling to bits and one end of you pas cooler circuit is rusty...basically doing the rad is easy but you'll likely find other bits to do as well!

Sent from my SM-N960F using Tapatalk

Posted

So... after all the front and rear suspension work was done, there's actually not many more updates to give on this car; I shall post what progress I made between then and now to try and get back to chronological order.

Firstly, the car has had a full stainless exhaust system from Tony Banks in Leeds - from the manifolds all the way back, replacing what remained of the original Toyota system (ruined and previously repaired). I don't have any pictures of the fit underneath (it's exquisite) - but a small video of a cold start idle follows below:

https://youtu.be/JBwuI6hmQIY

With that done, it was time to locate some rather fetching wheels. I went for a design from a company called XXR, with Uniroyal tyres - after a quick test fit:

20190128_210847_zpsvaojiumj.jpg

I need to lower the car still further and ensure the coilovers are set up right - after that I think I shall be spacing the wheels to fill the arches out a little more.

The more long term issue is that I want a pretty decent stereo in this car - so removing the original non-nav stereo was more or less the first thing I did. I used a double din fascia kit manufactured by Metra (model: 95-8152) - and an ISO adapter harness off eBay. Slight issue is the pins on harness aren't right; I ended up using the pin configuration in this post on ClubLexus:


I've installed a Kenwood DMX7017DABS radio, which has Android Auto/ apple Carplay - so you need to install a USB socket somewhere to connect your phone. I chose to replace the 12v power socket in the compartment under the Centre armrest:

20190210_175749_zps2ecdbpvv.jpg

Ignore the hole to the right of the socket - that was my first attempt at getting a socket installed - it didn't go well! I'll put a panel blank over that...


The double din looks like this when it's powered up:

20190212_165336_zpseapkylev.jpg


I've also started on replacing the door speakers:

20190224_221528_zpshhnwox5t.jpg

Very easy (by comparison to my old BMW e38) to get the door cards off, and was presently surprised by the condition of the doors behind the cards. This is OSF as an example:


20190224_221610_zpst6mkubap.jpg

There's a small scab in the OSR door near the side impact bar, and a seam of rust right at the front of the NSF door - I'll be treating it all and spraying Dynax along with some sound deadening material going on in due course.

The plan will then be to replace the factory parts with adapters sold on eBay from this company: https://www.ebay.co.uk/usr/pvcspeakeradapters79?_trksid=p2047675.l2559

I'll likely install a JL audio components up front, coaxials at the rear and 2x 10" subs with their own amp in the boot and call it a day on the stereo; I don't think I'll see the need for a separate amp for cabin speakers.

That's all for now..I shall sort through some nice pictures I've recently taken of the car, and post them up for your delectation!


  • Like 1
Posted

Great work so far.

Heard good things about the Tony Banks exhausts, I’d enquired with them before myself albeit never actually had one done in the end.

Non satnav cars are so much simpler to do the stereo on, i did the same double din type install on my old GS300, and also hooked up a reversing camera which sat just above the number plate (a little fettling of the number plate light panel made it an easy mount.

Not a fan of the wheels myself, but it would be boring if we all liked the same stuff.

Keep up the good work [emoji41]


Sent from my Iphone using Tapatalk Pro

Posted
On 2/27/2019 at 8:42 AM, TigerFish said:

Great work so far.

Heard good things about the Tony Banks exhausts, I’d enquired with them before myself albeit never actually had one done in the end.

Non satnav cars are so much simpler to do the stereo on, i did the same double din type install on my old GS300, and also hooked up a reversing camera which sat just above the number plate (a little fettling of the number plate light panel made it an easy mount.

Not a fan of the wheels myself, but it would be boring if we all liked the same stuff.

Keep up the good work emoji41.png


Sent from my iPhone using Tapatalk Pro

Cheers, the wheels need spacing front and rear, then with a bit more lowering they'll really set the car off I think. I did think about getting chrome plated factory wheels as on a GS430 - I might still do that for a winter set of wheels.


  • 2 weeks later...
Posted

Quick update on recent developlemts on this car. Main work has been to continue the replacement of the cabin speakers. I've used JL audio 6.5" components to the front, and also to the rear as co-axials.

I've used speaker adapter plates shipped in from the states - these make the job of replacing the factory pods sooooo much easier; here's the eBay shop in question: https://www.ebay.co.uk/usr/pvcspeakeradapters79https://www.ebay.co.uk/usr/pvcspeakeradapters79

Shipping took about 10 days as I recall - no customs fees either.

First step is to prepare the doors. I was surprised with the condition of all the doors rust wise. I found a small seam of rust in the NSF door that was kurusted/primed and a small scab on one of the side impact bars in the rear of the car - also sorted. Other than that, the bottoms of the doors are spotless.

Kurusting the seam in the NSF door (not the best pic given the access):

spacer.png

primed:

spacer.png

Interestingly, I did wire wheel a scab off the other side of this door in exactly the same location. I would recommend people take the time to remove their plastic door covers to check for any bubbling underneath.

Once that's done, it's time for Dynamat and a liberal spray of dynax to keep any future rust from forming (remember my pathological fear of the stuff):

spacer.png

The dynamat is necessary to keep the doors from rattling as the speakers are installed with an open back firing in to the door aperture. The less ratte/movement, the more we'll hear of the music.

In the front doors, it was possible to use the factory tweeter mounting brackets for the new JL audio equipment:

spacer.png

spacer.png

It's then simply a case of installing the main woofer in to the adapter and bolting that to the door using the factory mounts:

spacer.png

I've cut the connectors from the vehicle loom and soldered the wiring directly to the wiring for the JL audio speakers. I use butt connectors that contain a solder and heat shrink component - these things are great for making solid connections with ease - on Amazon: amazon link. I go over the top with a length of heat shrink insulation and cable tie everything in place.

The new speakers sound weedy with the door card off - but with everything buttoned back up and the door cavity sealed up - they sound great, considering I'm only using the headunit internal amp.

Once the cabin is finished, I shall put some subs in the boot - more on those later!


  • 4 weeks later...
Posted

If anyone is interested, here's what the rear of a GS300 looks like without the bumper on:

spacer.png

I wanted to see what condition the rear bumper bar was in. Pleased to see that only minor surface rust was starting - so it's all been buzzed off, kurusted then primed. I've also run some Dynax in the cavity areas; probably overkill, but felt good to do it!

Next job is to pull the front bumper off, to gain access to the end of the chasis legs to scrub any rust there, and then do the aircon condenser at the same time - that's easter weekend sorted!

Posted

Still looking smart:

spacer.png

I think I want to space wheels on front and back by 10mm - otherwise the car is pretty much exactly how I want it!

  • 1 month later...
Posted

i seem to be having a whale of a time trying to host various of my pictures from photobucket. let's see if these work..

Just to report some more work on the car, this time at the front - to deal with:

  • rusty front crossmember
  • rusty PAS cooling circuit pipework
  • replace a/c condenser that was falling apart - but somehow still holding pressure

decided to tackle all of this at the same time for ease.

First thing's first, radiator out, aircon degassed and condenser out as well:

spacer.png

yep - I'm not fussed about coolant on the floor...

ATF lines are plugged to prevent loss - radiator is set aside and PAS cooling circuit is removed.

If you click and zoom the image, you'll see the condition of the cross member - which isn't too bad - but was in need of a brush and kurust after best part of 18 years. all wire brushed and kurusted:

spacer.png

And primed:

spacer.png

And with a couple of coats of body colour:

spacer.png

The bottom of the crossmember got the same treatment, and some dynax in the void between the pressed steel parts.

Although I didn't take a 'before' pic, take my word that one of the elbows on my PAS cooling circuit was super rusty. Without much hope of salving the part, I did wire brush it - but it was already pin-holed:

spacer.png

Solution was to cut it after the rusty piece, and use a longer length of hose to make the connection between the cooler circuit and the rest of the pipework from the PAS pump:

spacer.png

spacer.png

I didn't bother trying to bubble flare the cut end of the pipework, the new hose was snug enough - but I did put some edge stripping on the cross member to stop the hose chafing.

New a/c condenser:

spacer.png

installed in to the car (super easy to get at once the engine radiator is out:

spacer.png

With everything put back together and the aircon regassed, the car is cold on demand, and I no longer have to worry about the PAS circuit letting loose at any moment!

  • Like 2

Latest Deals

Lexus Official Store for genuine Lexus parts & accessories

Disclaimer: As the club is an eBay Partner, The club may be compensated if you make a purchase via eBay links

Create an account or sign in to comment

You need to be a member in order to leave a comment

Create an account

Sign up for a new account in our community. It's easy!

Register a new account

Sign in

Already have an account? Sign in here.

Sign In Now


Lexus Owners Club Powered by Invision Community


eBay Disclosure: As the club is an eBay Partner, the club may earn commision if you make a purchase via the clubs eBay links.

DISCLAIMER: Lexusownersclub.co.uk is an independent Lexus forum for owners of Lexus vehicles. The club is not part of Lexus UK nor affiliated with or endorsed by Lexus UK in any way. The material contained in the forums is submitted by the general public and is NOT endorsed by Lexus Owners Club, ACI LTD, Lexus UK or Toyota Motor Corporation. The official Lexus website can be found at http://www.lexus.co.uk
×
  • Create New...