Do Not Sell My Personal Information Jump to content


  • Join The Club

    Join the Lexus Owners Club and be part of the Community. It's FREE!


Recommended Posts

Posted

It's definitely worth taking the time to prep/clean and paint parts - these now look soooo much better, well done :thumbup1:

  • Thanks 1
Posted
1 hour ago, Farqui said:

It's definitely worth taking the time to prep/clean and paint parts - these now look soooo much better, well done :thumbup1:

Thanks, ive always been to car shows and seen really clean engine bays and shiny parts fitted and everything looking brand new but alot of my cars have been clean under the bonnet but not to this level, i thought i may aswell go the whole hog and do it

  • Like 1
Posted

Had another part turn up yesterday thanks to co-ordsport (part box) my mishimoto oil sandwich plate is here.

20180112_190100.thumb.jpg.9159e53c26cabd92510e0c164b5fd672.jpg

20180112_190414.thumb.jpg.186f4a14c37cabd762d2b76987072eeb.jpg

Got this trial fitted to just to see how it went on, it can be rotated to sit in what ever position you need for the ports. This will now allow me take an oil feed for the turbo and also fit oil pressure/temp sensors for gauges.

Rod bearings are going to be here on monday along with my turbo, cannot wait to get some momentum back to this build! Hope you guys are enjoying the updates, ive been toying with the idea of doing a youtube channel dedicated for the build, not that confident infront of the camera though so we will see how that goes

  • Like 4
Posted

So my rod bearings and turbo have come....... but the rod bearings are damaged. Ive emailed whifbitz about it and just waiting for a response, it was just poorly packaged and the turbo has dented/crushed the bearings so its a little set back but its ok im sure it will be sorted.

The turbo on the other hand ......... jesus ***** it is huuuuuuuuuge!!! Alot bigger in person compared to looking at pictures of it! 

20180115_223114.thumb.jpg.164a34dbee09b0f1f25d02c562c5a12d.jpg

Just for comparison ive placed a 2ltr coke bottle next to it, keep in mind this is slightly larger than the normal 2ltr20180115_201349.thumb.jpg.b3211152810610c1b6824b5b626356f3.jpg

20180115_201432.thumb.jpg.e10fdede738e568568fdb3bbc11a3b85.jpg

20180115_224144.thumb.jpg.66e7471bfc48103afcd2ee8076981858.jpg

And 1 next to honey 😂

Will crack on with piston ring gaps tomorrow and hopefully my bearings wont set me back too much

  • Like 5
Posted

Crumbs, that snail is huge!

Sorry to hear your deliveries weren't a success tho #painful

  • Like 1
Posted

Yeh its a little annoying but these things happen i guess, whifbitz are a good company so i have faith in them. Im not entirely sure how its happened because the turbo looks like it has come in from another company, so i dont know if whifbitz have recieved it and put the bearings in the box and shipped it on to me or if the other company has put them in there. Either way there was no protection for them at all. There is boost lab stickers all over the box which is an american company so it may have been them.


Posted

Woaw that´s a huuuuge turbo :) Some serious boost is coming your way :) Sorry to hear about your bearings, i do hope that they sort out som new ones for you quickly

  • Like 1
Posted
10 hours ago, Bempa said:

Woaw that´s a huuuuge turbo :) Some serious boost is coming your way :) Sorry to hear about your bearings, i do hope that they sort out som new ones for you quickly

Yeh its a shame about the bearings but whifbitz are sorting it now, paul has emailed me today and ive sent them back. Made a start on the rings too, got 3 pistons assembled 3 more to go. Its very easy with the proper ring filer, just took my time and followed the instructions to the letter. Pictures coming when the other 3 are done.

Posted

New bearings come today, Paul from whifbitz got them quickly sent out, top man 👍should have the pistons, rings and rods assembled on the weekend.

  • Like 3
Posted

So i finally have got the pistons rings and rods fitted but not without a small drama😓

I started with the ring gaps got most done but had small issue with number 4 piston top compression ring, i checked the gap using the feeler gauge, filed, checked, filed, checked, filed and checked...... and it went over spec!! I did get distracted by the mrs on the last file and it was around 20 mins before i continued so i think i just applied more pressure than the previous times. Its not far out of spec but its different to the other 5 and as im at this point and just 20 odd pound for a new ringset its a no brainer. Really annoyed with myself for this but these things happen!

20180116_123947.thumb.jpg.aeab44761d197d1c48d3b1b24807fa1c.jpg20180116_130120.thumb.jpg.4db9b6f959a8cb778c8652ecc146e9d4.jpg20180120_171100.thumb.jpg.2ebcbe2cfdb420922fc70c00ab713207.jpg20180120_183531.thumb.jpg.e43b042e321da0ecfd2f624eaf51f08d.jpg

20180121_160358.thumb.jpg.0f4ad2fb41484fcd73ff770a2d787082.jpg20180122_190920.thumb.jpg.c41ec7d53a2ee18c486ac3b6910154aa.jpg

pretty easy and pain free getting the piston rings in the correct location, bearings installed and pistons fitted using a piston ring compressor they just glided in.

ARP bolts dipped in 30 weight oil, fitted and torqued down to 60ft lbs.

So just need the new ringset now to finish that. I took the cylinder head to work and soaked it in wheel acid before jet washing it all off and its come up amazingly clean ready for me to get the valves out to send the head away, i also did the valve covers and they too come up amazing. No pictures of these just yet but will grab some soon


  • Like 4
Posted

Cracked on today with the head, i cleaned this at work last weekend to make this job less messy. Took a couple of snaps before i started.

20180127_133405.thumb.jpg.c7f41d3ea06fe8261fd1d5f0f2df780b.jpg20180127_133428.thumb.jpg.9098f1c3a2f09585da5fe0129e664834.jpg

plan was to completly strip so i can get this to the machine shop for a skim, so i removed the collets, valve caps and springs. Then made sure i removed the valve spring washers and pulled all the stem seals out.20180127_135141.thumb.jpg.b4ba9b5ab9212e8fe6015bbdde878d30.jpg20180127_135158.thumb.jpg.75938e08d45c8c1dd9712c3acaaa858a.jpg20180127_142156.thumb.jpg.df8cc378c24a2ed5f77aa3626732076f.jpg20180127_144819.thumb.jpg.611065deeb5e49c79f785dc7c2f6a030.jpg20180127_150030.thumb.jpg.ca85e38e9a3391b0cdeecda5ecc3f485.jpg

all done, need to find somewhere now to do the skim and also thinking of having a 3 or 5 angle valve job done. Also will be sending the valve covers away for powder coating im thinking of going orange as i would like a black/orange theme going on but this idea may change with the wind. Will soon be ordering an adjustable exhaust gear too thinking of going for either titan or power house racing so i can get the head, cams and belt fitted. Coming together nicely now, really enjoying this build, hope you guys enjoying reading/seeing it too

  • Like 2

Posted
26 minutes ago, rob_clio172 said:

Coming together nicely now, really enjoying this build, hope you guys enjoying reading/seeing it too

Absolutely! You must have a very understanding partner, mine would not let me get away with car parts in the kitchen!


  • Like 1
Posted
57 minutes ago, bobmc said:

Absolutely! You must have a very understanding partner, mine would not let me get away with car parts in the kitchen!


Mmm well i did it with her out the house..... but she came back and caught me in the act 😂😂 i think if it was covered of oil she would have had a problem. Aslong as i leave it spotless she leaves me alone 

  • Like 1
  • 2 weeks later...
Posted

Got some done this weekend and im happy with the progress, im gona have to crack on now because ive changed my job ive got to bring my toolbox home so i need the garage space. This means i need the engine back in the bay by the end of feb so i can pack the engine stand and crane away in the shed.

So my new water pump has come along with the seals and i also got the oil pump fitted too, gave these a bit of paint just to keep the engine looking fresh.

Water pump next to the old 1 before painting....20180210_151745.thumb.jpg.d8aae69e47201a79104998a93476768f.jpg

Oil pump painted ready for fitting ...20180211_094736.thumb.jpg.4d861e95dd10c9ed908d8cbfb5629ec6.jpg

And with them fitted, looking minty fresh....20180211_144254.thumb.jpg.a0cef6ccf1d23e121b84bd223e55e30d.jpg20180211_144326.thumb.jpg.4b5b2ad145723aaf91b9187da41049c9.jpg20180211_144358.thumb.jpg.ad4b3f7627e22e6a0959d3d303df9745.jpg

also got the rear crank housing cleaned up and the seal fitted in the housing

20180211_153648.thumb.jpg.7a15485ace64cfb2d24b67d3c0ec6d41.jpg20180211_185736.thumb.jpg.bc92d5f948cb18f484feb4892a64246e.jpg20180211_170557.thumb.jpg.b76eb440ce23cfde37fb9d87504f54a7.jpg

Tomorrow i will be taking the sump to have the turbo oil return boss welded in as i finally finished cutting the hole..

20180211_160040.thumb.jpg.fa789af7f49d3c3022610624647454af.jpg20180211_160046.thumb.jpg.8871e21aefcc485ae248e2f8d6e91e96.jpg20180211_160115.thumb.jpg.15a83fce9d7e8cf2a6f2dd7a53fb5454.jpg

will post pictures tomorrow of this welded in 👍

May also be getting the head back tomorrow if its finished at the machine shop im pretty excited to get that back and see the results.

  • Like 3
Posted

So got the sump welded today...

20180212_120452.thumb.jpg.77909fa5316de4327288b6a155cc7454.jpg20180212_120508.thumb.jpg.c00e81c0f89c4e9f7252784696717626.jpg

then cleaned it up and gave it a spray, looking nice and fresh again.....

20180212_123301.thumb.jpg.5c89bca57619fc2f6f70c6b311dd488a.jpg

1 last final inspection of inside the block to make sure nothing had fell in there and hiding and all was ok, applied the toyota sump sealer and dropped the sump on....

20180212_134459.thumb.jpg.4fe02c0b350ae042437e96c96c59f28d.jpg

Then fitted the sump baffle.....

20180212_141919.thumb.jpg.95b41a3aa664da0c33c408aa87060ca8.jpg

Also noticed something really cool which toyota did. Where the oil return boss has been welded in, the baffle tray already has a nice moulding to it to catch the oil and return it into the sump pan....

20180212_141928.thumb.jpg.924a3b39cc9fc6239361644efaff952a.jpg

Then got the pick up pipe fitted with new gasket and fitted the lower sump pan again with toyota sump sealer....

20180212_142607.thumb.jpg.bd846da6bef2f312d486c200e3d58970.jpg

20180212_144234.thumb.jpg.2e80309dd4ffb1a3d071214fe3ab80f4.jpg

Also painted the alternator, now i could have stripped this down but i used a trick i think i found on this forum for painting this. I just tucked bits of news paper in between all the gaps so the paint didnt go inside it, then pulled them all out and it worked a treat....

20180212_172344.thumb.jpg.7ef6827d08a06b4ec2f215b2575f29c5.jpg

20180212_172353.thumb.jpg.5a162fa063c219220cf9af0a7ab7c6c1.jpg

Thats it for now, next plan is to paint the a/c compressor and bracket for power steering pump, also paint the large metal coolant line that goes around the block and make a new coolant line to bypass the auto transmission cooler. Head will be back on saturday now and by then my gasket set should have come from toyota, no over night parts from japan like toretto here!!


  • Like 3
Posted

So got the head back today, skimmed and angle job done, hard to capture the angle job on a picture and is alot more clear in person. Will be lapping valves in on tuesday and hopefully fitting the crower springs and titanium retainers.

20180217_123041.thumb.jpg.24cbe28b86ccadbedf4c3e724cc7044c.jpg20180217_123148.thumb.jpg.f13823936e1ea5ecac80740200ab17d4.jpg20180217_123231.thumb.jpg.bcab27e9d88ef94dc3214b9a902548e2.jpg

  • Like 3
Posted

Small update, head is almost done now will post pics when its finished and bolted down. Exhaust has turned up, ive had a 2nd hand system from another is300 turbo this has come from america off a guys car ive been following on you tube, ive posted a link to the guys channel earlier on in the thread. He has broken the car for parts as he is looking to do other things. It was cheaper to do this than get my car transported to an exhaust place to have a costly system custom made.

It is a 4inch system straight through with a small vibrant silencer .... which doesnt really silence it tbh 😂 im over the moon with it and cannot wait to get it welded back together and on the car it has saved me a fortune. 

20180223_201551.thumb.jpg.cc5e52c5b73834c98372f6a6f4116263.jpg20180223_205401.thumb.jpg.53ffb025ee76a849c884222c93f781a5.jpg

back using pop bottles as demonstration props 😂 2ltr bottle slots inside it. On the 1st picture you can see the silencer on the middle section towards the right hand side. I will try and get a picture side by side with the original system tomorrow, the difference is unreal!


  • Like 2
Posted

Big sexy update time!!! So i got all the valves lapped in, brian crower springs and titanium retainers fitted and the head back on!

20180220_101612.thumb.jpg.9a134a792493d370362457bae739a51e.jpg20180220_185243.thumb.jpg.b10139a969765e586c900cfd3c6cd138.jpg20180227_102448.thumb.jpg.e4c8c6628644d27664bcab7526a770ff.jpg20180227_143756.thumb.jpg.4c0779c697b36f07376b23d1b1d04d37.jpg

once that was on, i banged on the 2 manifolds and the a/c compressor. This was the exciting bit as i can now see the engine taking shape! Its looks pretty damn amazing!

20180227_154331.thumb.jpg.fb468e65c43954c9deba4fcaf7b613ce.jpg20180227_161335.thumb.jpg.4be50a5a71edcb26f8c9b281785fbd4e.jpg

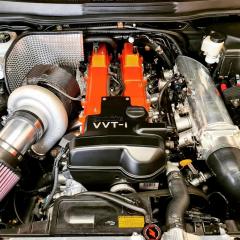
At this point i was about to pack up for the day but ........... it would be rude to get to this point and not trial fit the turbo!! Also thrown on the 90mm throttle body.

20180227_201447.thumb.jpg.2eba8c84fa50f75bb70a091bad5bf9a3.jpg20180227_201547.thumb.jpg.a74c5a9d5f7f4151b12a01293ef8e9f7.jpg20180227_163558.thumb.jpg.f86d2f61f96f889940bcb45ad1bf0fd3.jpg20180227_163520.thumb.jpg.4dfdbcf4f5644ba93f4143c4f17fc1ce.jpg

Could not stop staring at it! Still thinking of a colour for the valve covers but im thinking of maybe orange but we will see. Let me know your thoughts guys 👍


  • Like 4
Posted
24 minutes ago, J Henderson said:

No compromise indeed! This build is incredible! :biggrin:

Cheers matey 👍👍im getting excited now, looking forward to getting this done and hopefully attending some meets even though its a long time away. 

Posted

Really coming together now. That's a great result with the exhaust too. 

  • Thanks 1
Posted

Thank you 👍i showed the mrs when she got back from work, her face was a picture 😂 the neighbours are going to hate me!

Posted

Another update, engine is back in the bay!! Looking right at home too! Will let the pictures do the talking.

20180301_122645.thumb.jpg.dc45c0c524ef4bf7f9510c71e8cc2e62.jpg20180301_125008.thumb.jpg.5fb70df366c8d6896fea6c1b1a516cc8.jpg20180301_124924.thumb.jpg.b7ee4cdc41f06ccb3ff3012d887c7912.jpg20180301_124918.thumb.jpg.f1c658247a0628c699b806b8a178b721.jpg

as you can see in the last picture the manifold is VERY close to the suspension turret! Looks like i will be using the competition vibratechnics mounts to minimize engine movement. I had those in my mk1 focus rs and on cold start/idle they would literally shake the car to pieces!! 6cyl engines are more balanced so im guessing vibrations wont be as bad not to mention the lexus is put together better than an old ford 😂. Also there is an issue with the powersteering pump and reservoir, looks like i will need a relocation kit as the reservoir is going to be obstructed by the throttle body.

As you can see ive just thrown this back in, ive not done any of the loom as i just needed to create space in the garage. Its easy enough to lift back up to change the mounts and put the loom back on if needs be.

  • Like 2

Latest Deals

Lexus Official Store for genuine Lexus parts & accessories

Disclaimer: As the club is an eBay Partner, The club may be compensated if you make a purchase via eBay links

Create an account or sign in to comment

You need to be a member in order to leave a comment

Create an account

Sign up for a new account in our community. It's easy!

Register a new account

Sign in

Already have an account? Sign in here.

Sign In Now


Lexus Owners Club Powered by Invision Community


eBay Disclosure: As the club is an eBay Partner, the club may earn commision if you make a purchase via the clubs eBay links.

DISCLAIMER: Lexusownersclub.co.uk is an independent Lexus forum for owners of Lexus vehicles. The club is not part of Lexus UK nor affiliated with or endorsed by Lexus UK in any way. The material contained in the forums is submitted by the general public and is NOT endorsed by Lexus Owners Club, ACI LTD, Lexus UK or Toyota Motor Corporation. The official Lexus website can be found at http://www.lexus.co.uk
×
  • Create New...