Do Not Sell My Personal Information Jump to content


  • Join The Club

    Join the Lexus Owners Club and be part of the Community. It's FREE!


Recommended Posts

Posted

I have been looking at sets similar to these - be nice to see a picture of them on the car when the rubber arrives are they 18's or 19's?

How did you get the sound files posted? I have a stainless cat back exhaust on mine and it sounds quite deep, rumbling noise, not to excessive outside but an annoying drone in the cabin at around 2k revs. I will post the sound if its an easy process.

Posted
10 minutes ago, is200 Newbie said:

I have been looking at sets similar to these - be nice to see a picture of them on the car when the rubber arrives are they 18's or 19's?

How did you get the sound files posted? I have a stainless cat back exhaust on mine and it sounds quite deep, rumbling noise, not to excessive outside but an annoying drone in the cabin at around 2k revs. I will post the sound if its an easy process.

Yeah Ill post plenty pics of them over time, they are 19's I would prefer the comfort of 18's but 19's just have the perfect look on the IS

When you say sound files can you not see the videos on your PC? As far as uploading them goes in the reply box there is an insert other media yellow box bottom right corner just hit that and upload them and paste the link into yours reply.

Yeah I would get a drone at time with my exhaust however I only open it up to give it a boot it so don't have to suffer with any drone.

Posted
21 hours ago, dougie175 said:

Yeah Ill post plenty pics of them over time, they are 19's I would prefer the comfort of 18's but 19's just have the perfect look on the IS

When you say sound files can you not see the videos on your PC? As far as uploading them goes in the reply box there is an insert other media yellow box bottom right corner just hit that and upload them and paste the link into yours reply.

Yeah I would get a drone at time with my exhaust however I only open it up to give it a boot it so don't have to suffer with any drone.

Just tried to record exhaust - done it on phone but too much background noise

Posted

Thanks for the link. I thought they were Lexus originals because of the centre caps. Forgive my ignorance, but did they come with the caps or did you purchase them separately? If you got them separately, are they a perfect fit or did they need modification?


Posted
1 hour ago, juicestop said:

Thanks for the link. I thought they were Lexus originals because of the centre caps. Forgive my ignorance, but did they come with the caps or did you purchase them separately? If you got them separately, are they a perfect fit or did they need modification?

They come with a solid black centre caps and badges separate so rather than fitting the badges I have taken genuine Lexus centre caps removed the badges and transferred them across to these centre caps, these wheels have a couple of mm larger centre caps than Lexus OEM but with a gloss black centre cap and the Lexus centre caps installed they will look spot on and genuine.

The caps that come with the wheels are just bare plastic so matt in appearance, so I will be spraying them gloss black before fitting the badges so you wont be able to tell where the genuine badges stop and the caps start

I'm glad you thought they were genuine Lexus alloys that is the idea wouldn't want them to look out of place or cheapen the car

Posted

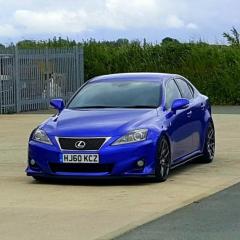
That is looking fab!

I think those wheels will look better on my IS250, i can PM you my address :P

  • Like 1
Posted

Couple of people said they couldn't see/hear the videos so uploaded them to youtube

https://www.youtube.com/embed/D2L5vjHfIqY - Exhaust closed Window closed setting off

https://www.youtube.com/embed/ar81jJGed1w - Exhaust open Window open setting off

https://www.youtube.com/embed/HktyZKkeETU - Exhaust open Window open setting off 2

https://www.youtube.com/embed/PhyuKdUmdtI - Exhaust closed Window closed accelerating

https://www.youtube.com/embed/I2N-XjNXBVU - Exhaust open window closed accelerating


Posted

This arrived from the US today for the rear, just thought it would make a nice touch on the boot lid

59708a0527dee_2016-04-0714_01_40.jpg.da45266ce735ebf273734c32a16efbb2.jpg

Posted

How much did you pay for that? I have it on my watch list on eBay lol

I need new 'IS250' badge for mine as someone put the square F Sport and removed the '250' from the rear boot. I want to put it back to normal again.

Posted
10 minutes ago, Cracksta said:

How much did you pay for that? I have it on my watch list on ebay lol

I need new 'IS250' badge for mine as someone put the square F Sport and removed the '250' from the rear boot. I want to put it back to normal again.

Too much for a badge hehe!

It ended up as £29.86 delivered to the door


Posted

Bought myself a very rare boot F-Sport badge, now there is no correct place to put this as the car doesn't come with 1 but out of 1 2 or 3 where should I position it?

Obviously with 1 I will be removing Lexus and replacing it with the F-Sport

badge.jpg.c12d84ff80195d005f5849529f225daf.jpg


Posted

Ok well after a bit of looking I decided position 3 was best so then wanted to make sure I got the exact position correct so tried a few different positions

I'm thinking 3.4 wins hands down really, looks how I wanted it too. Just wanted to get the placement right.

Others agree 3.4 looks best?

Posted

I'm torn between 3.3 and 3.4, but erring towards 3.4 as it seems to sit better with the IS250 badge.

  • Like 1
Posted

Looks great! It's a nice touch and doesn't look at all tacky like some add-on badges.

  • Like 1
Posted
14 minutes ago, juicestop said:

Looks great! It's a nice touch and doesn't look at all tacky like some add-on badges.

Thanks that was the idea was hoping it would come across as OEM like it was there from factory. I feel the F-Sport should have come with a rear badge.

Yeah I wouldn't dream of adding one of those after market badges you see on some cars such as "TURBO"

Posted

Made some good progress today with the rear diffuser, bit of a pig to fit and as usual I decided to make a load of extra work for myself by smoothing the thing in rather than just sticking it on like any normal person would

The extra effort should be worth it though as it will become 1 with the rear bumper and look like it is all part of the same piece once I am finished

Bumper prepped ready for the diffuser to be bonded on:
59708b42e6576_2016-04-0912_25_47.jpg.8eea24058b29de5358fd796063342bcd.jpg

59708b5367d0c_2016-04-0912_25_52.jpg.2c2932f75b1ea7b67e7f0206bccc60fe.jpg

Diffuser is then bonded on and held in position with tape:
59708b62eb5c0_2016-04-0913_22_05.jpg.7503149c72ddbc6649a035b44114f248.jpg

Once the bonding is complete I have then run panel bond right around the edge where the splitter meets the bumper, this stuff dries incredibly strong, it is used for holding quarter panels onto cars so you can imagine its got some good strength to it.

The main reason for using panel bond over anything else though is that it does not crack, ones smoothed over like this is has fuel the diffuser to the original bumper they are pretty much 1 piece now, the slightest knock isn't going to crack the edge right along and look a right mess like you see on some vehicles that have had bits and pieces added this stuff is superb, also it can be sanded smooth

59708b74205d6_2016-04-0914_03_29.jpg.7cf158204c843e994597451c1cbf7c22.jpg

59708b83805b0_2016-04-0914_03_33.jpg.c09feb3352f716e6903be3194df90a8b.jpg

So that was as far as I could get today as the panel bond takes quite a while to really cure so I can sand it down make it smooth and give it a final bit of stopper before prepping up the entire area and high build primering, so until I get chance to work on it this is how my car will look driving around for a while, bit of a mess!

59708b9352f42_2016-04-0914_42_44.jpg.9649e624b1bfee8b02cff96605fd20dc.jpg

59708ba12cb81_2016-04-0914_42_49.jpg.04959d771f25434dd173d6a83ac35724.jpg


Next on the agenda was a job that should have been nice and simple quick job but actually took me 3 hours!

My new wheels have centre caps that are about 2mm bigger than the original Lexus ones, I needed to remove the domed logos from my original caps onto the new caps.

New caps lacquered around the edge so the glossy Lexus logos don't look smaller than the caps

59708bb1ddc3d_2016-04-0915_32_28.jpg.f7c20a079c8a780689ef4dc8ad207881.jpg

This was the bit that took all the time, logos removed from original caps, all the double sided sticky removed and undersides re-blacked ready for to stuck onto the new caps

59708bc55d0e9_2016-04-0915_32_23.jpg.f619e9c5c9bb624747aaed4d9ccbf4b9.jpg

Badges then glued to the new caps, excuse the dust couldn't wipe them clean until it has dried, will give them a quick polish on Monday and they will be all good and ready to go as soon as the tyres are fitted on the new wheels and I can get them installed

59708be6cbce9_2016-04-0915_41_07.jpg.dce0c449553753c43775b3753aa0831f.jpg

Posted

Nice job - I will be looking for a diffuser soon when I get my exhaust done - I have found one and just need to order (from the states) Is it quite flexible to fit the shapes of the bumper? Also you mentioned panel bond - could this be used to adhere the diffuser onto the bumper?

I was planning to get it sprayed up at a body shop and then stick it on. Would be nice to have the use of a garage like you have..

Posted
36 minutes ago, is200 Newbie said:

Nice job - I will be looking for a diffuser soon when I get my exhaust done - I have found one and just need to order (from the states) Is it quite flexible to fit the shapes of the bumper? Also you mentioned panel bond - could this be used to adhere the diffuser onto the bumper?

I was planning to get it sprayed up at a body shop and then stick it on. Would be nice to have the use of a garage like you have..

If you are having an exhaust custom made I would suggest getting the diffuser on first as you will probably want to make the exhaust tips stick out slightly further with the added depth of the diffuser means the standard distance the tips would finish are a touch too short.

Yeah the diffusers are very flexible, nice quality plastic not nasty fiberglass type things.

You could use panel bond to adhere it, buts panel bond is £60 a tube not to be wasted, it is also 2 pac so requires a fancy gun to apply it, the gun we use was £250 so not a cheap buy.

As far as bonding it on goes I would suggest windscreen sealer, it is extremely strong, dries fast and holds the panel in place whilst you adjust it into position, I can assure you it wont be going anywhere with windscreen adhesive.

Yeah seems most people have them sprayed then just stick them on which is fine, the fitment is OK in fact its quite good for a Chinese part (dispatched from the US) but with that being said there will be gaps and I wouldn't say it will look genuine without going to the trouble of smoothing it in. Good from a distance bit average up close I would say sticking it on

Latest Deals

Lexus Official Store for genuine Lexus parts & accessories

Disclaimer: As the club is an eBay Partner, The club may be compensated if you make a purchase via eBay links

Create an account or sign in to comment

You need to be a member in order to leave a comment

Create an account

Sign up for a new account in our community. It's easy!

Register a new account

Sign in

Already have an account? Sign in here.

Sign In Now


Lexus Owners Club Powered by Invision Community


eBay Disclosure: As the club is an eBay Partner, the club may earn commision if you make a purchase via the clubs eBay links.

DISCLAIMER: Lexusownersclub.co.uk is an independent Lexus forum for owners of Lexus vehicles. The club is not part of Lexus UK nor affiliated with or endorsed by Lexus UK in any way. The material contained in the forums is submitted by the general public and is NOT endorsed by Lexus Owners Club, ACI LTD, Lexus UK or Toyota Motor Corporation. The official Lexus website can be found at http://www.lexus.co.uk
×
  • Create New...